
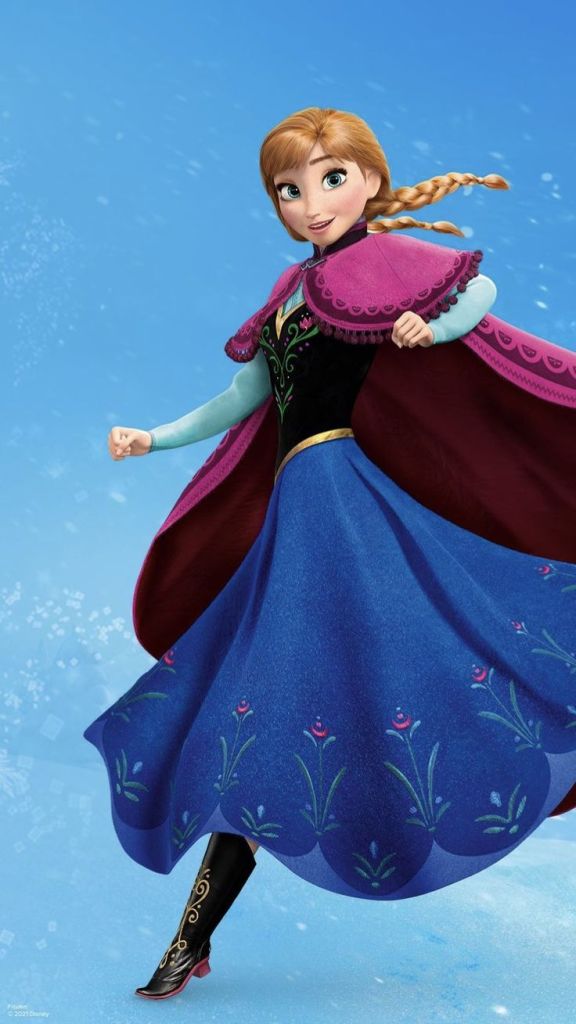
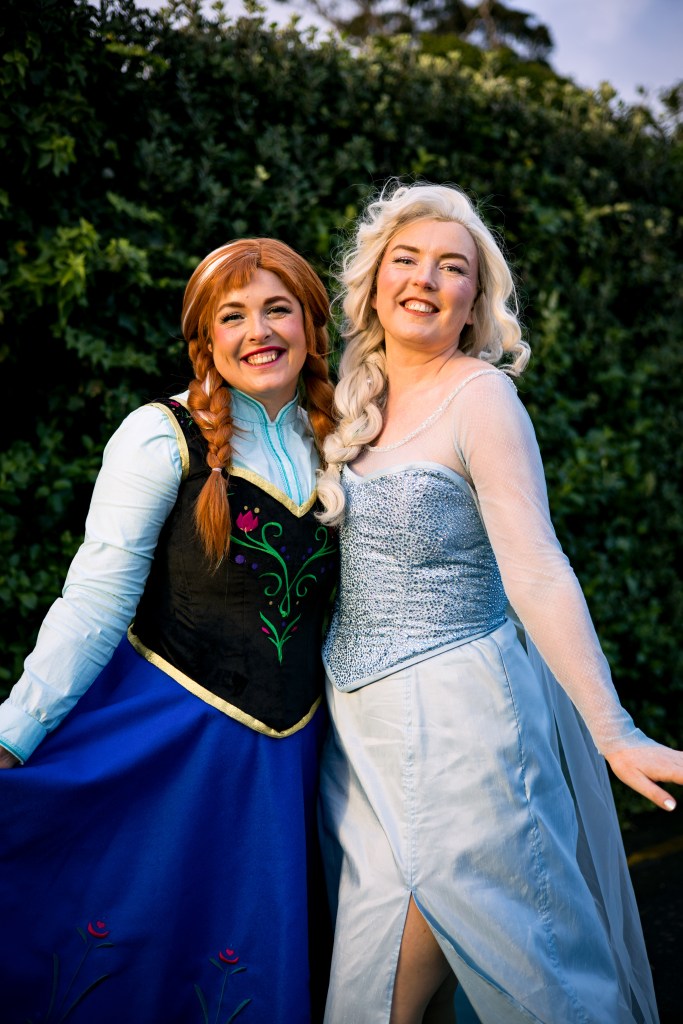
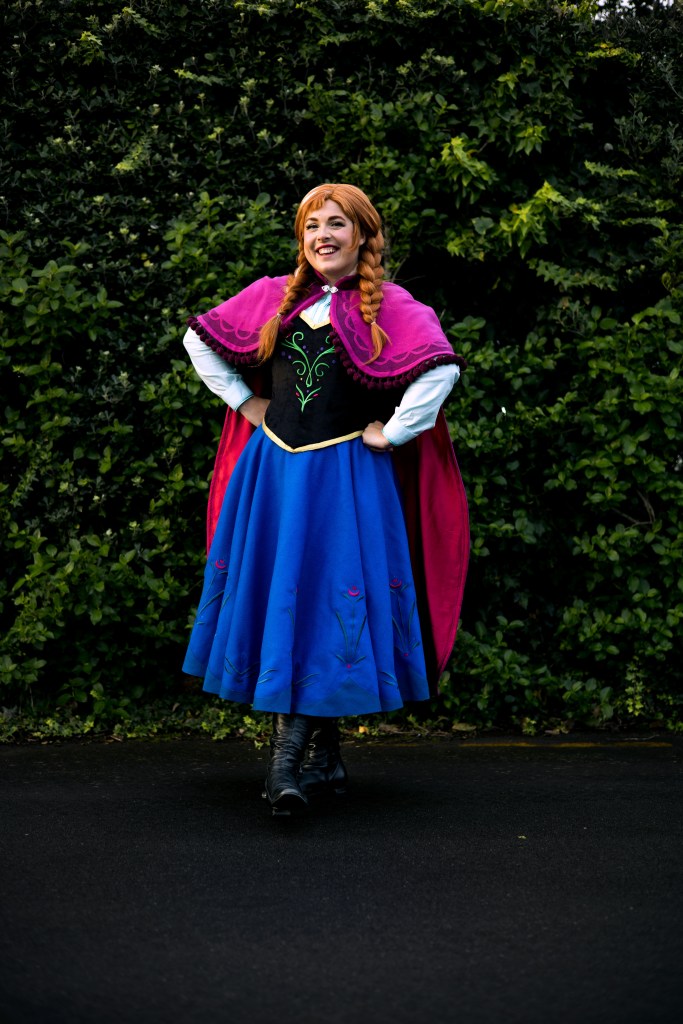
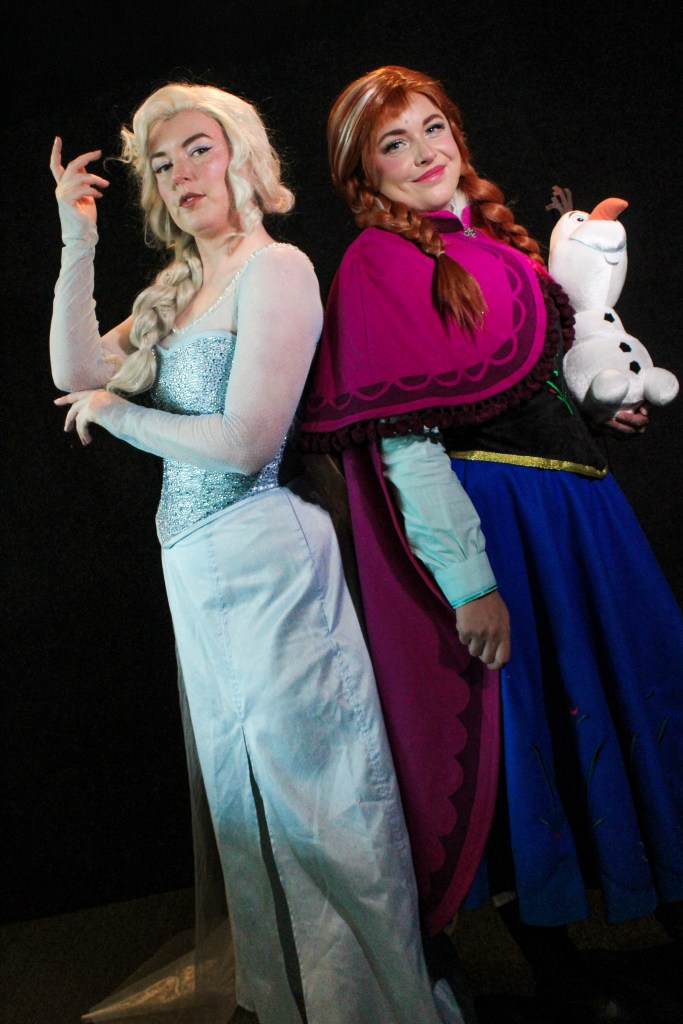
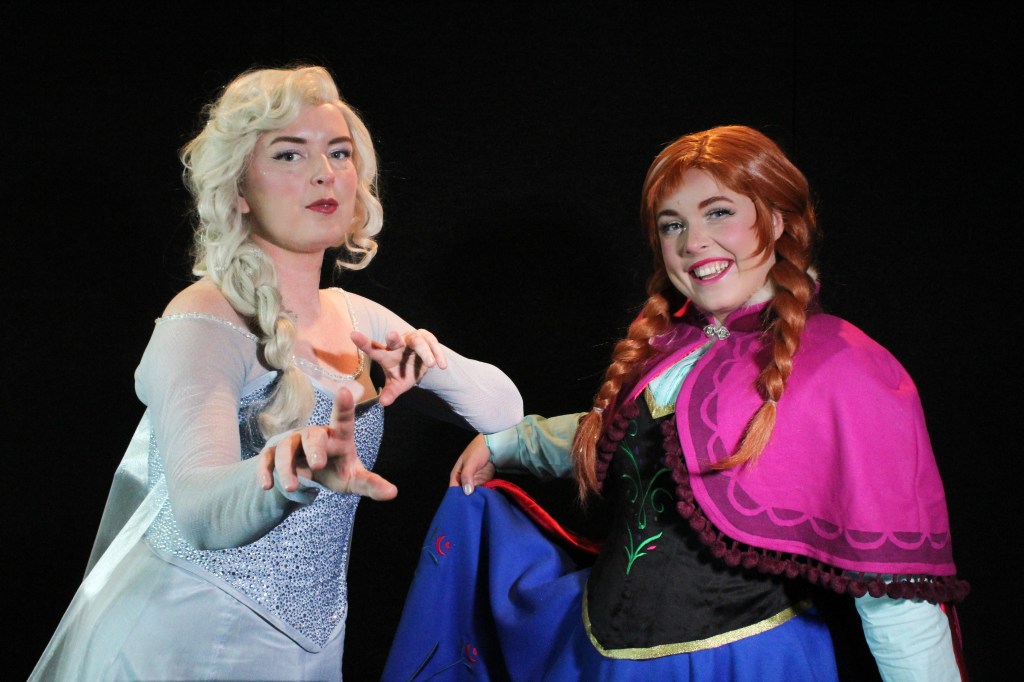
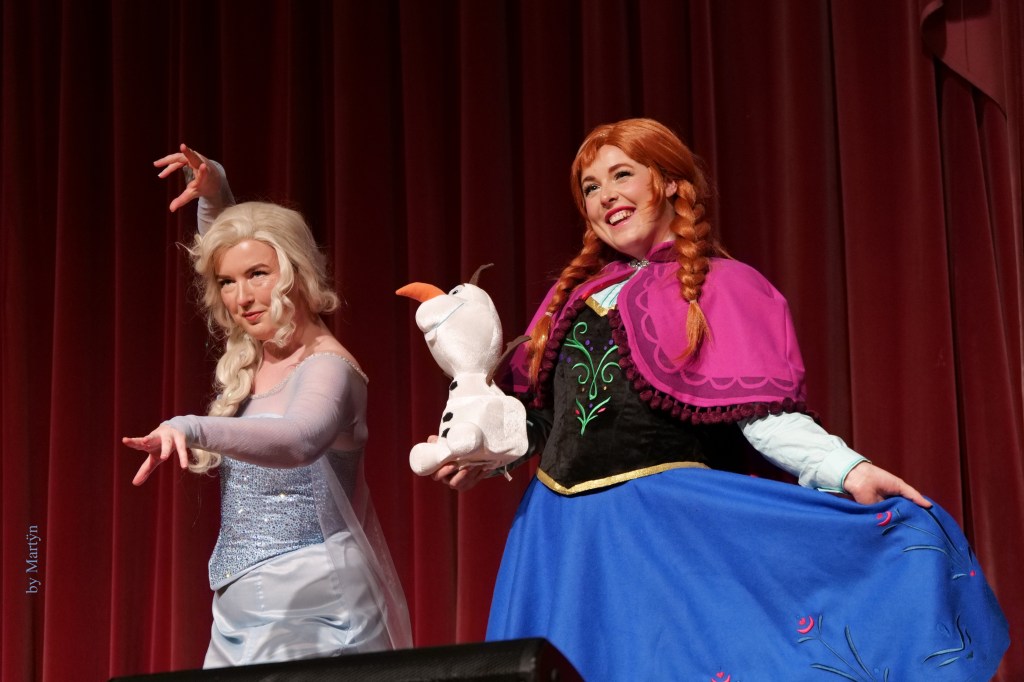
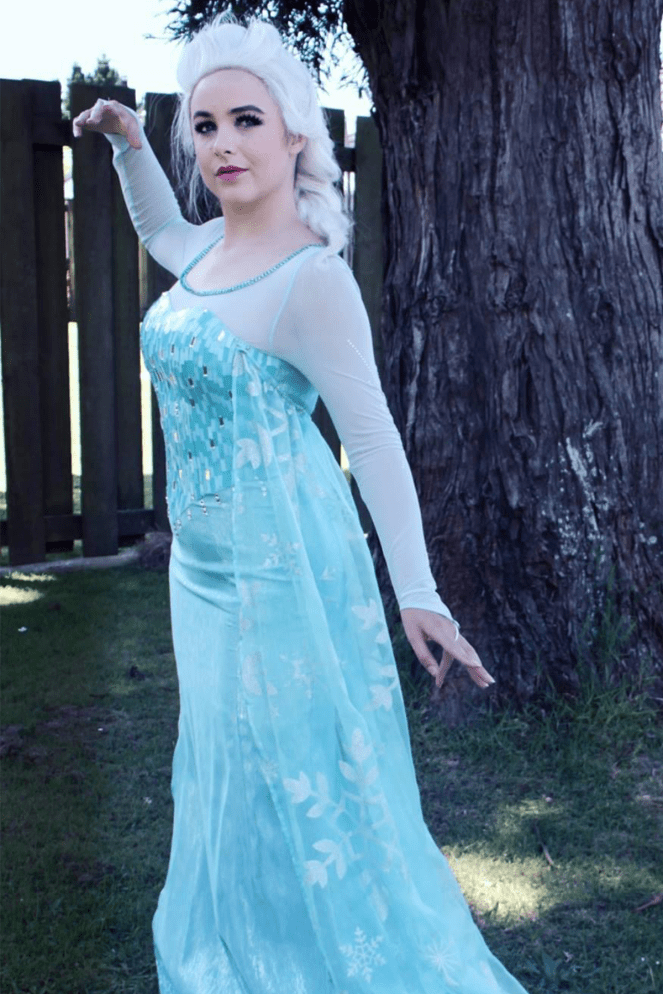
Anna | Frozen
Made for : Armageddon Expo, Winter 2025
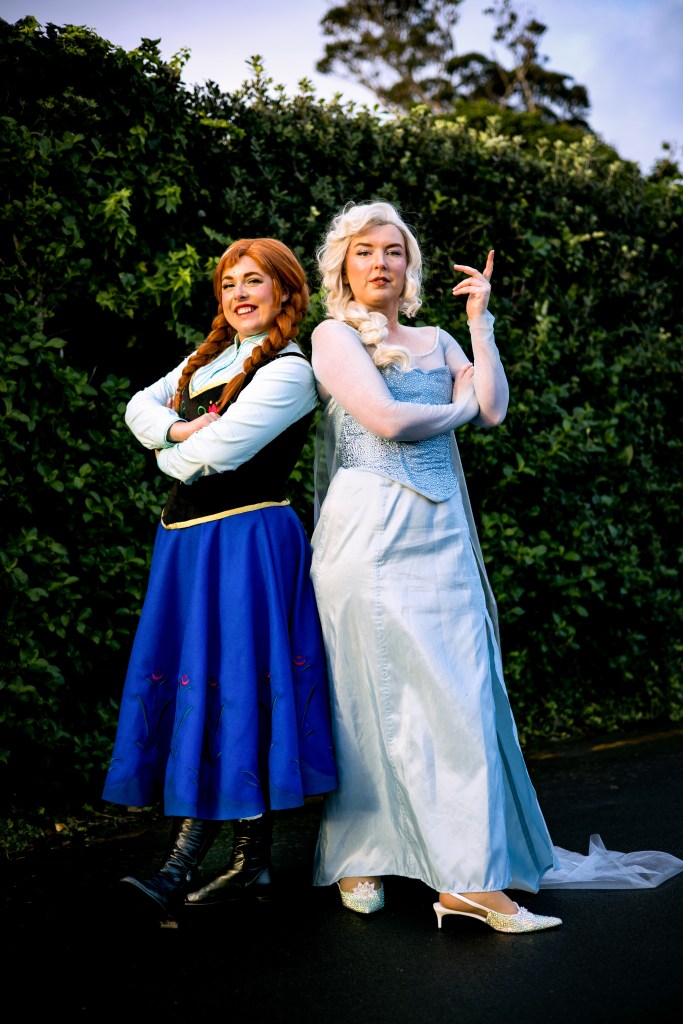
Background : My friend, Anna, was making an Elsa costume for the event. I decided to surprise her by making the Anna to match!
gallery


Things used :
Cape
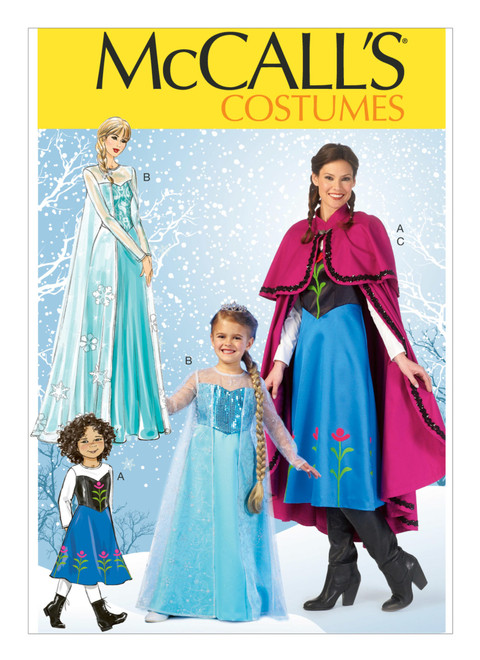
- McCall’s M7000
- 3m wool viscose melton in lipstick – Fabric Box
- 3m deluxe satin in ruby – Spotlight
- 3m jumbo cotton Pom Pom trim in white – Spotlight
- 1x vintage cardigan clip – Ali Express
- Rit all purpose dye in purple and wine
- rabbit fur offcuts
Blouse
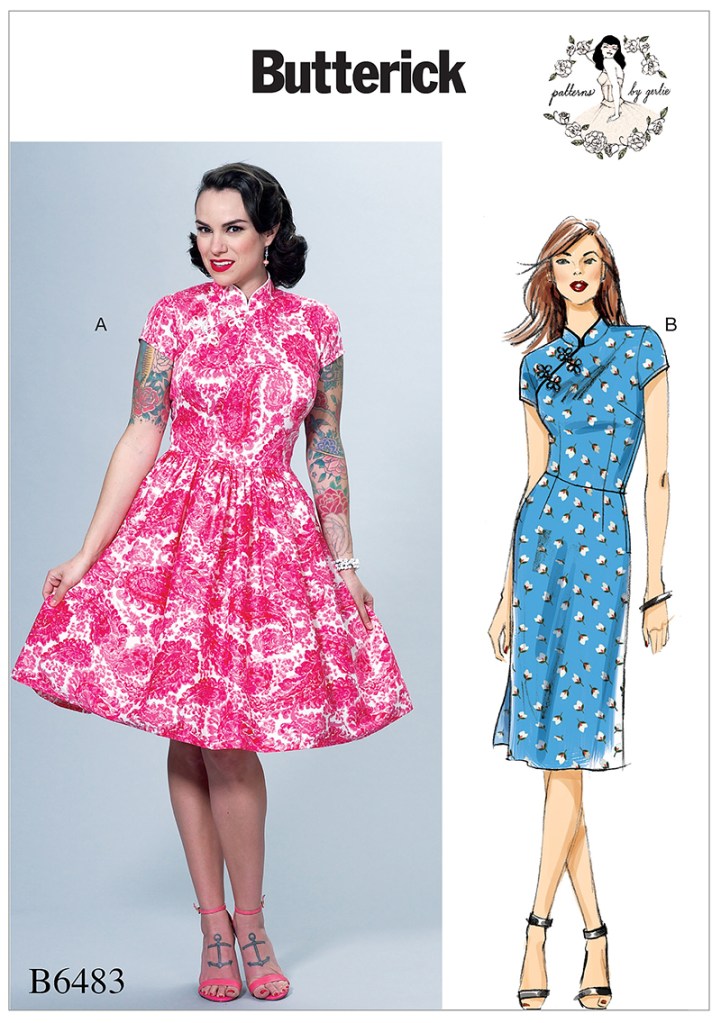
- Butterick B6483
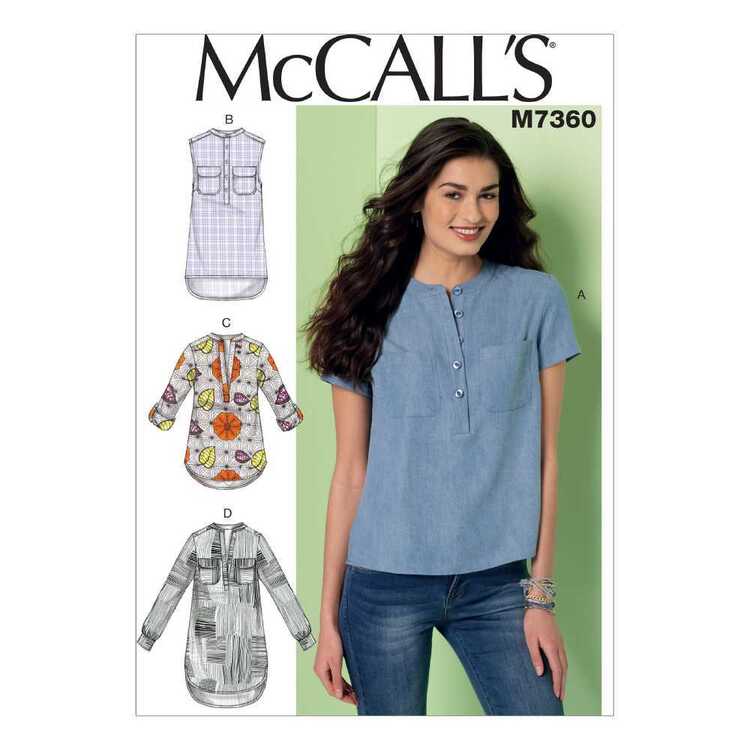
- McCall’s M7360
- 2.5m plain poplin in pale blue – Spotlight
- 2m teal ribbon – Arthur’s Emporium
- teal alcohol marker
- 2x buttons – Spotlight
- Clear plastic snaps
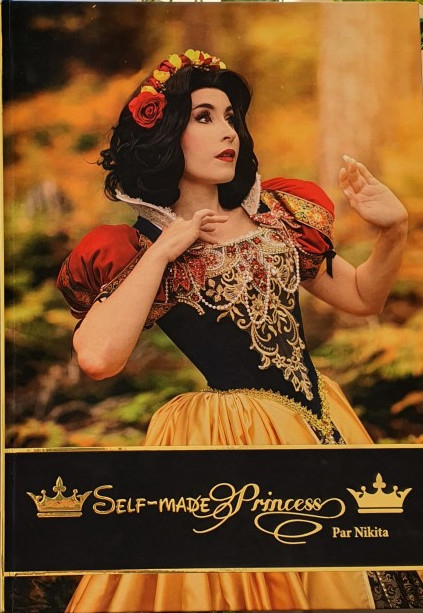
Corset
- Self-Made Princess by Nikita
- 1m mink fabric in black – Spotlight
- 1m cotton in Elsa print – Spotlight
- 2m cotton drill in black – Spotlight
- 5m wide metallic ribbon in gold – Arthur’s Emporium
- large gold eyelets – Spotlight
- assorted machine embroidery thread
Skirt
- 3m felted wool in blue – Arthur’s Emporium
- 3m felted wool in deep ocean blue – Arthur’s Emporium
- 1x 9 inch zip
- scrap cotton in navy
- assorted machine embroidery thread
Accessories
- black leather boots
- gold embroidery thread
- scraps of the lipstick colored wool viscose melton
construction
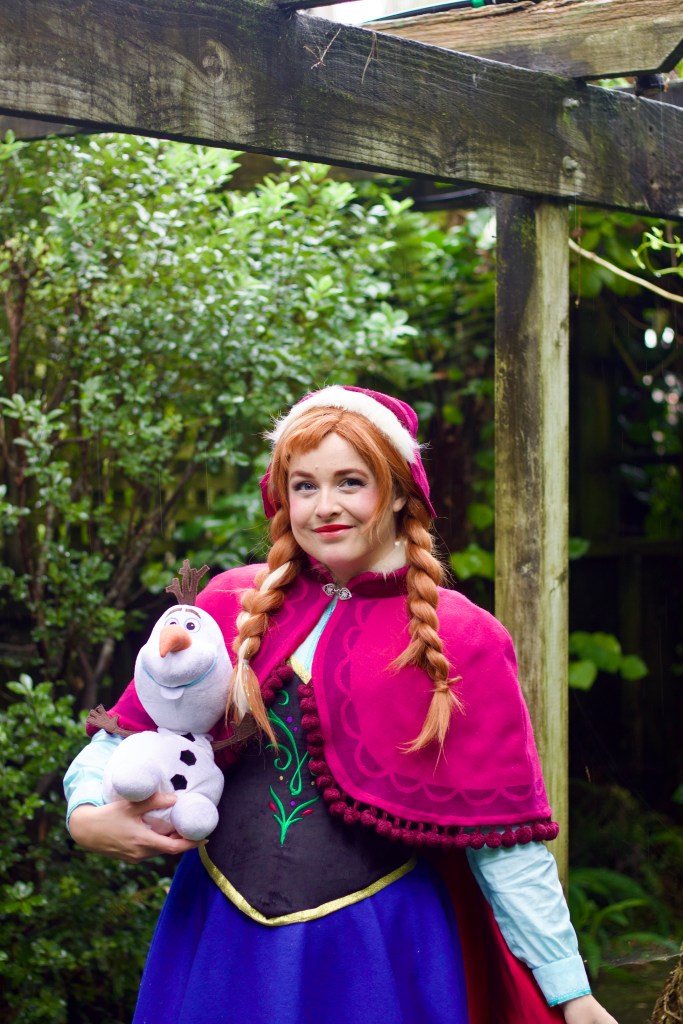
Hat : I made a pattern by wrapping a head form in glad wrap and covering that in masking tape. I then drew on the masking tape the shapes I wanted, cut them out and used it as a pattern which I transferred on to the same wool fabric as the cape. For the decorative trim, I cut it from the same wool that I had dyed using a combination of Rit wine and purple dyes, this was then top stitched on to the cape. Finally I sewed some fur to the inside of the front. It pins in to the wig.
Wig : I used this wig here as a base. I added two of these clip in extensions and some hair tinsel to create the streak. I only had to trim and style the fringe.
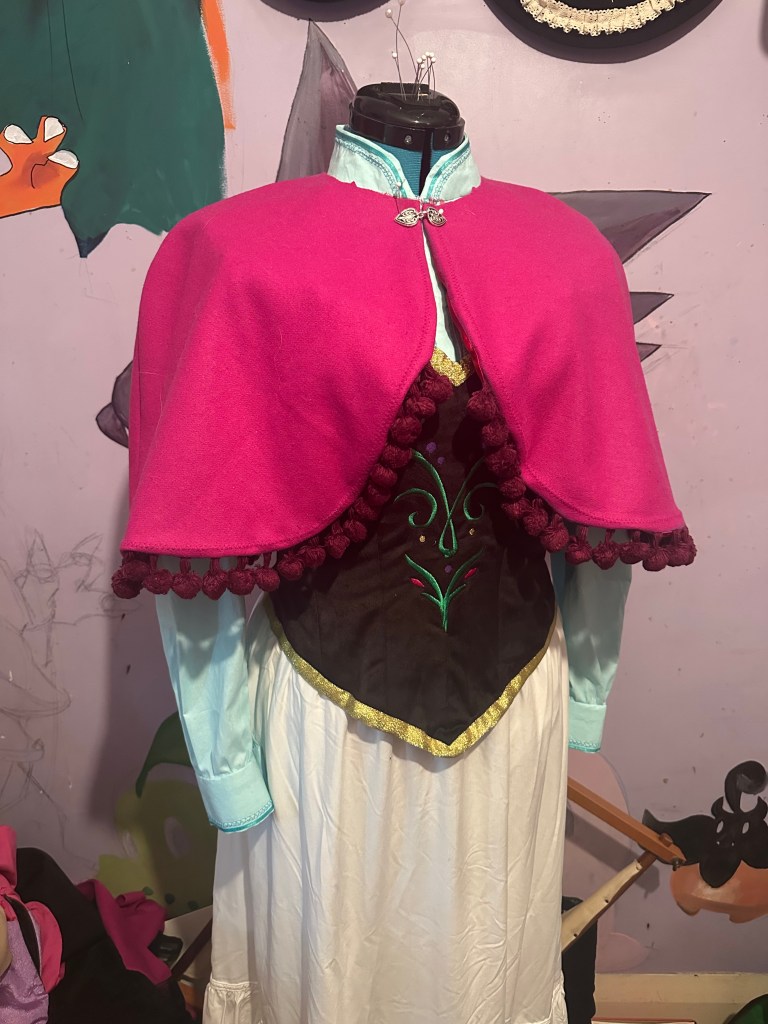
Cape : Made using McCall’s M7000 as the base pattern from a pink wool viscose fabric lined with a ruby red satin.
I adjusted the under cape piece by eliminating the two front pieces altogether, then I curved the bottom side edges of the back piece where it would have joined to the front pieces.
That was the only alteration I made. The upper cape and collar all followed the pattern exactly.
I added a pompom trim (which I had dyed the same color as the fabric paint I’d picked to add designs to the cape with later)to the upper cape edge, used my machine to add decorative stitches and hand painted on the larger scallop and semi-circle designs using a wine colored fabric paint.
To the collar, I added an extra piece of wine colored wool which I had dyed in the same dye bath as the pompom trim. This got topstitched to the outer collar piece. Once the collar was attached to the rest of the cape, I sewed a piece of rabbit fur to the inside of the collar.
Lastly, a silver cloak clasp was added to the front of the cape just below the collar.
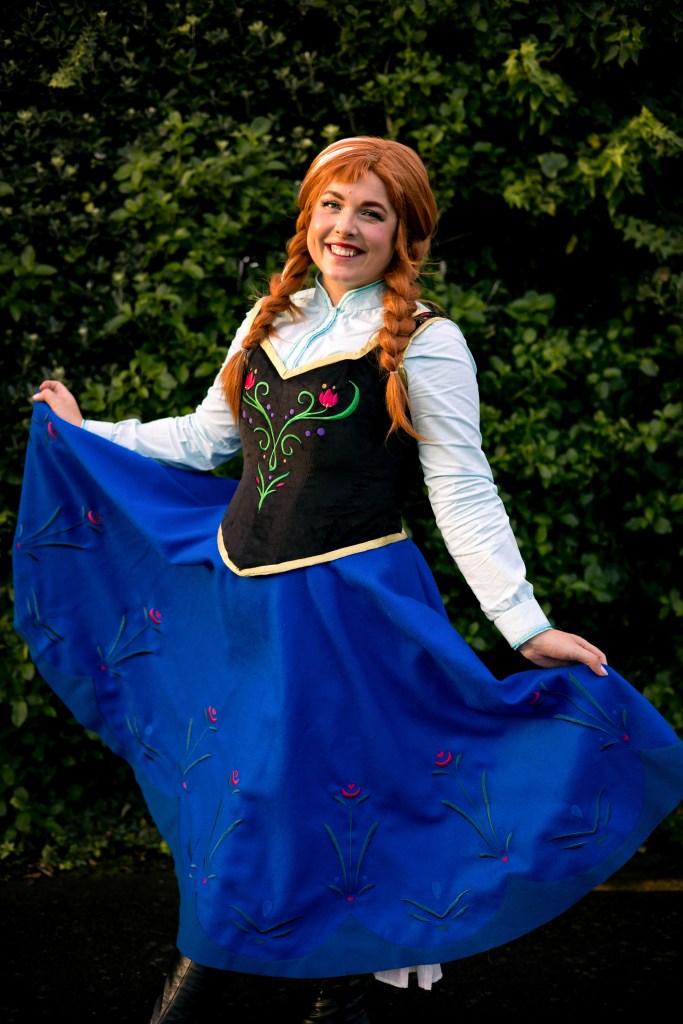
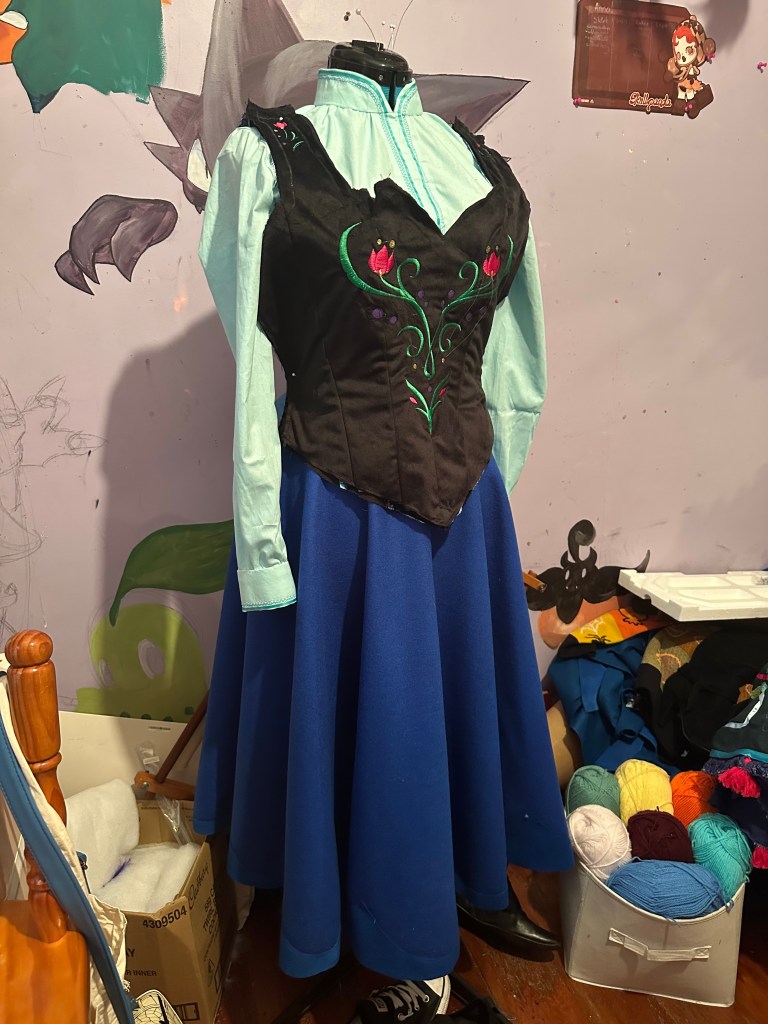
Shirt : Made using McCall’s M7360 as the base pattern from a pale blue cotton fabric.
I only made some slight adjustments to the pattern. First I made the shirt length shorter, left off the pockets, used the collar from Butterick B6483 and instead of having the front placket close with buttons, I opted for snaps.
I added detail to the collar, cuffs and front placket by sewing on a tiny ribbon and using the decorative stitch on my machine. The ribbon was initially the wrong color (it was exactly the same shade of blue as the shirt) and I need it to be darker, so I colored it with an alcohol marker.
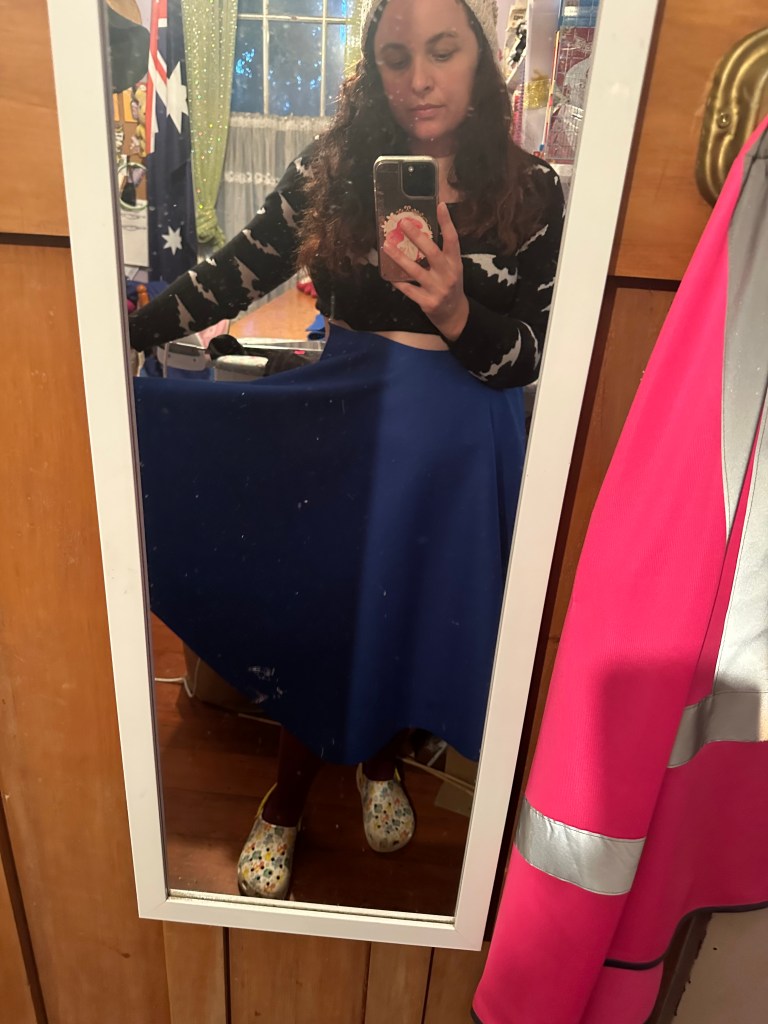
Skirt : Originally, I did sew up a skirt using a pattern, and I got all the way to putting in the zip and waistband before I realized I hated it. It personally wasn’t quite full enough for my liking so I started another from scratch.
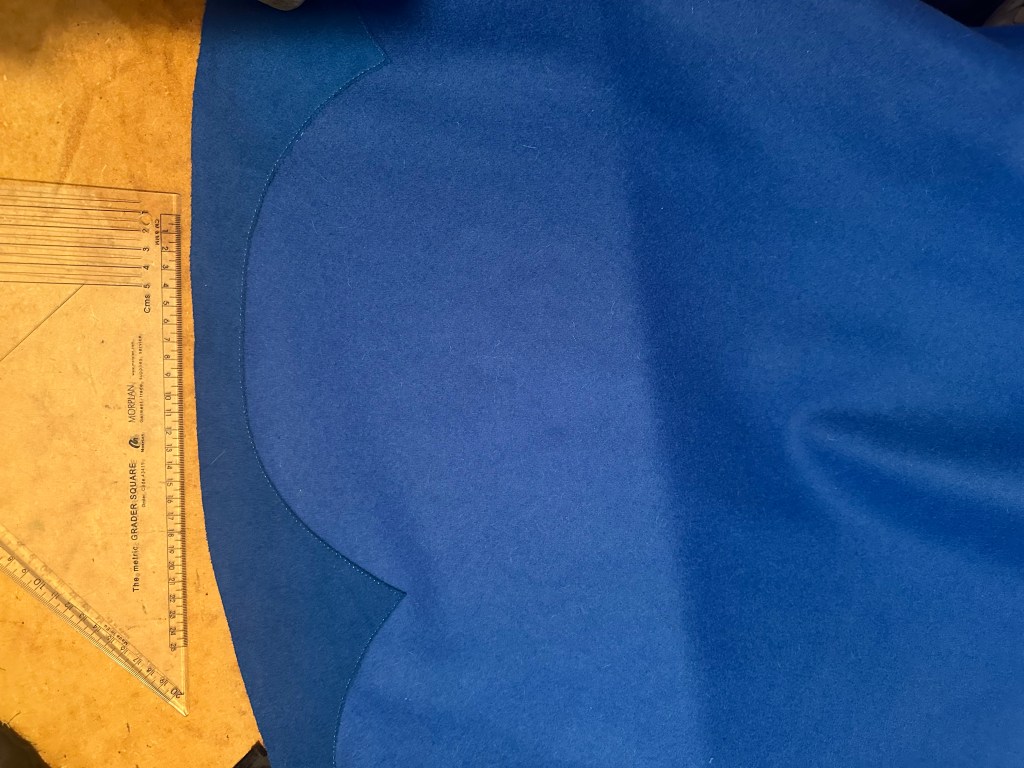
My second was a tried and true self-drafted circle skirt made from a felted blue wool.
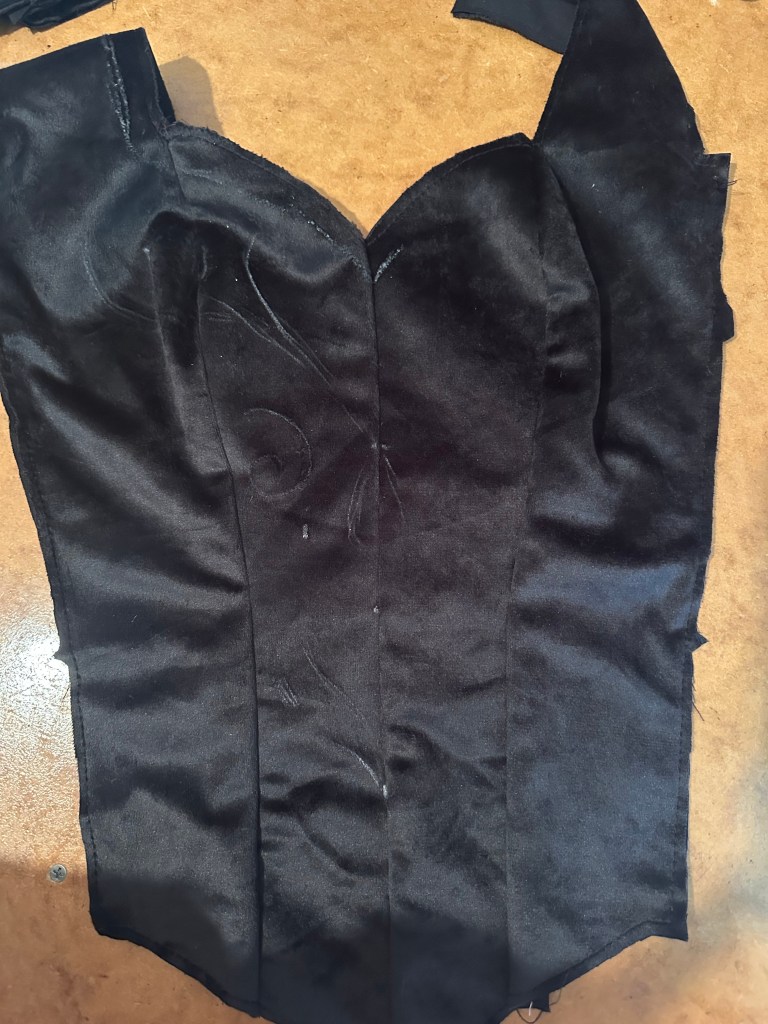
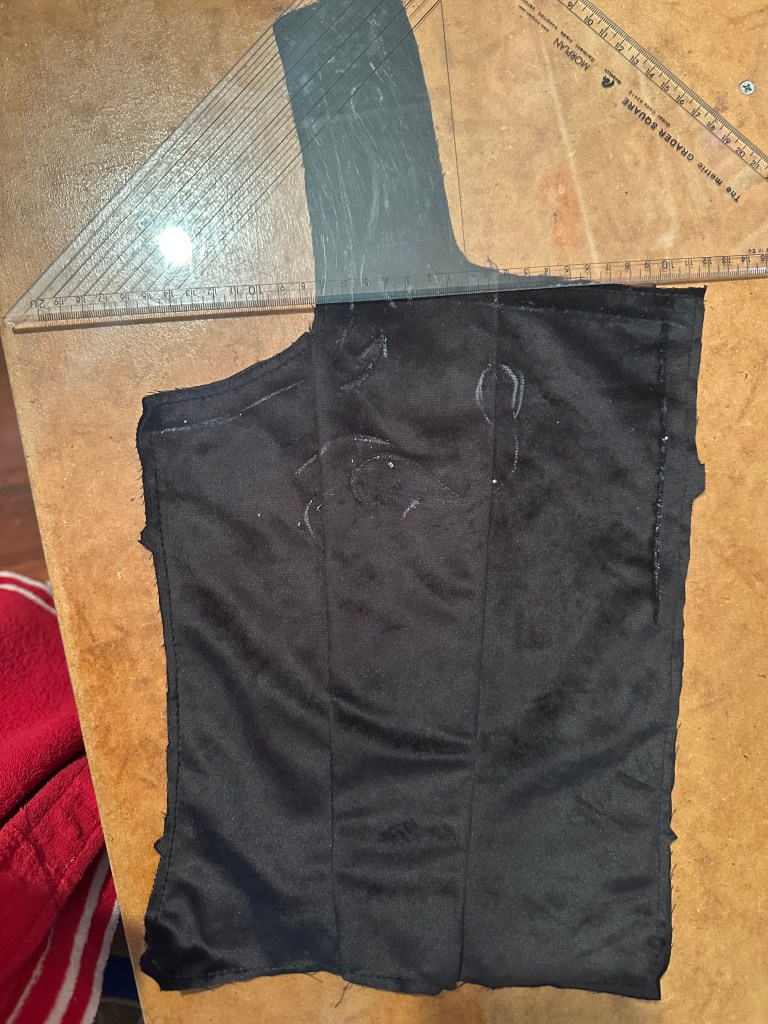
Bodice : I used one of the patterns found in the book Self-Made Princess by Nikita. It was great as I didn’t have to make any alterations in order for it to work. There are four layers of fabric in it, the outer is a soft black mink, two layers of black cotton drill for the interlining and the lining is an Elsa print cotton.
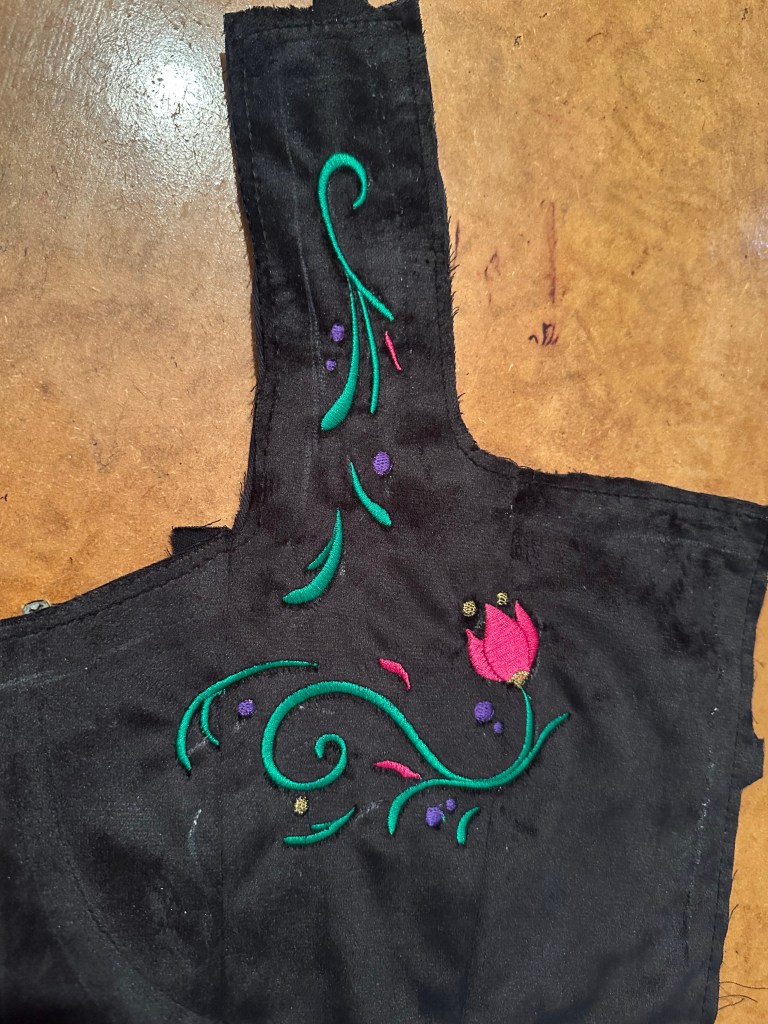
I added boning to the inside which was spiral steel. I designed the embroidery myself and had to add it to the front and back pieces before they got sewn together at the shoulders and sides.
Lastly, I added a gold ribbon along the edges and gold eyelets in to the back.
Boots : I found a pair of black leather boots at the secondhand store. I painted the heel/sole white first and then a metallic pink color.
I then added the embroidery by stitching it out on four layers of black tulle and water soluble interfacing. I cut the designs out, washed away the interfacing and then glued them to the boots using UHU glue.
You can download the embroidery files for yourself, for free, here!
progress photos


One thought on “Anna | 2025”