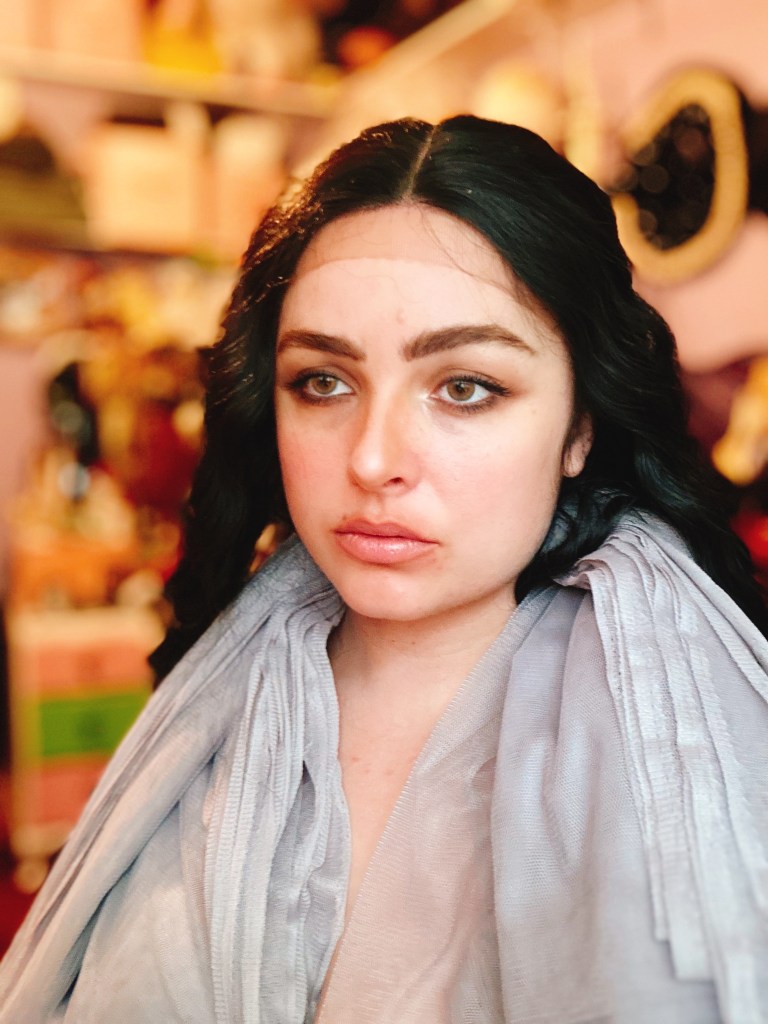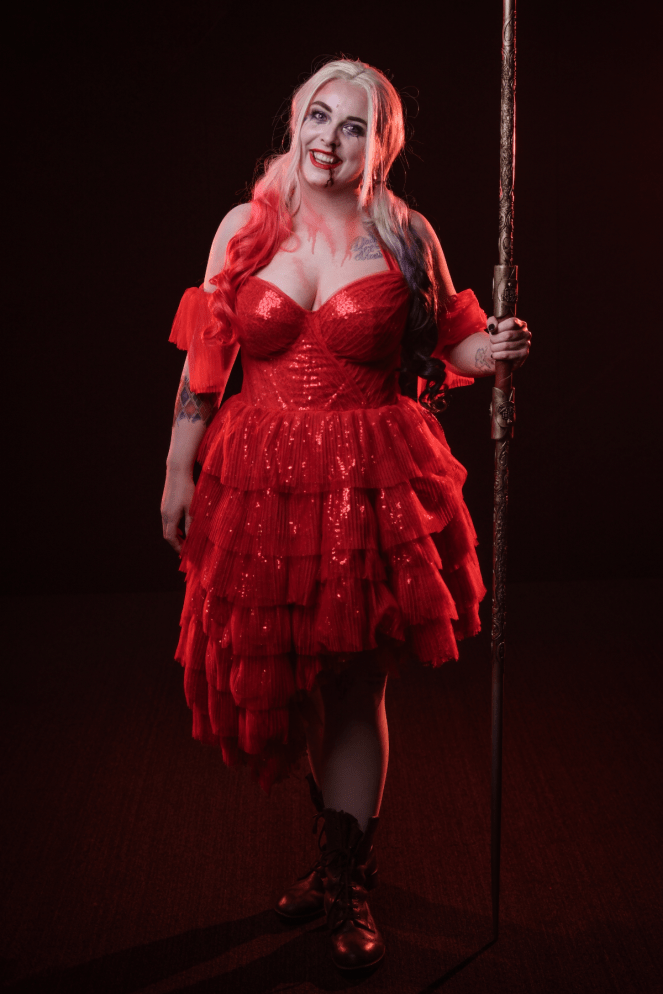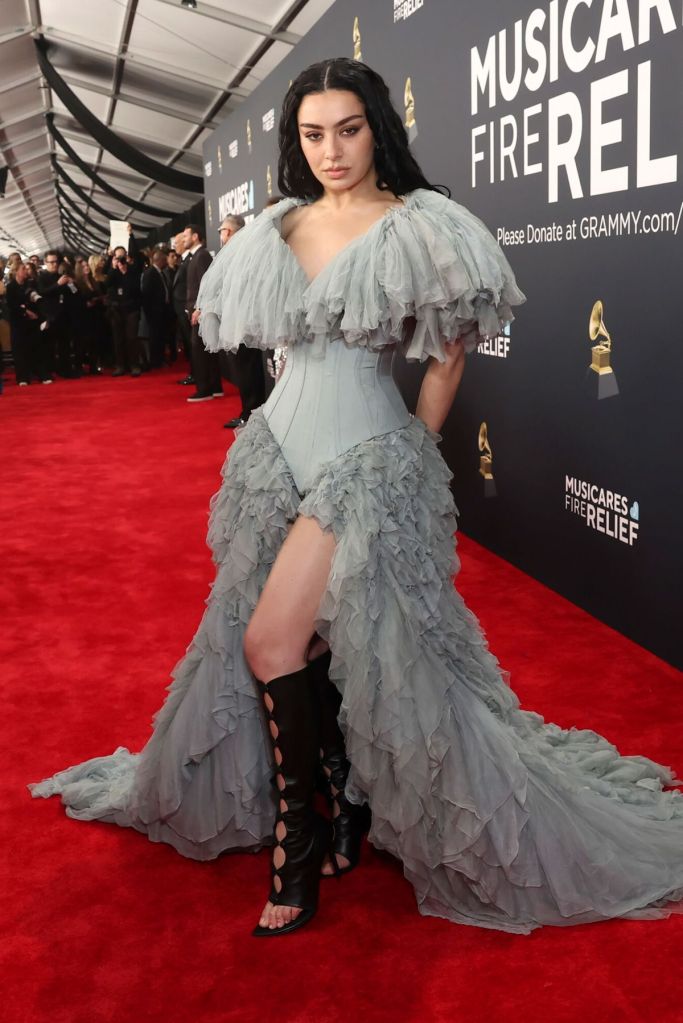
Charli xcx – Grammys 2025
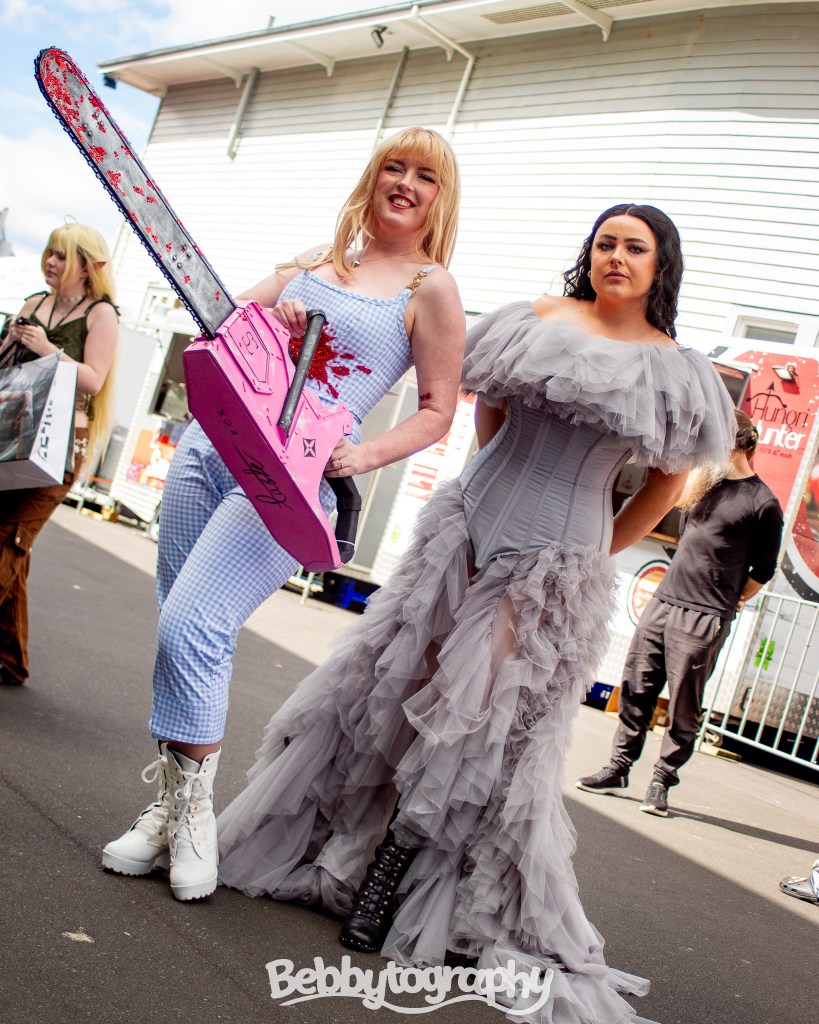
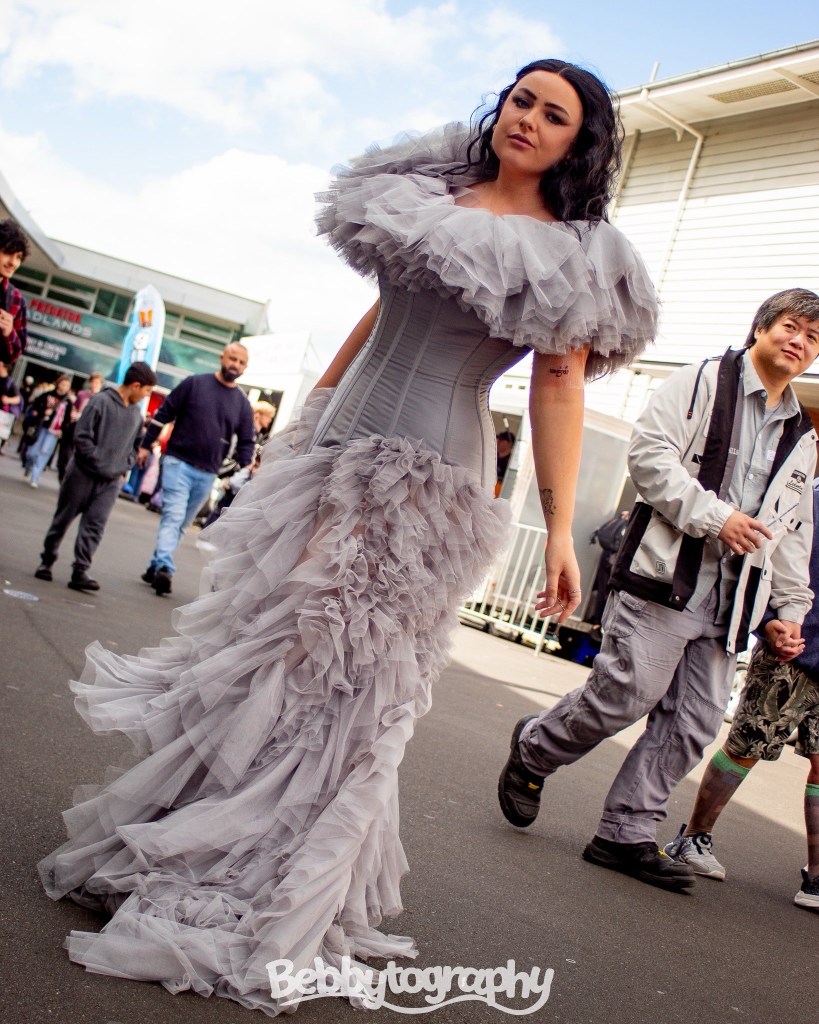
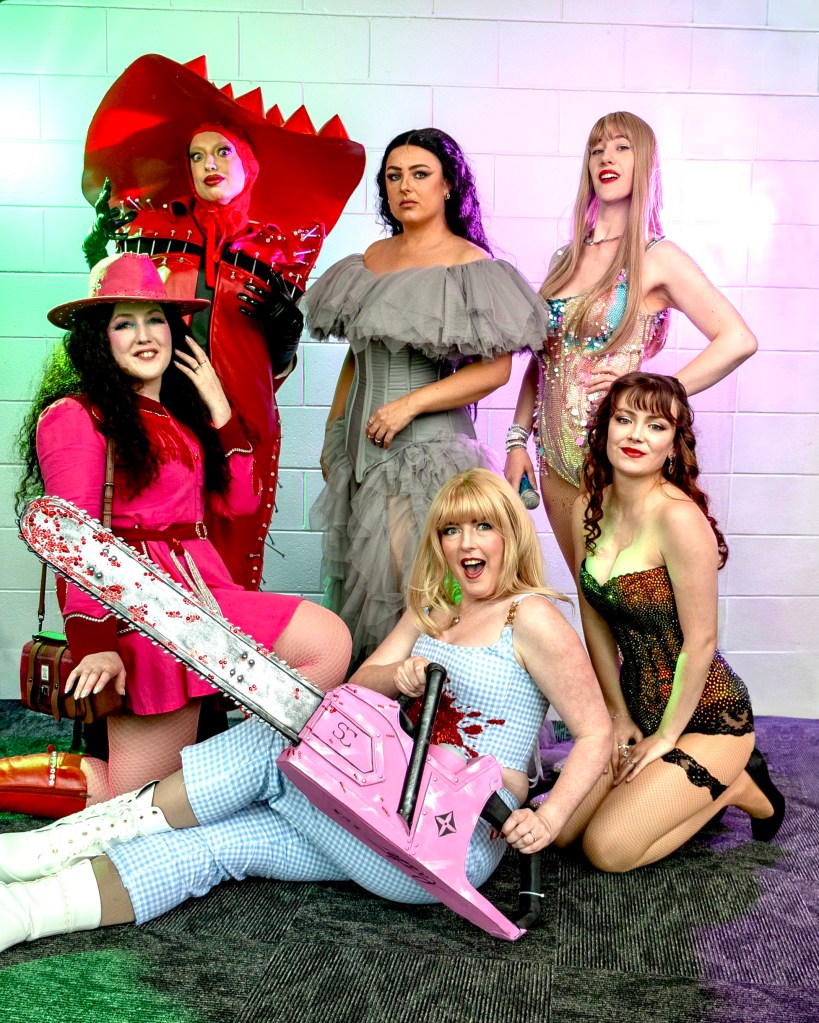
Made for : Auckland Armageddon Expo – Spring 2025
Background : On the way down to the Armageddon Expo earlier in the year, Anna and I were listening to Sabrina Carpenter and I asked her if she’d seen the fanart or Sabrina, Chappel Roan and Charli xcx as the Powerpuff Girls. It was from that comment that the idea to cosplay the girls to the next con was born. We even roped in a few extra friends who joined us as Lady Gaga and Taylor Swift as well!
gallery


Things used :
Corset
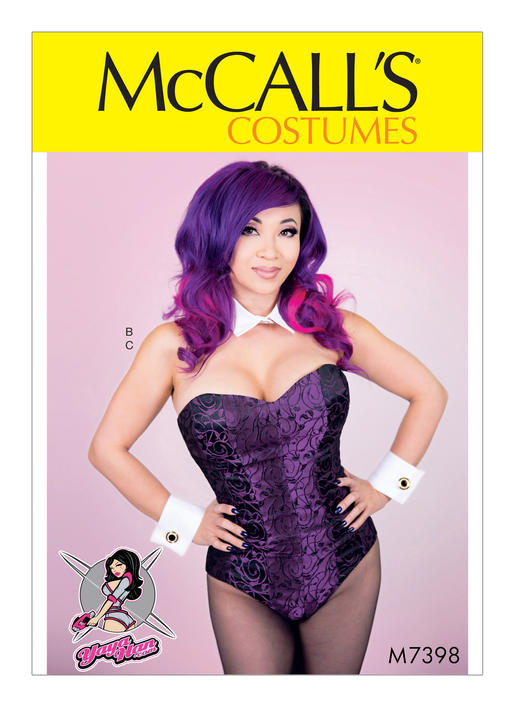
- McCall’s M7398
- 1.5m grey cotton sateen – Spotlight
- 1.5m grey drill – Spotlight
- 1.5m lime green drill – Spotlight
- 1.5m lime green cotton – Arthur’s Emporium
- 5m spiral steel boning
- 2m flat steel boning
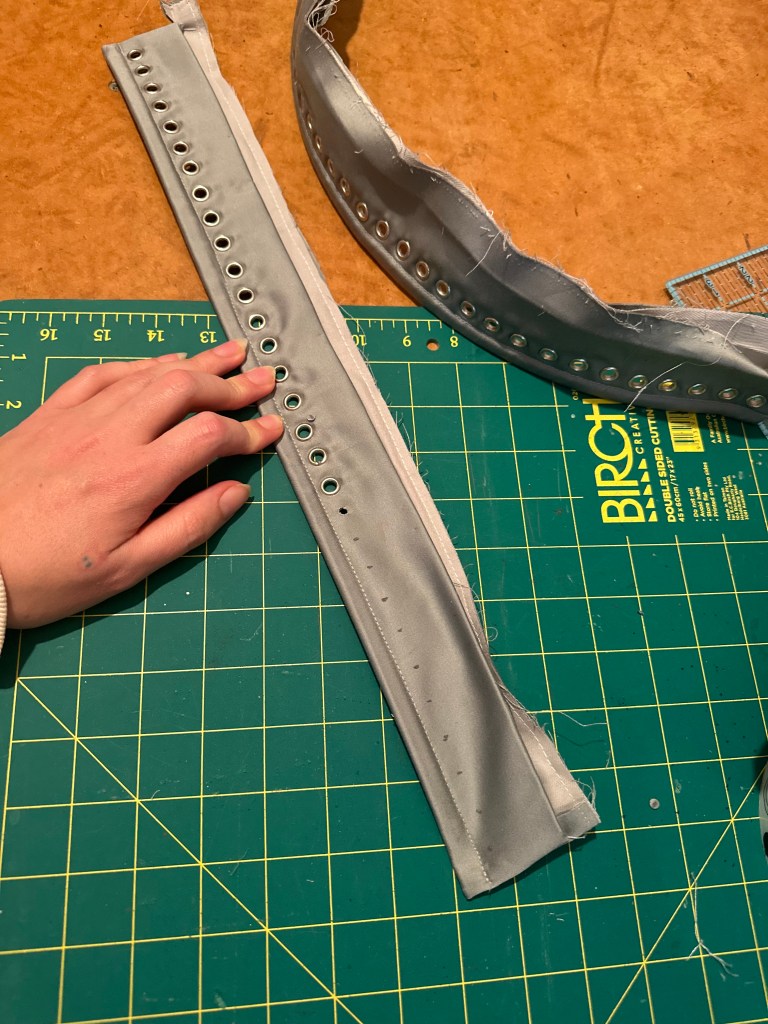
- 50 silver eyelets
- 5m silver ribbon
Skirt
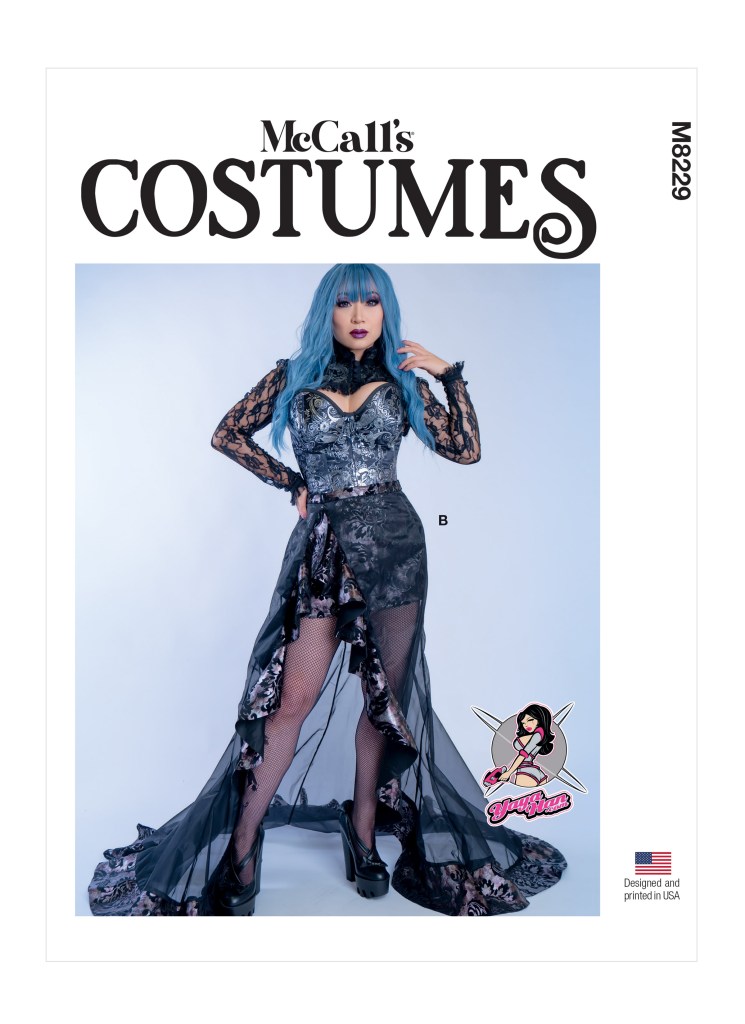
- McCall’s M8229
- 25m soft grey tulle – AliExpress
- 5m grey polyester organza
- 10m grey bias tape
- 50cm grey cotton sateen
- 1x hook and bar
Shoulder Ruffle
- 15m soft grey tulle – AliExpress
- 1m stiff black tulle – Arthur’s Emporium
- 2x jumbo snaps
construction
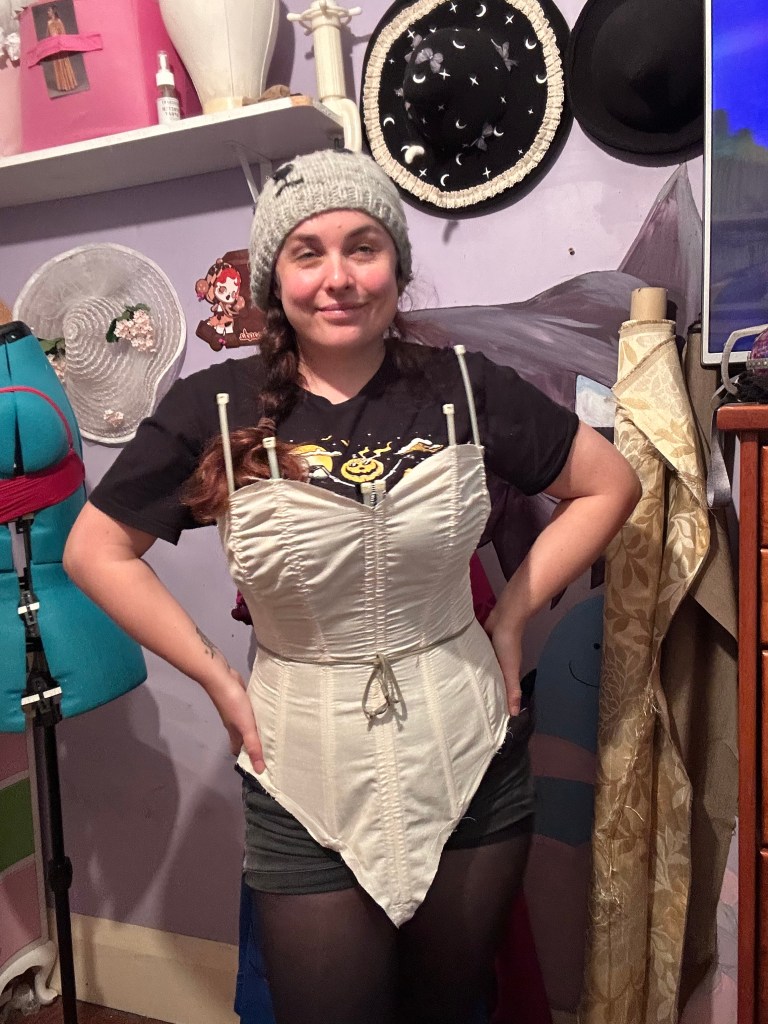
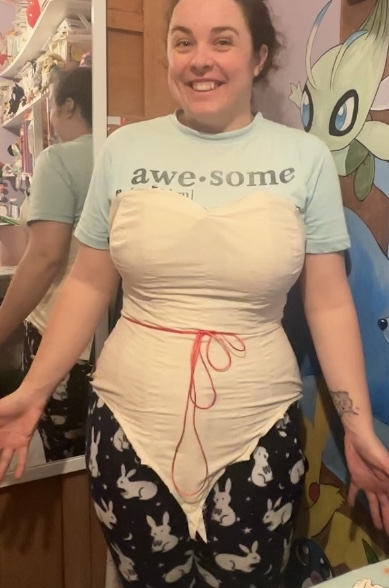
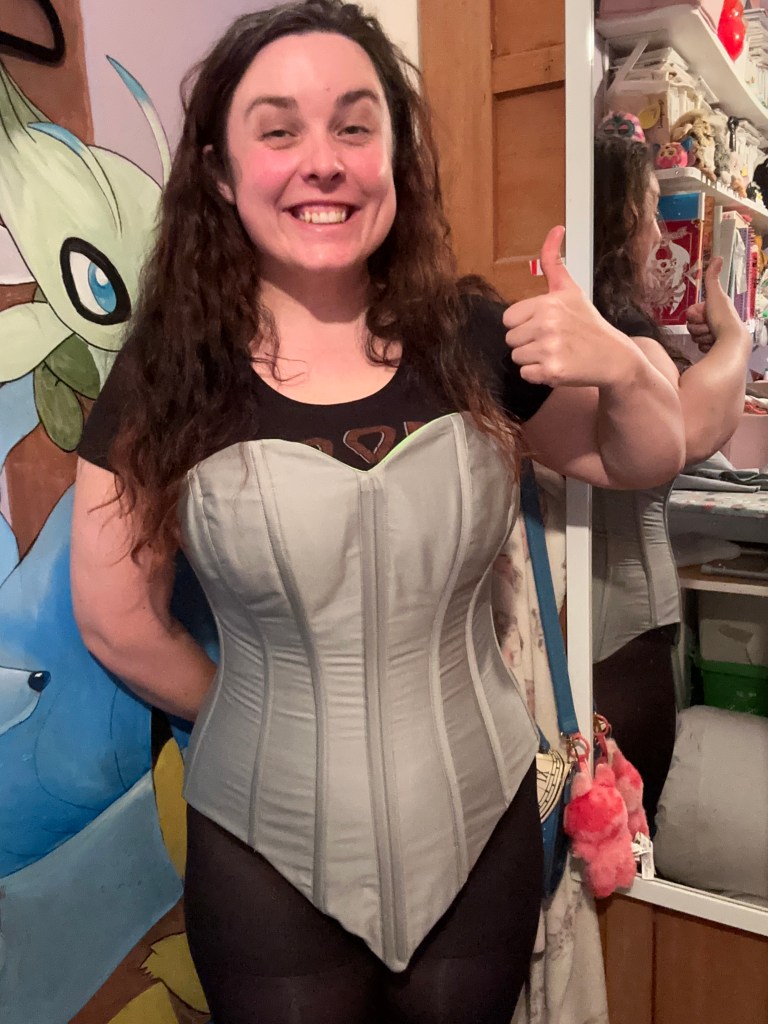
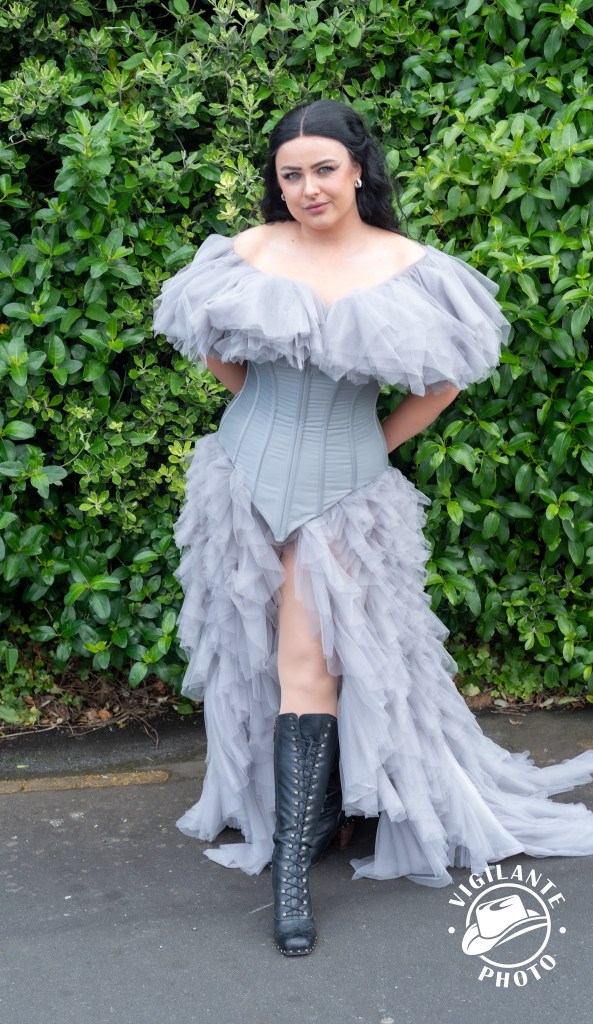
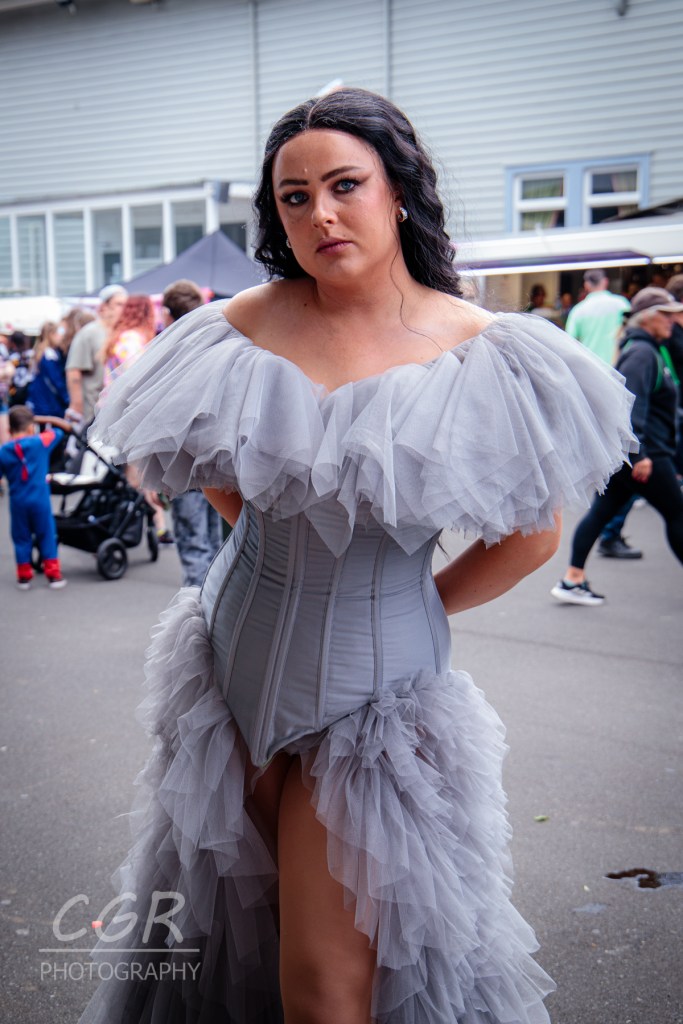
Corset
I started this part of the project off by making a mock up of a long corset Vogue pattern. After finishing the first mockup, I realized the seams weren’t pointing in the right direction on the bottom front and decided it would be too much work to try and change the direction of them and looked for another pattern instead. That’s when I found McCall’s M7398 in my collection. It had the right length, and right seam direction, only it was a bunny suit and not a corset.
When making my first mockup, I eliminated the snap closure in the crouch by instead redrawing the pattern pieces and straightening out the crotch curve. This worked really well and gave the look I was going for. After trying on the first mockup, the only changes I had to make were shortening the point in the front and back and making it a size smaller. The pattern recommended I make a size 20, I had already sized down my first mockup by making a 16 and that was still too large. My next mockup was a 14 and fit much better.
Happy with how the mockup fit, I moved on to my real fabrics – an outer layer of grey cotton sateen, two strengthening, inside layers of grey and green drill and a lining layer of green cotton.
It mostly went together according to the pattern (bar the alterations I had made during the mockup stage), except I sewed self made bias strips from the cotton sateen to the outside of the corset to create the boning channels. I used a combination of spiral steel and flat steel to create the bones. It was at this point I tried it on again, before adding the eyelets in the back so I was holding closed at the back with my hands, and I thought it was too small (spoiler alert: it wasn’t). So to “fix” this, I added separate panels to the back with the eyelets on it hoping to add a few inches. After lacing it up for the first time, it was too big after all so I just shortened the panels I had made.
A waist tape was added on the inside to help distribute the weight of the garment.
In the end, it was still a little bit too big, I shouldn’t have kept the extra eyelet panels and instead, made them directly in to the corset back as the pattern called for.
Skirt
I used McCall’s M8229 as the base pattern for the skirt. I changed the front from being asymmetric to symmetrical, meeting instead, directly in the center.
The skirt base was made from a polyester organza that I found on clearance ($4 a meter). I sewed the panels together using French seams and hemmed the raw edge using a grey bias tape.
Next came the ruffles. I used approximately 25m – 30m of soft grey tulle which I cut in to long teardrop shapes, gathered down the center and then sewn directly to the skirt base, spread evenly.
After all the ruffles were attached I added a waistband made from the same cotton sateen as the corset.
The skirt wasn’t as full of long as I would have liked, but I had run out of tulle twice already and didn’t have enough time to order more before the convention.
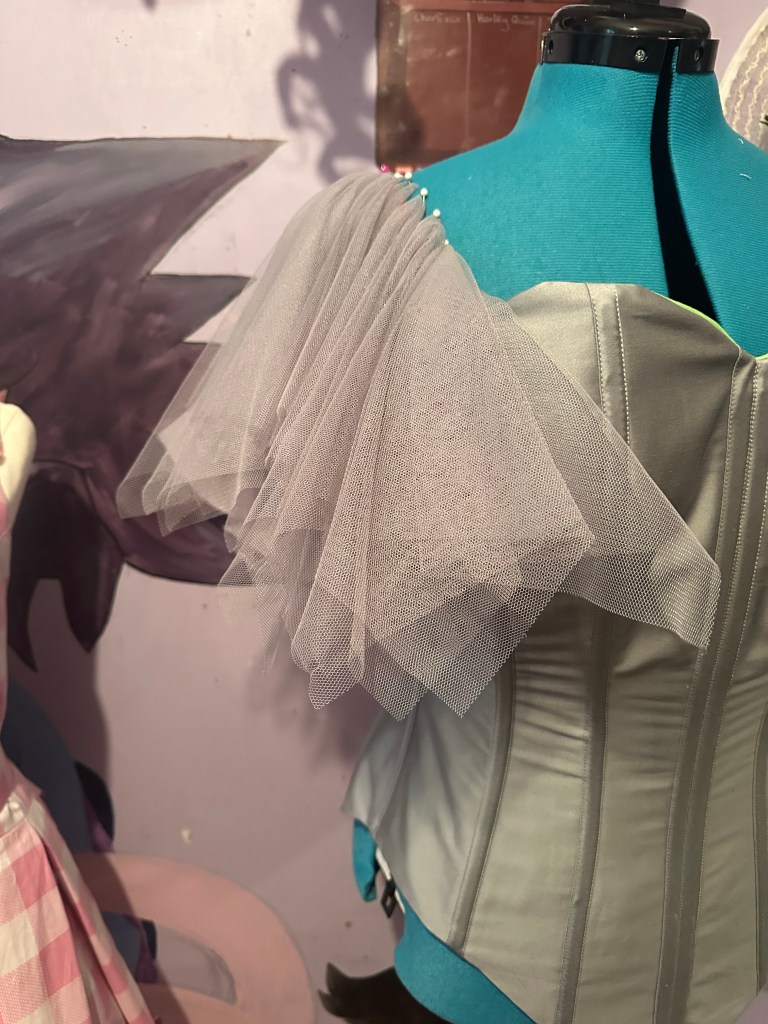
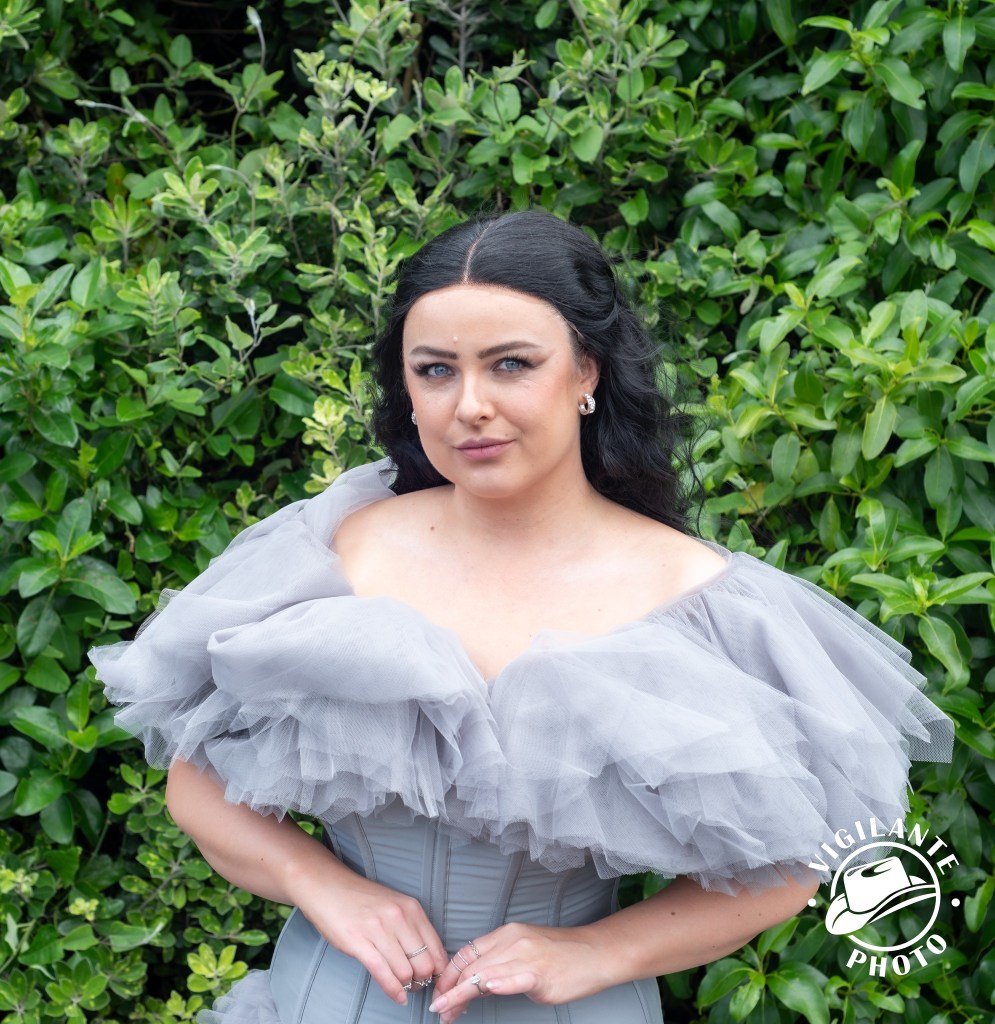
Shoulder Ruffle
I was so confused as to how to approach this part. So I started by gathering some long rectangles of tulle and some large squares of tulle, pinched in the middle and draping them over the corset on my dress form to see which looked better. I still couldn’t decided and so I did a poll asking you on my instagram and it was an even split. That meant I had to decide, and I went with the gathered rectangles because it was easier.
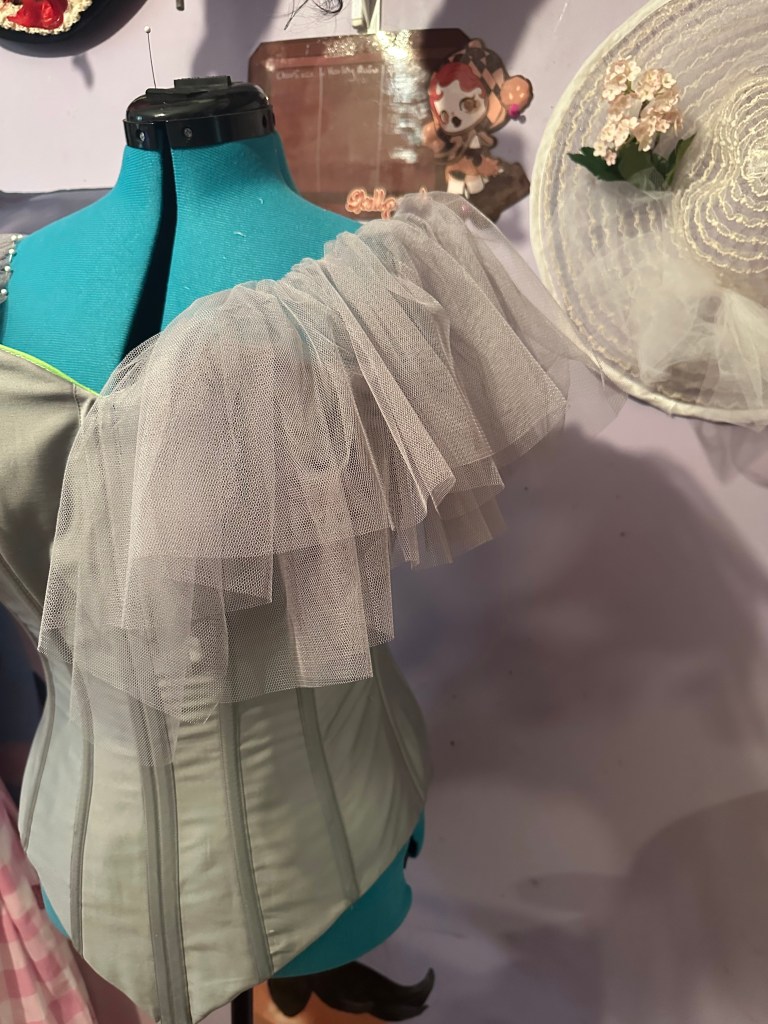
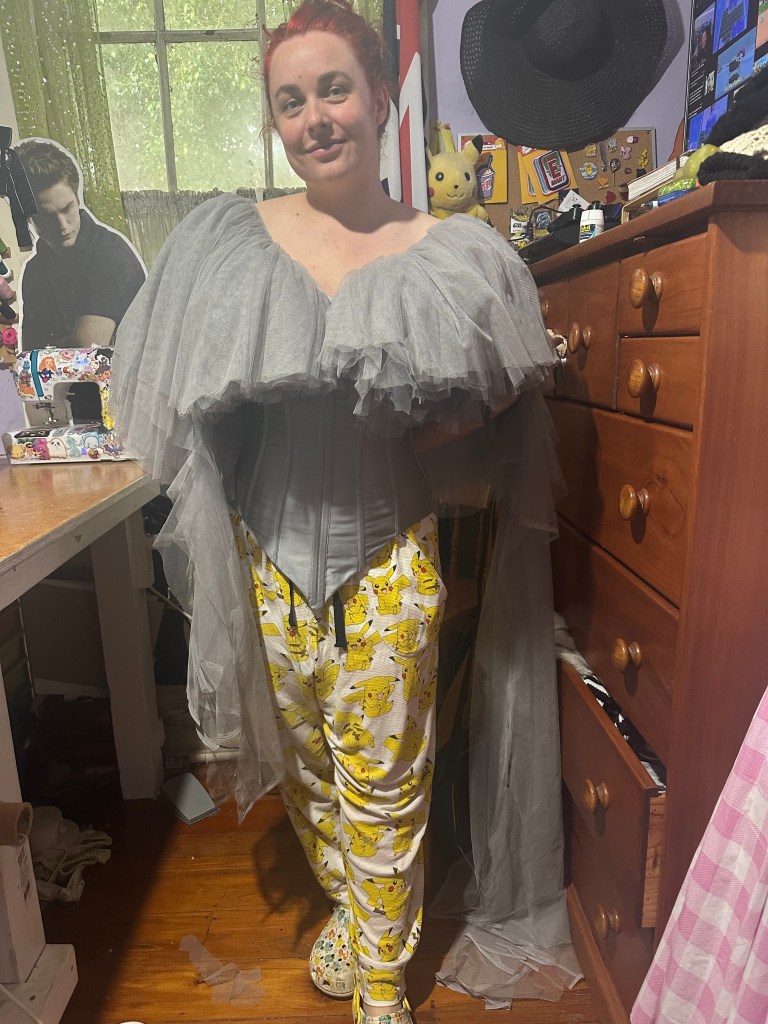
I used approximately 15m-20m of the same soft grey tulle as the skirt, cut it in to long wide rectangles and gathered them in the middle. I then sewed layers of these rectangles (5 total) to one single rectangle piece of the tulle which wraps around my shoulders like a shawl.
After the first try on, I thought it looked a little limp so I added a layer of stiff black tulle under the third layer of grey to give it some volume.
I tried it all on together with the corset, marked where it needed to be trimmed, and then cut through all the layers. The black layer I cut a little shorter so that it would remain hidden.
I added large snaps to the front of the corset and the shawl and that’s how it attaches. I was planning to add straps as well but it didn’t;t end up needing it.
It was here that I din’t like how plain the gathered rectangles looked and so I added a final top layer of the large pinched squares to add some texture.
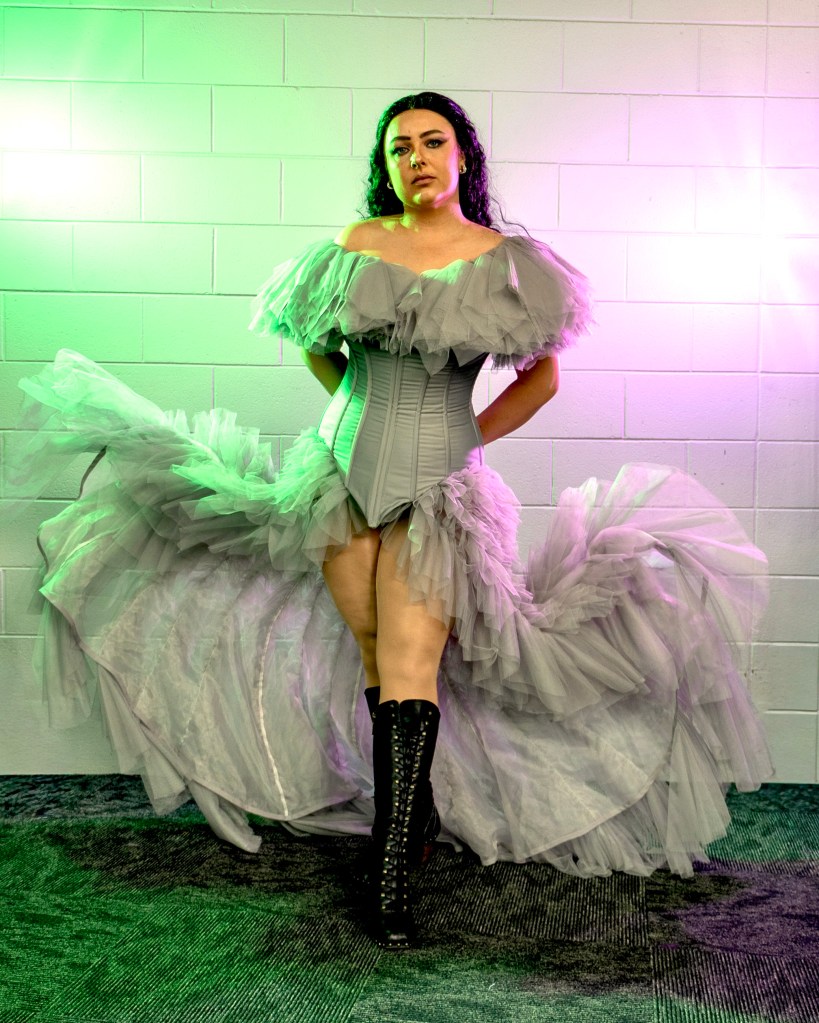
progress photos