
Made for : Our wedding in 2020
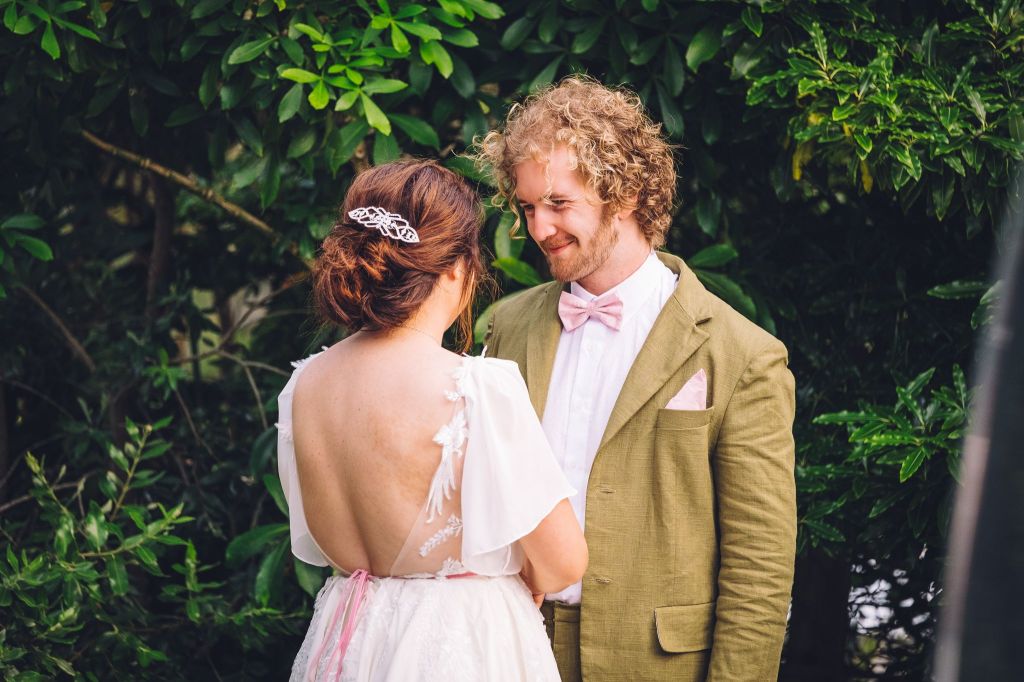
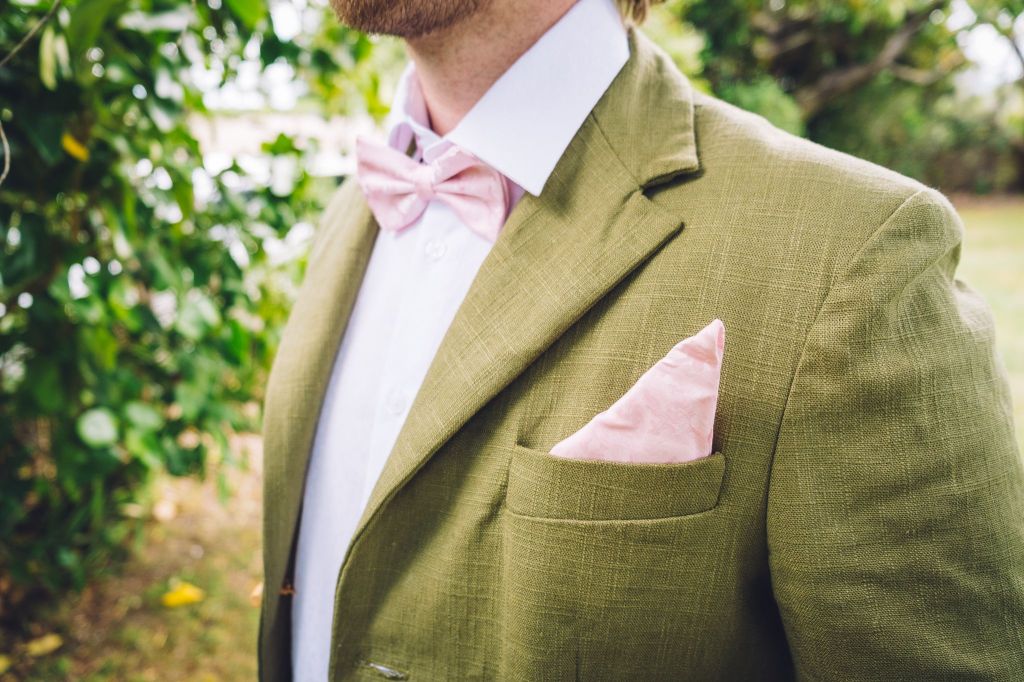
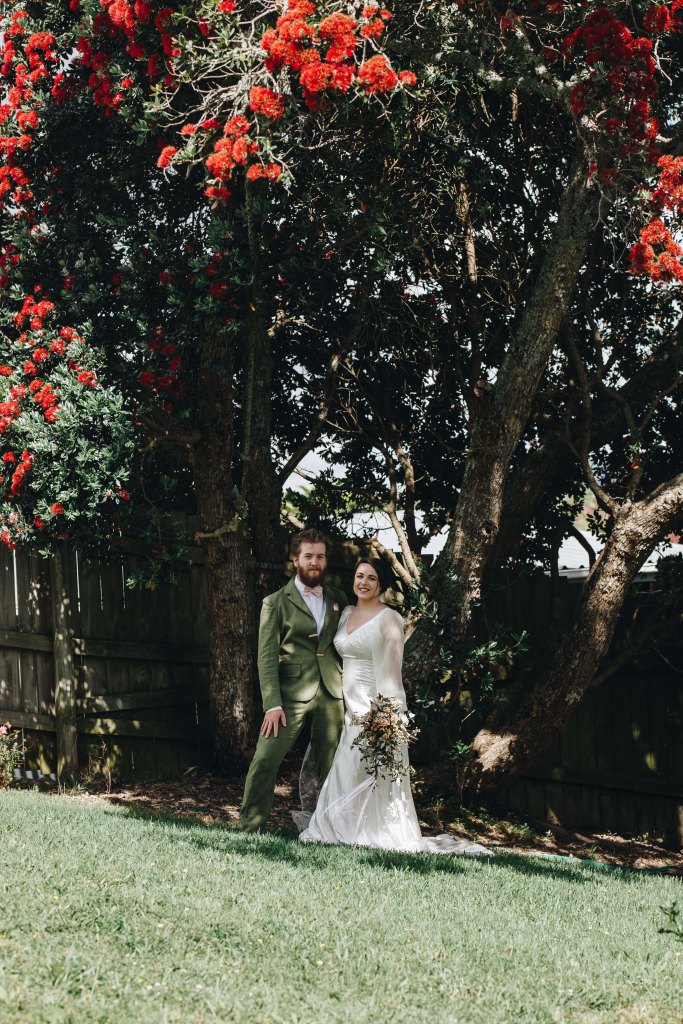
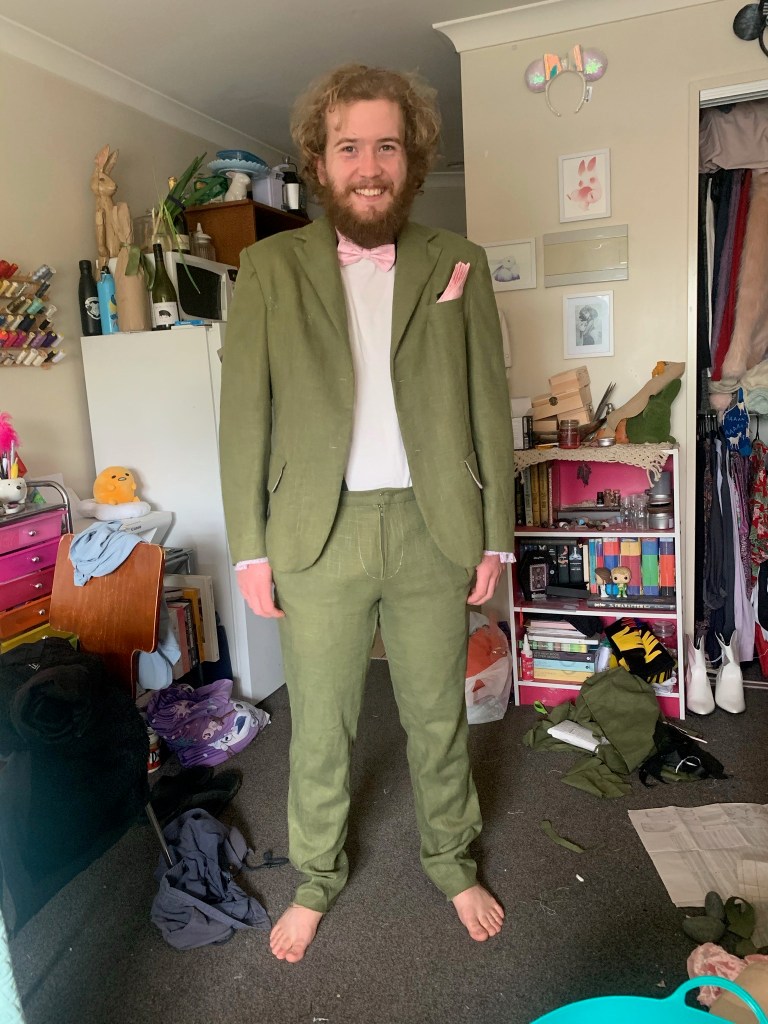
Background : Peter Pan and Neverland was the theme for our wedding. I knew from the start that Cameron’s suit would be some shade of green to mimic Peter Pan’s costume. When choosing the fabric, Cameron quoted one of my favourite lines from the film A Knight’s Tale ‘It will be green, with, ahhhh, wooden toggles!’. It was in that moment that I knew his suit would now feature wooden toggles.
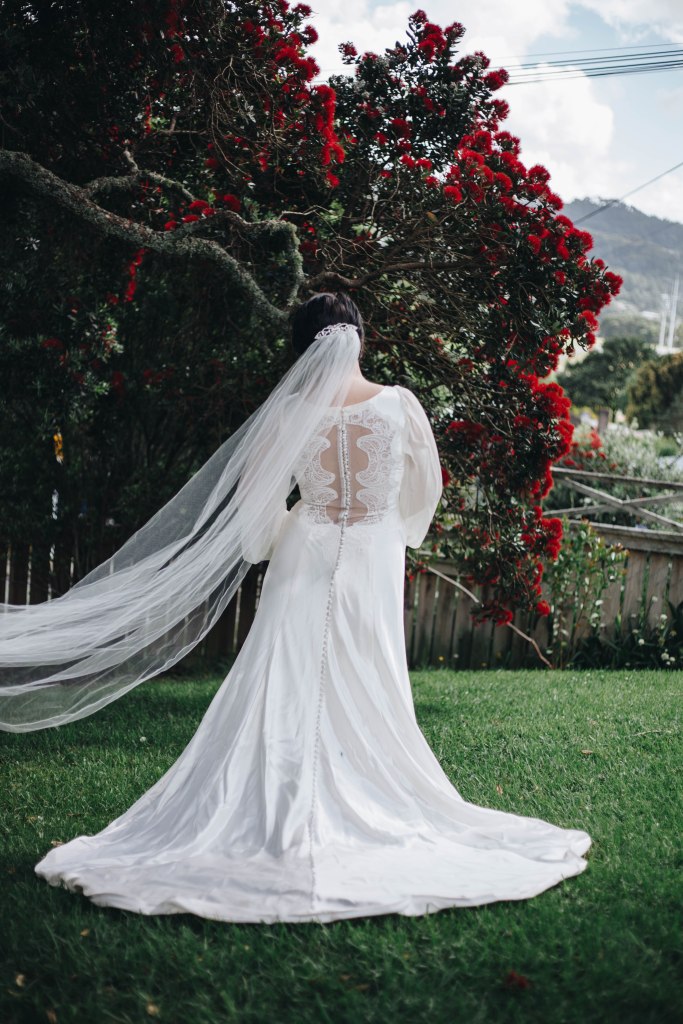
For my own dress, I originally planned to make myself a replica of Bella’s wedding gown from Twilight: Breaking Dawn for my ceremony dress. I had brought the pattern and found the screen accurate lace and then a miracle happened, someone in New Zealand, in my small hometown of Whangarei, was selling the officially licensed replica by Alfred Angelo on Facebook Marketplace for cheaper than I could have ever dreamed of making it myself.
gallery


Things used :
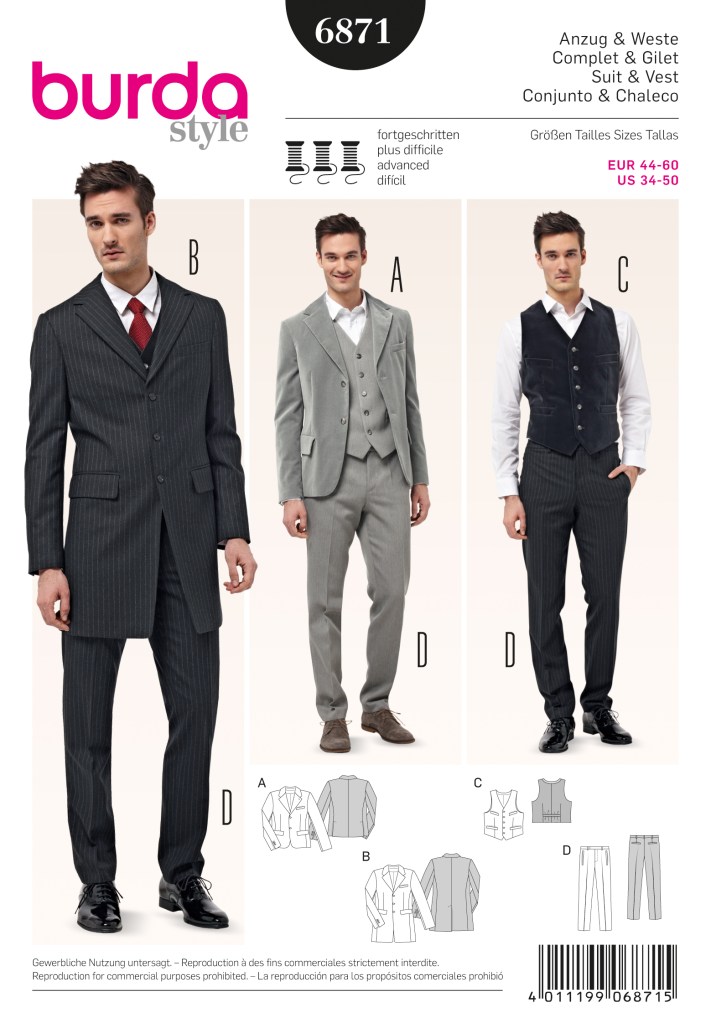
- Burda 6871
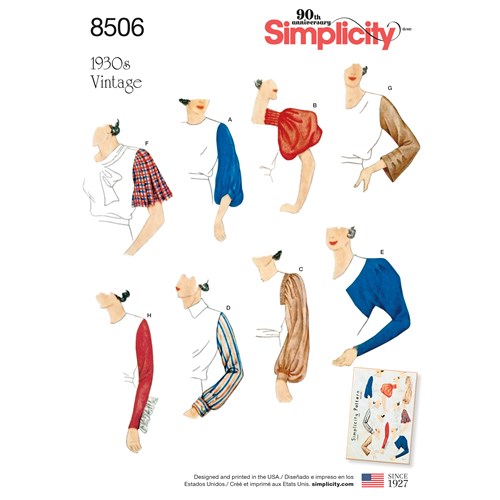
- Simplicity 8506
- green linen – The Fabric Store
- ivory chiffon – Spotlight
- floral cotton – Spotlight
- wooden toggles – Arthur’s Emporium
- wooden buttons – Arthur’s Emporium
- shoulder pads – Spotlight
- woven interfacing – Spotlight
- dress shirt – Hallenstein’s
- bow tie + pocket square – Hallentein’s
construction
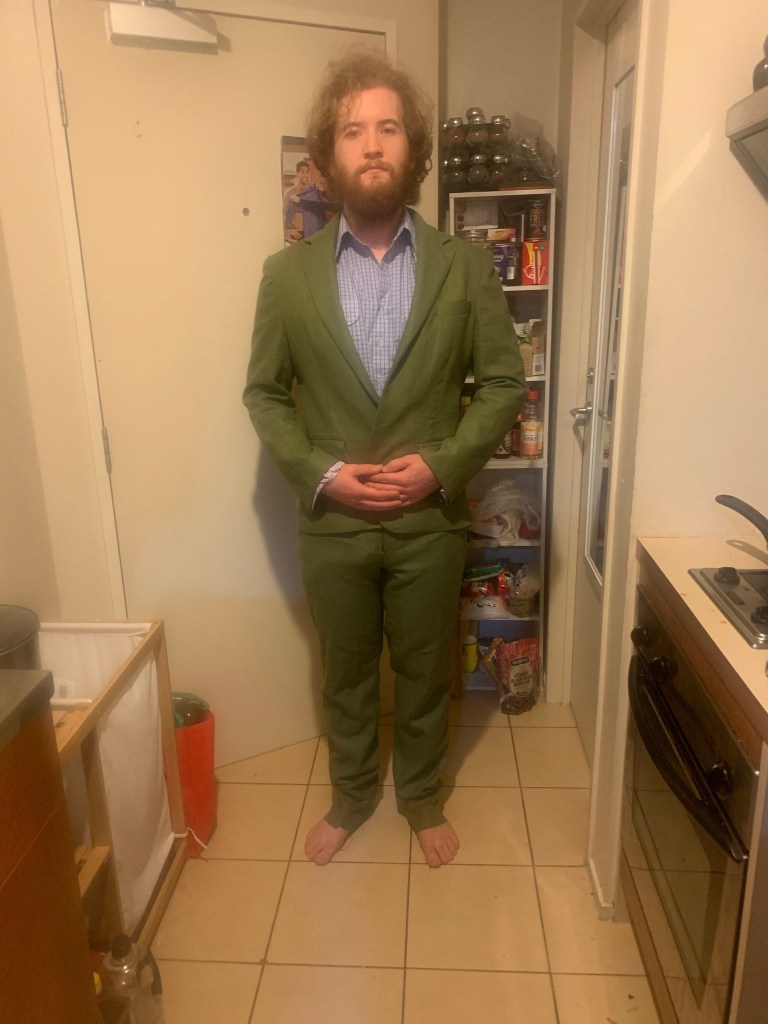
Cameron’s suit : I’m not a huge fan of Burda patterns. I’ve always found their instructions to be quite mealy. They’re just not easy to follow. However, looking through all the suit patterns available together, my husband decided this was the one he liked the most so I didn’t have a choice.
I’ve made suits before but they’d always been for costumes so they didn’t need to be that fancy, however, this was my husband-to-be’s wedding suit. I’d have to bring my A game.
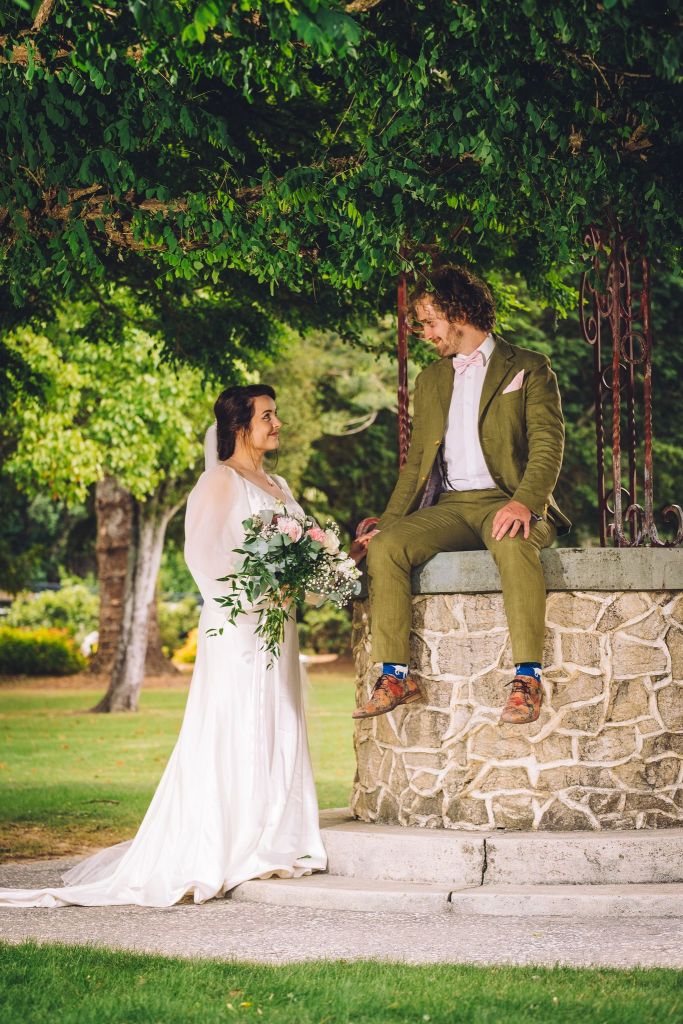
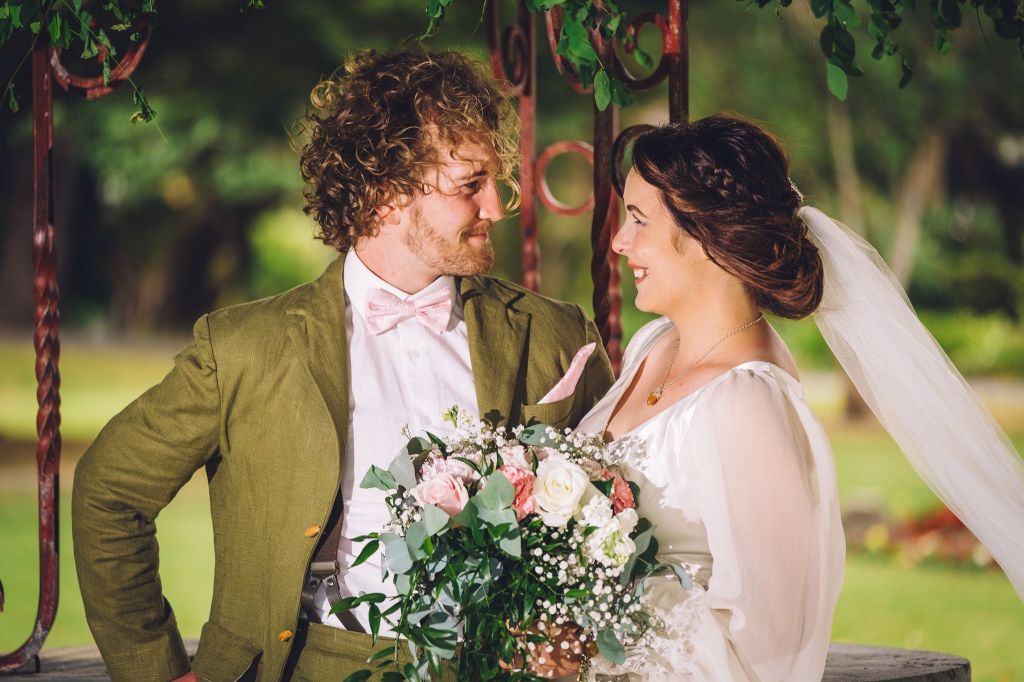
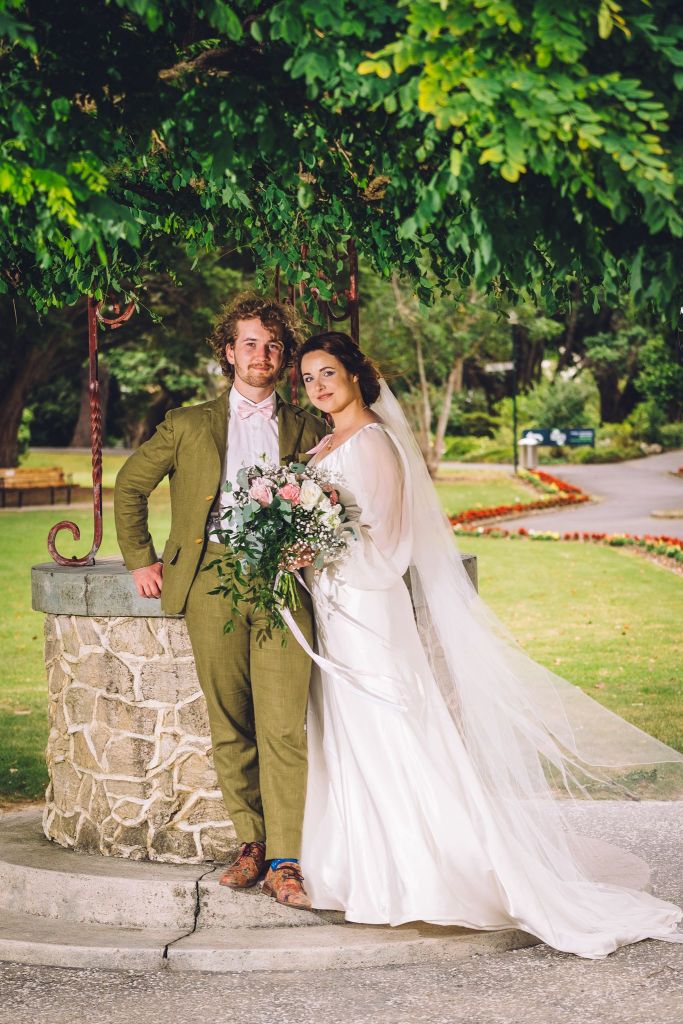
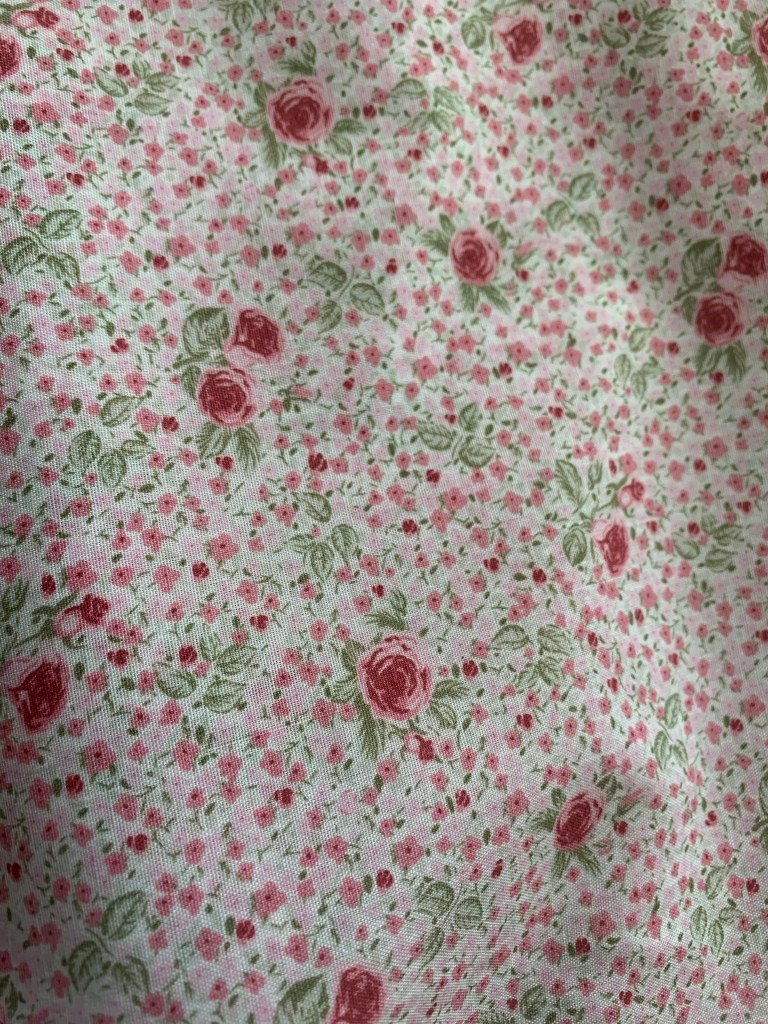
He chose a gorgeous light green linen which was a dream to work with. It was soft and held its shape beautifully. I chose the lining fabric which was a light, pink rose with green leaves cotton. Cameron hated this fabric at first but when he realized how well it matched everything else, he changed his mind. It’s now one of his favourite parts.
As mentioned above, I did find the pattern difficult to follow. There was a lot of jargon I didn’t understand and a few times where I swear they literally skipped steps. I found this blog *click here* which was a real life saver for me working with this pattern. It guided me through a few of the places where I got stuck and I don’t think it would have turned out half as nice without it.
I’m really proud of how his suit turned out, I especially love the addition of the wooden toggles on the front and it being a nod to one of our favourite films. Having said that, I also told my husband that I hope he doesn’t ever want a suit like this made again in his life. It was far too stressful!
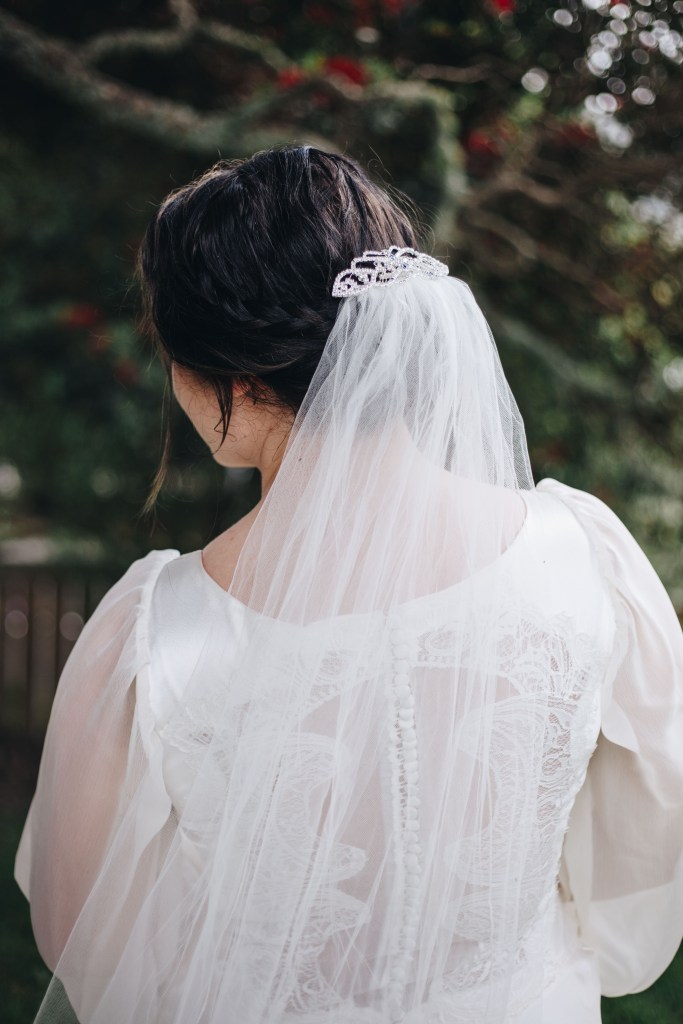
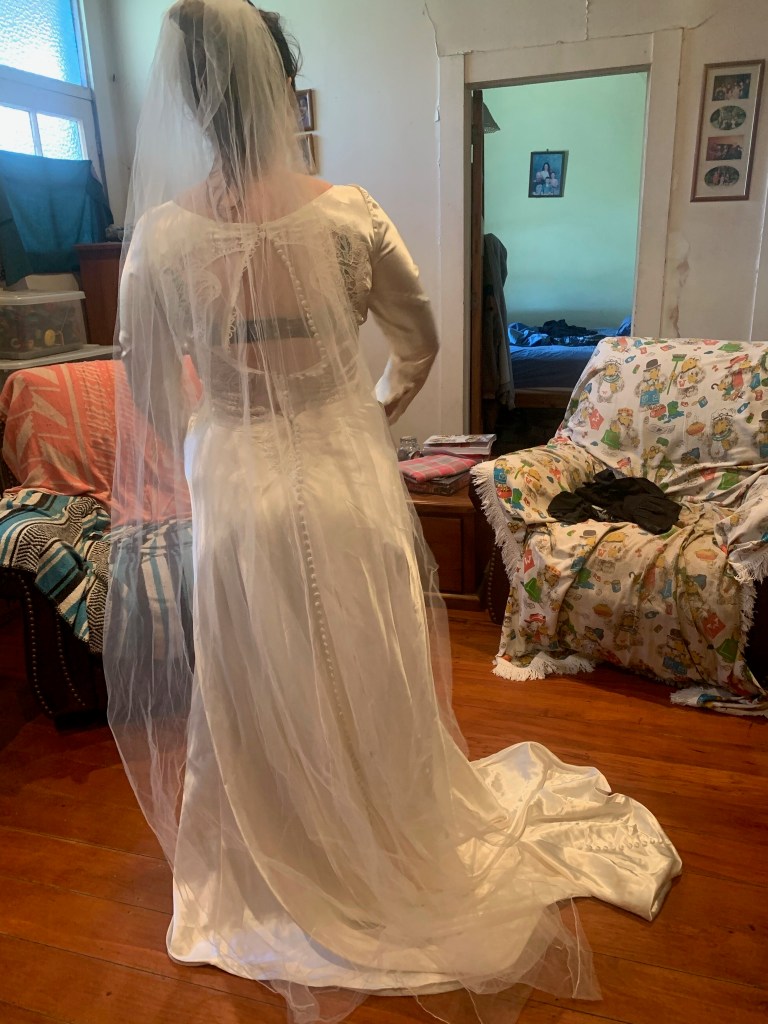
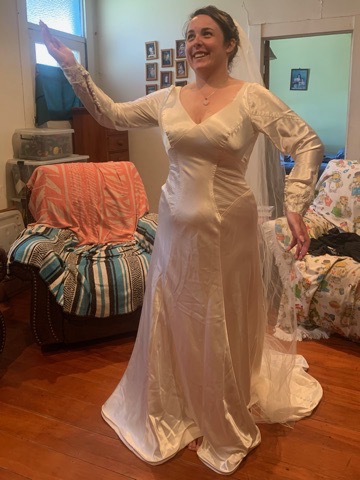
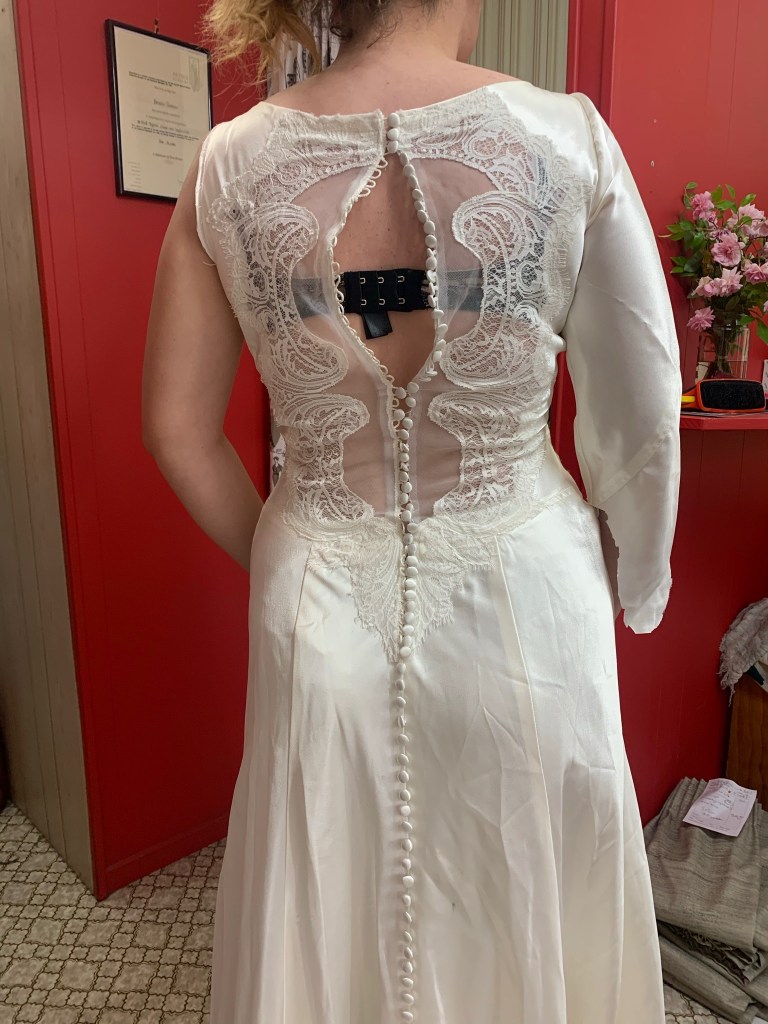
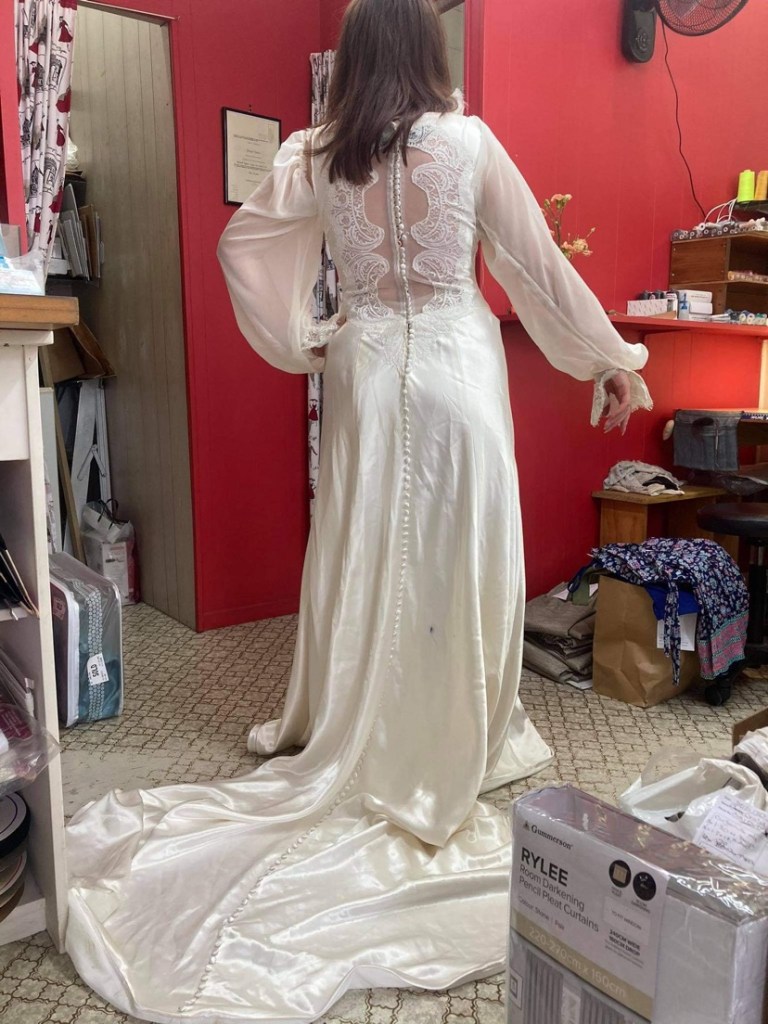
My dress : If you’d have told me I was going to find a replica of Bella’s wedding dress for sale in little ol’ Whangarei, I would have told you you were insane, but as luck would have it, that’s exactly what happened. I met with the lady to try it on and it was love at first sight. It didn’t fit (but I was also the largest I’d been in my life and planned to lose what I’d put on recently), there were some marks on the train and one of the bust panels had some shredded threads. Due to these reasons, I managed to get it even cheaper than what the lady had originally asked for. Plus she threw in the matching veil and hair comb.
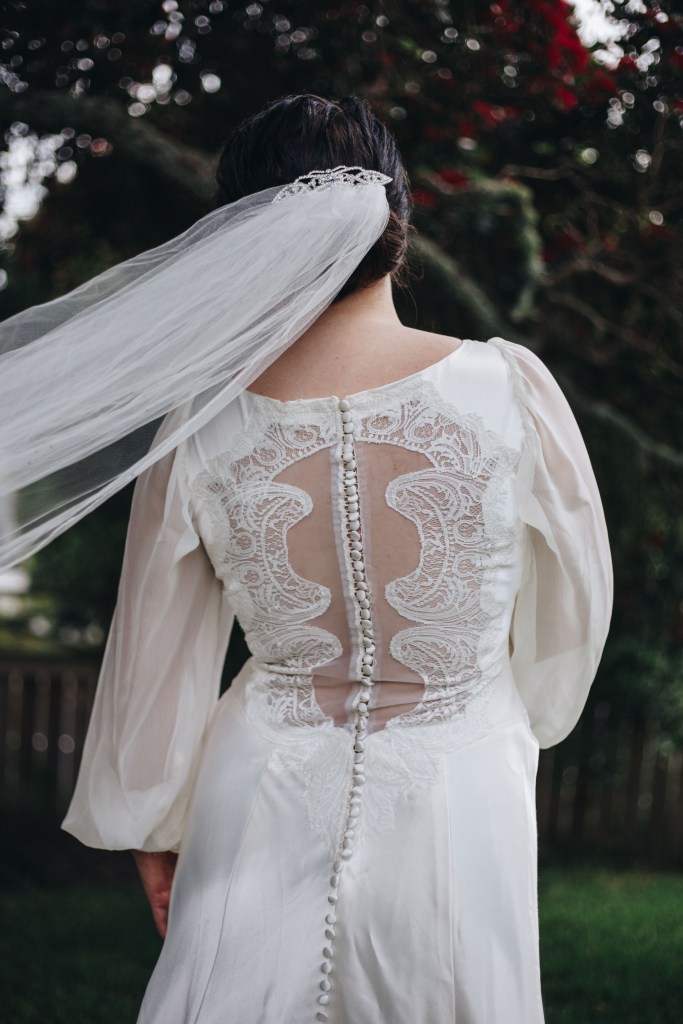
Because the bust panel was shredded on one side, I knew it would have to be fixed. My initial thought was to see if I could find a fabric match at Spotlight but the fabric had a slight texture to it and nothing was remotely close. I should probably mention now that I actually kind of hate the sleeves, and I was getting married in summer. So I made the executive decision that one of the sleeves would be sacrificed to replace the wrecked panel. That way the fabric would be an exact match.
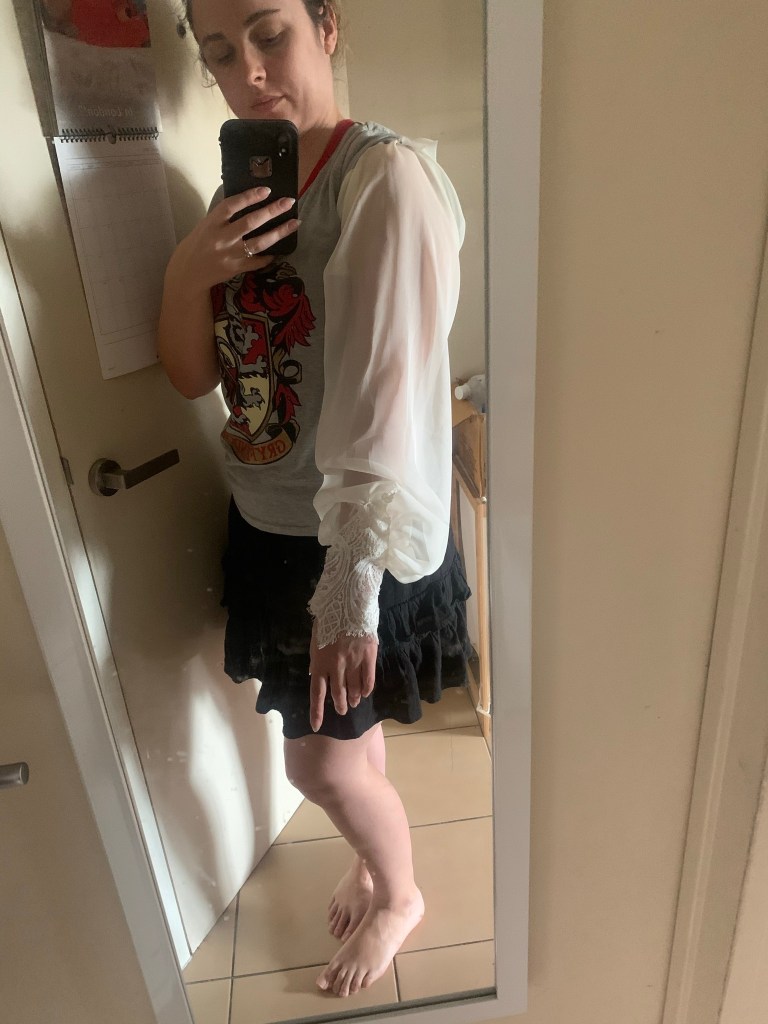
That left me with doing something about the now missing sleeve. I decided I wanted a light flowy fabric to give me some soft of relief from the hot summer sun. I chose a crinkle chiffon in ivory for this. I went with a balloon shape to embrace my inner Victorian ghost fantasy.
I made the new sleeves using Simplicity 8506. Because it’s a reproduction of a vintage sewing pattern, it was so easy to follow. I love how the top of the sleeve had gathers so I didn’t have to worry about trying to fit it to my gown. I took the lace cuffs and buttons from the original sleeves and added them to the new ones. If you didn’t know that the dress was a replica of Bella’s you’d swear the new sleeves were how the gown was made to begin with.
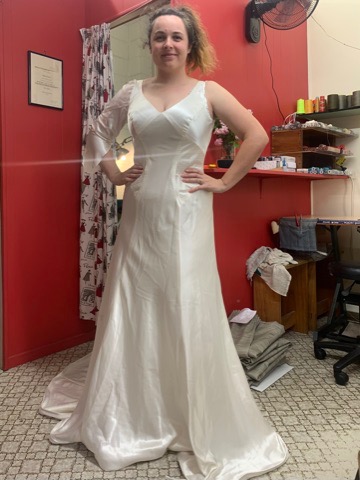
I was going to replace the bust panel and sew the sleeves in to the gown myself but my mum decided as a wedding treat that she would take them to the local alteration’s store – Kensington Alterations and have someone else do it for me so I had one less thing to worry about. The ladies did such a phenomenal job and I was beyond happy with how my dress looked on the big day.
progress photos


Difficulty : ***** (it’s Burda patterns I’m telling you)
Time : months

One thought on “Green, with Wooden Toggles | Burda 6871, Simplicity 8506”