
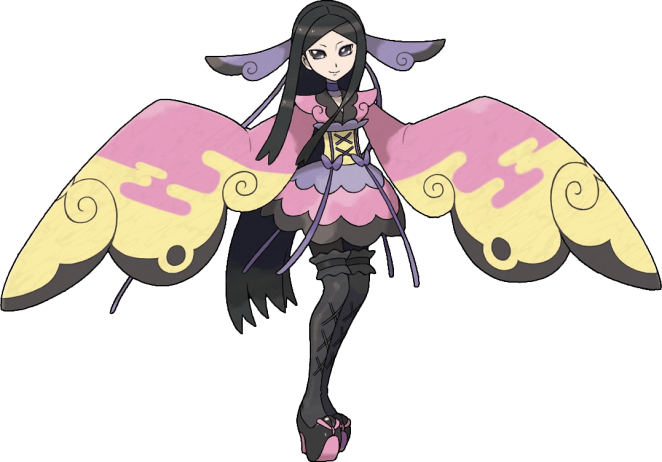
Valerie – Pokemon X and Y
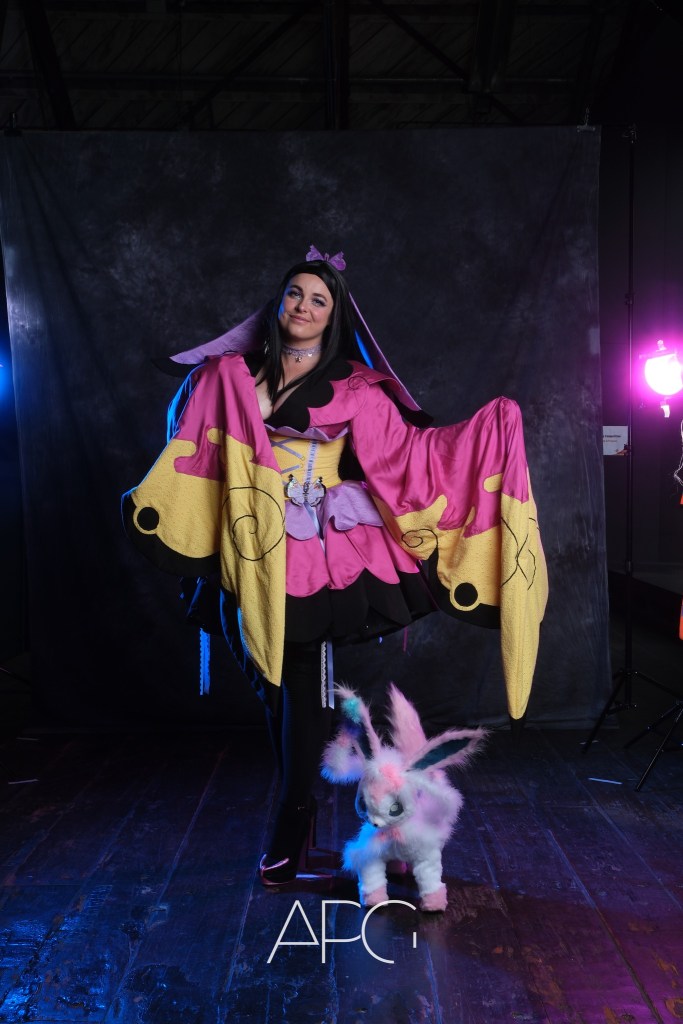
Made for : Overload 2025
Awards : Best in Show – Overload 2025
Background : Way back when, was it 2016? When I played this game on release, I fell in love immediately with Valerie’s design. I always had the idea of making her tucked away in the back of my mind, but I never thought I’d ever get round to it as I always prioritize film over anime when it came to my costume making. I guess when your one big national event does away with it’s cosplay competition and the only other one left remotely comparable in size is an anime based one, costume priorities tend to change.
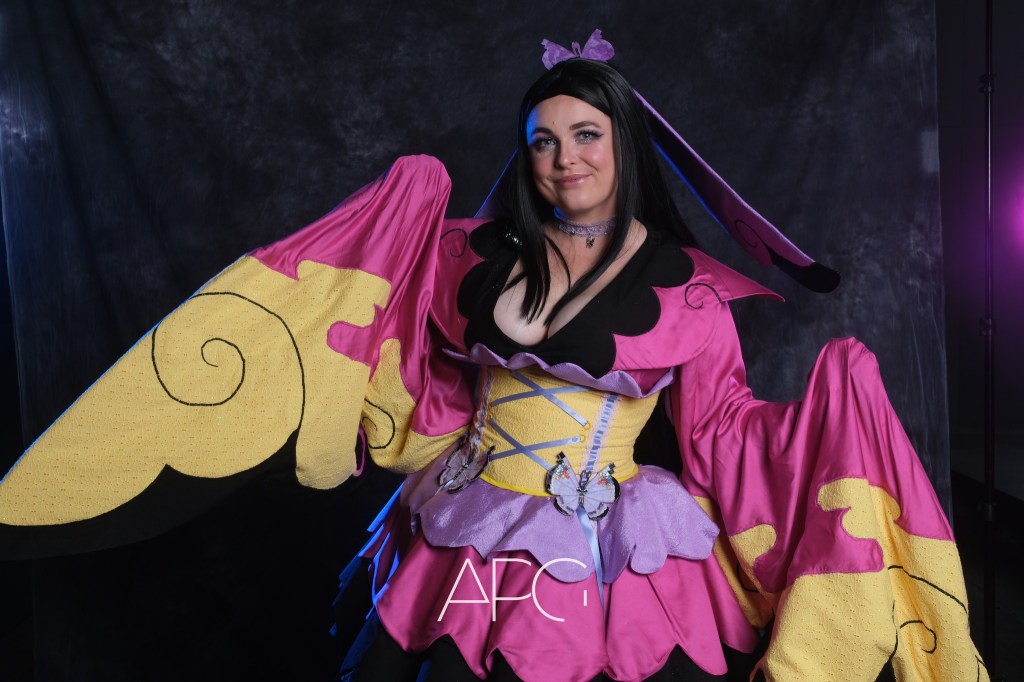
gallery


Things used :
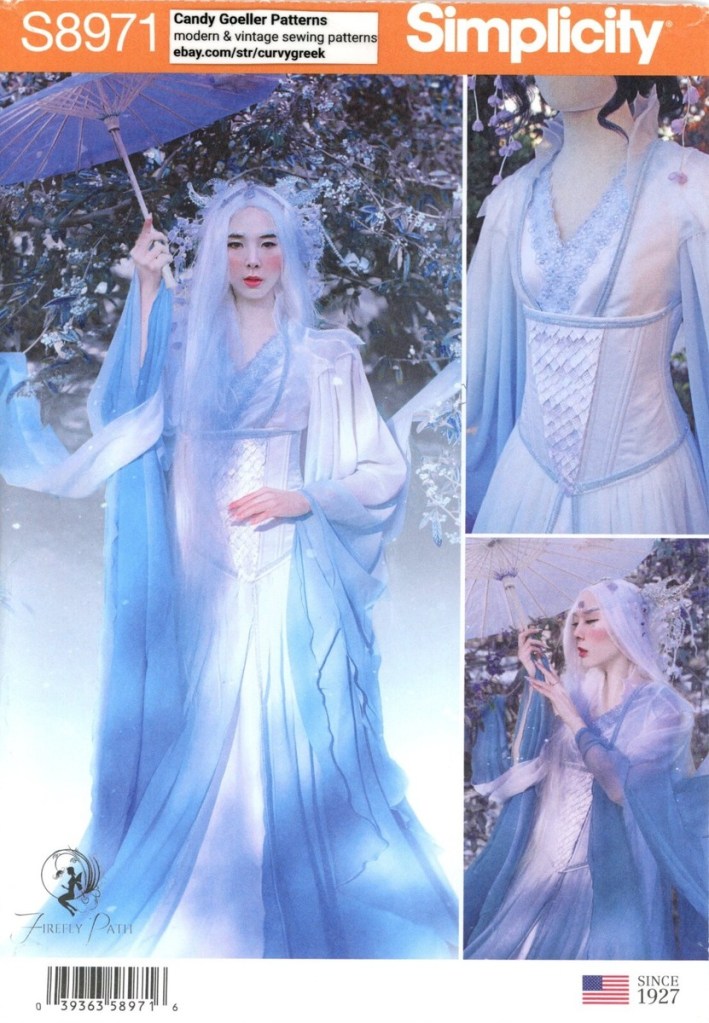
- Simplicity S8971
Hair Bow
- .5m purple synthetic fabric : Spotlight
- .5m purple poly cotton : Spotlight
- .5m eva foam
- .5m iron on buckram : Spotlight
- 1x hair comb
- 1x snap
- 3m purple satin ribbon : Spotlight
Choker
- .5m white embroided lace ribbon : Arthur’s Emporium
- 1x lobster clasp jewelry setting : Spotlight
- assorted butterfly charms : Lovisa
- jump rings
Top
- 4m pink satin : Spotlight
- 3m black sandwash satin : Spotlight
- 4m yellow embroided cotton : Spotlight (only white left)
- 3m pink fairy organza : Spotlight
- 2m pink cotton : Spotlight
- 3m yellow cotton : Spotlight
- 2x bamboo rods
- snaps
- hook + bars
Corset
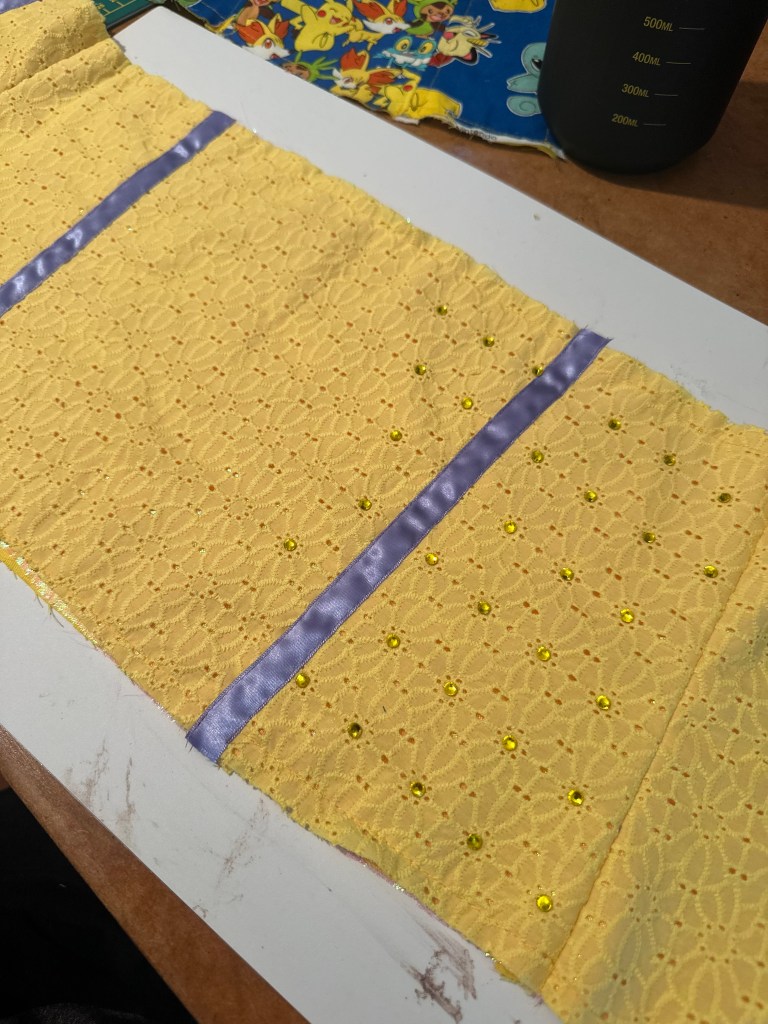
- 1m yellow embroided cotton : Spotlight (only white left)
- 1m pokemon cotton : Spotlight
- 1m pink fairy organza : Spotlight
- 1m yellow drill : Spotlight
- yellow eyelets
- 4m yellow satin ribbon : Spotlight
- 3m yellow bias tape : Spotlight
- 8m purple satin ribbon : Spotlight
- 8m lilac lace : Arthur’s Emporium
- spiral steel boning : NZ Corsetry
- flat steel boning : NZ Corsetry
Skirt
- 3m purple synthetic satin
- 3m pink satin : Spotlight
- 4m black sandwash satin : Spotlight
- 4m black lining fabric : Spotlight
- 3m pink cotton : Spotlight
- 6″ invisible zip : Spotlight
- hook + bars
Petticoat
- 2m black cotton : Arthur’s Emporium
- 5m black stiff tulle : Arthur’s Emporium
- 2m black glitter tulle : Arthur’s Emporium
- 20m black cotton ribbon : Arthur’s Emporium
- 5m black scalloped lace : Arthur’s Emporium
construction
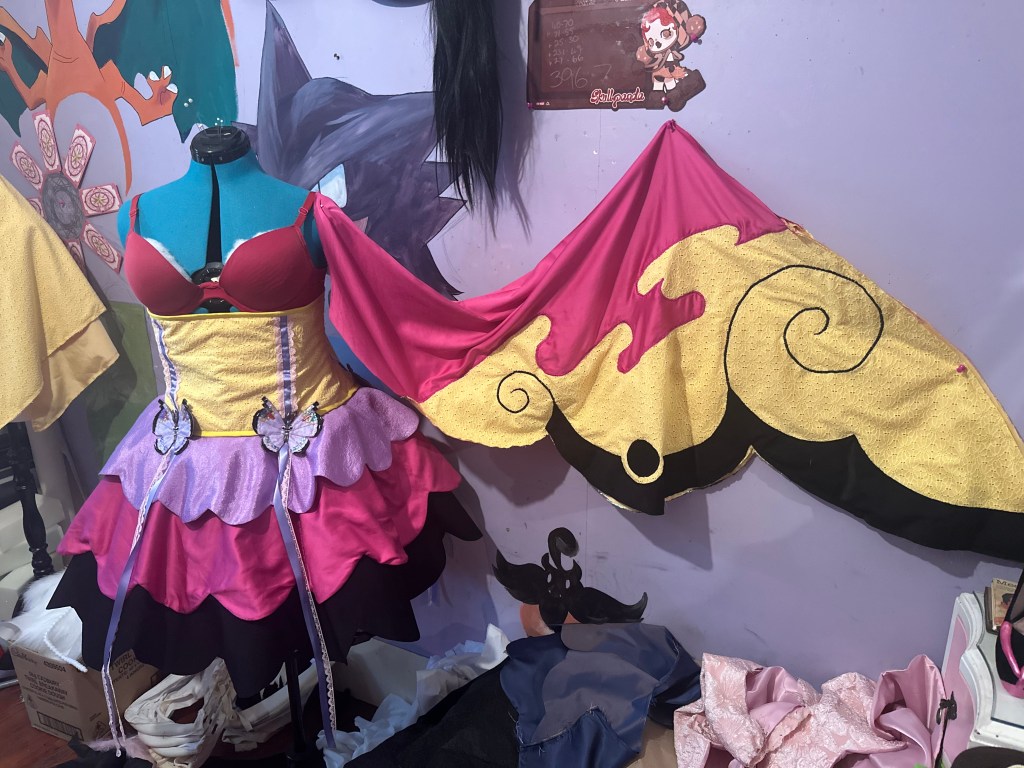
Hair Bow : I cut the wing shapes from eva foam and reinforced each side of them with some iron on buckram. I joined the two wings in the center with contact cement and then covered the seam in even more buckram to stabilize it further.
With the base done, I then cut the wings from a layer of purple cotton and the synthetic purple fabric. I added the black details using a sandwash satin and satin stitching before sewing the two sides together. I left a big enough gap in each wing piece so I could slide the foam base in. I then hand sewed the center seam closed incasing the foam completely.
Finally I sewed a hair comb to the back so I could anchor it to my wig and added the vivillon and ribbons to the other side using snaps.
Choker: I cut a length of ribbon lace to the width of my neck, then colored it purple using an alcohol marker. I prevented the ends from fraying by running them through a lighter flame. I added a lobster claw closure system in the back and then took apart a butterfly charm necklace and added the charms evenly space along the front of the choker.
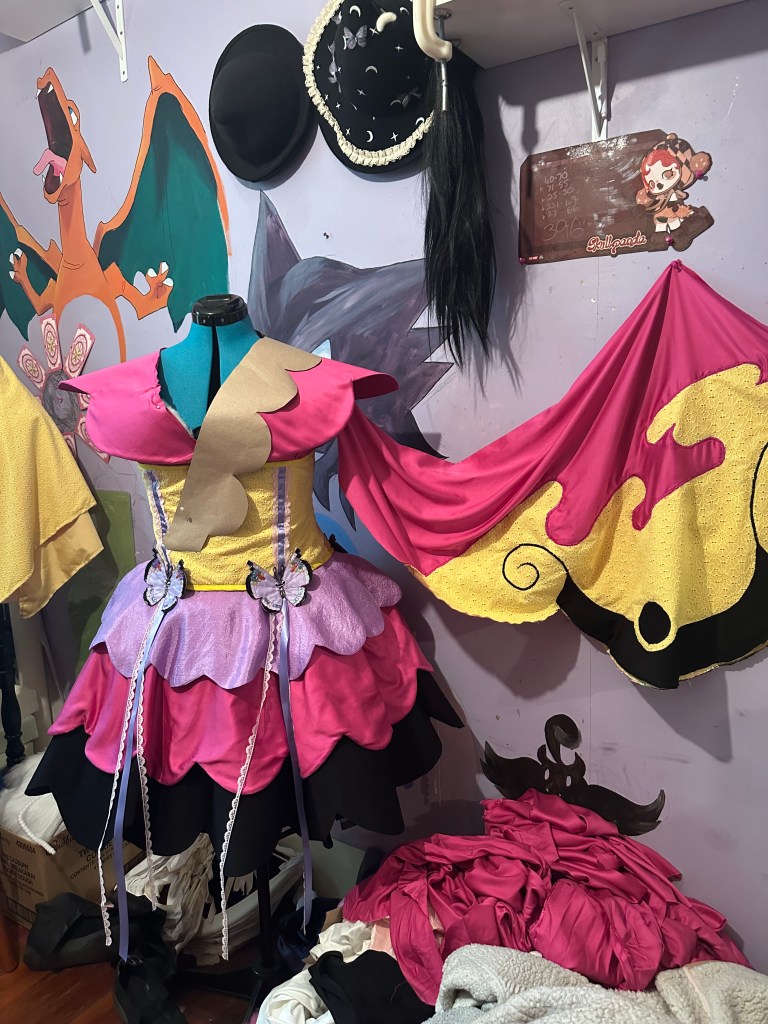
Top: I used Simplicity S8971 as a starting point and added my own drafted sleeves, pointed over collar thing and the scalloped neckline bit.
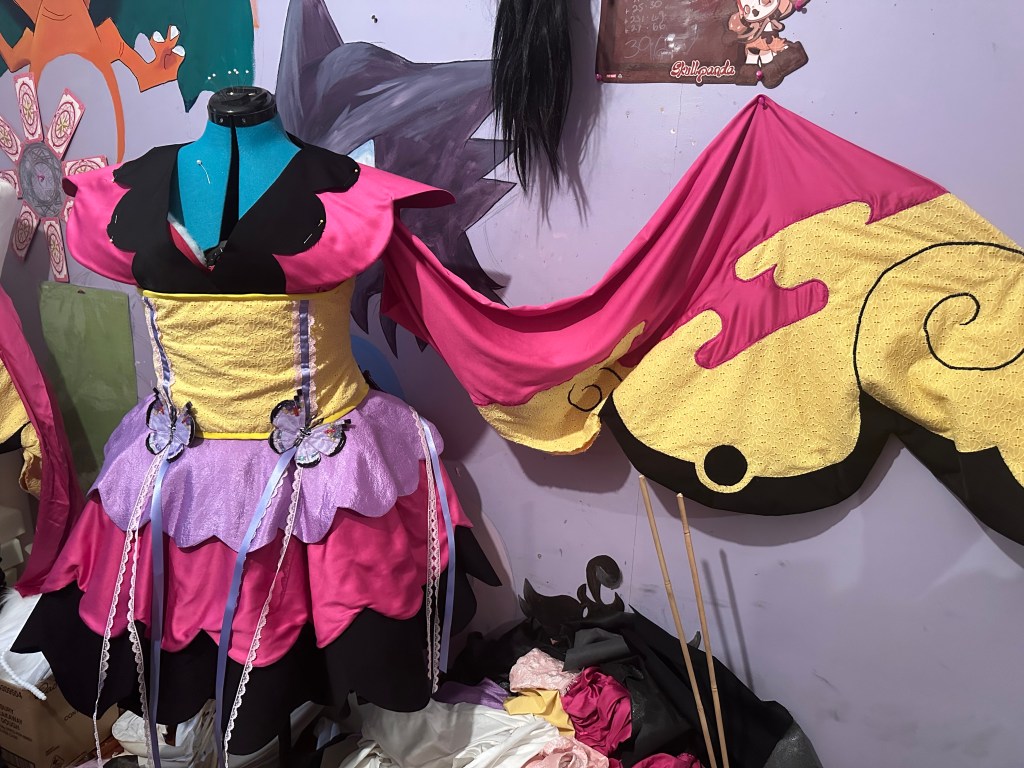
The over-collar was made from the same pink satin as the rest of the top and had a layer of buckram fused to the lining as to help it hold its shape. The swirl details on the front and back were made using a satin stitch on my sewing machine. This part was then basted to the rest of the shirt (before the sleeves were added) and then the black scalloped neckline piece was added overtop. The edges of the scallop piece was also finished with a satin stitch.
The sleeves were self drafted. They’re made up of several layers of fabric, the bottom yellow is three layers, a base of plain yellow, pink fairy organza and then a top layer of the embroidered yellow cotton. The pink layer of the sleeve was then top-stitched in place over the yellow and the edge finished with a satin stitch. The black decals were added along the bottom with black sandwash satin, basted first and then finished with a satin stitch. Finally the gigantic black swirls were sewn using a satin stitch which gradually decreased in size.
Next the sleeves were sewn up leaving a small gap underneath the bicep. I finished that gap’s edge using a yellow bias tape on the inside and attached a series of washers and strong magnets. This was so I could access my hands easily during the day, but otherwise, the seam would appear to be closed.
Finally the sleeves were sewn to the top. I then added some small loops to the inside so I could slide some bamboo rods in place which I could hold and give that big dramatic wing shape. Then I sewed black bias tape along the bottom edge of the top to finish it. It closes via a snap and hook + bar.
Corset: Once again, I used Simplicity S8971 as a starting point. I made a mock up from calico, changed the bottom shape and changed the position of the front seams, tested the fit and then used it as new pattern pieces for the final piece.
The corset is five layers of fabric. The lining is a Pokémon print fabric I’d had scraps of in my stash for years and a yellow drill. The outer layers are a yellow drill, pink fairy organza and a final layer of yellow embroidered cotton.
I added boning channels to the insides and used a combination of flat steel and spiral steel boning.
To the outer layer, I added purple and lilac ribbon to decorate, sewed the lining and outer layers together and then finished the top and bottom edge with a yellow bias tape.
Finally, I added eyelets to the back and a yellow ribbon to lace it up with.
To attach the vivillon’s, I added snaps. I did this rather than sewing them straight on because I wanted the corset to be machine washable and the vivillon’s are too delicate.
Skirt: I drafted a series of circle skirts, used math to figure how how to make the scallops on each tier even and then sewed them out of the following fabrics – black sandwash satin for the very bottom tier, pink satin for the middle and purple for the top. Each layer was lined and had interfacing applied to the scalloped edge to help it hold its shape easier.
I added a side zip and a waistband. There are also a series of hook + bars along the waist band that correspond with ones on the waistband of the top This is to help hold the top down in place because of the weight of the sleeves.
Petticoat: I used this tutorial as a starting point. From that, I was able to figure out how to make my own cupcake style petticoat.
I made a base layer of a plain back cotton, finishing the bottom edge with a black scalloped lace. I then did two layers of stiff black tulle, and a final layer of a black glitter tulle. I finished the tulle edges with a black ribbon and added a drawstring waistband. Originally I used elastic, but the skirt was too heavy for it.
Shoes/Socks: I brought plain black shoes from the second hand store, drew on the designs in chalk and then painted them with acrylic paint. First I did a base of white, and then a few layers of metallic pink. I added the raised detail to the toes using Crayola model magic and sculpted it. I then glued them to the shoe and painted it with the same metallic pink.
For the socks, I added an elasticated black ruffle trim to the top edge of some black thigh high socks with attached via some snaps.
Vivillons : I designed an embroidery file in Inkscape and then embroided five sets of them onto four layers of lilac crystal organza and a tearaway backing. I cut the vivillon’s out using a soldering iron which sealed the edges of the fabric. I then decoded the wings and eyes using a combination of glitter glue and glass beads. The glitter was sealed using mod podge.
After the decorating, I backed each vivillon with a satin fabric, attached ribbons and a snap to the back and then attached them to the corset. I made one shiny one which attaches to the hair bow.
Free vivillon embroidery file here
progress photos


One thought on “Valerie | 2025”