

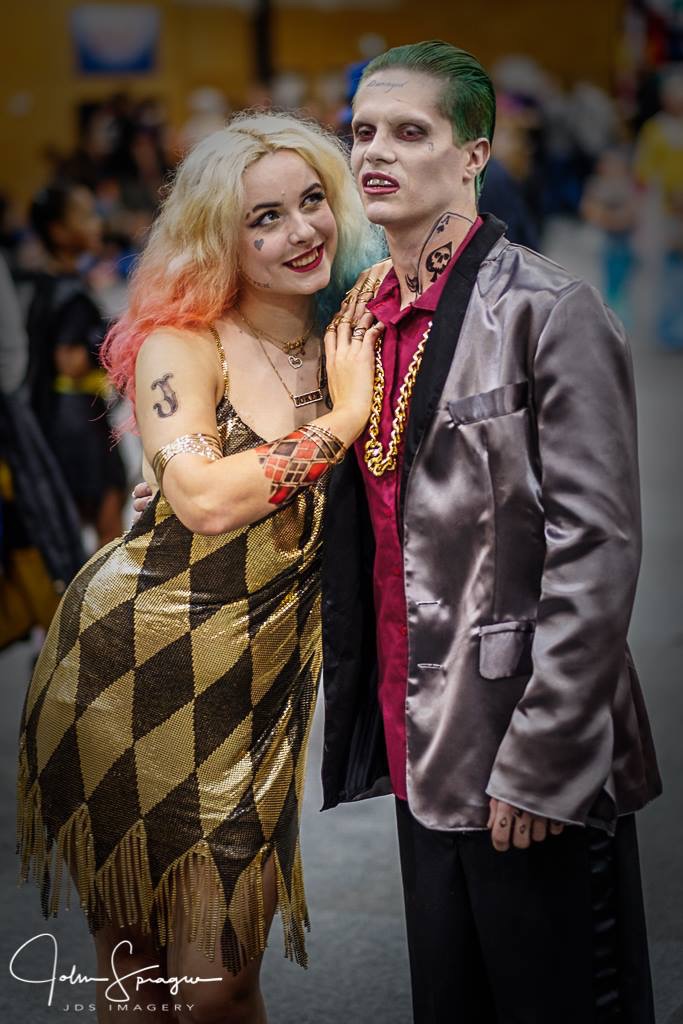
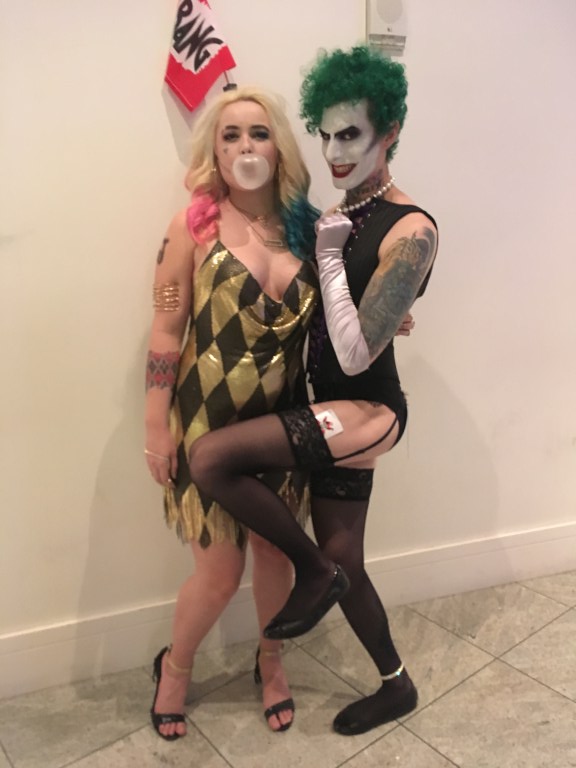
Harley Quinn – Nightclub | Suicide Squad
Made for : Dragoncon 2017
Awards : Best Group – Tauranga Armageddon Expo 2017
Background : As soon as I saw the Suicide Squad film, and the fleeting moment that this dress appeared in it, I knew it would be something I’d have to have in my own collection.
I first attempted to make the dress whilst the film was still in theaters and there were little to no reference images of it online, and what images there were, they were grainy, low quality and photos of the bust up. Not much to work with. However I was going to Dragoncon in a few months and I desperately wanted to wear a Harley Quinn costume, and one that was different to all the “daddy’s little monster” ones that I knew were bound to be there in abundance.
As I said above, there were no clear images when I first made it so I wasn’t able to tell what the fabric was, all I knew is that it was sparkly, so I made it majorly from memory. I went with a sparkly lame mostly because it was cheap and I hated sewing sequins.
For a first go made from memory, it was okay. It served its purpose but I knew I could make it so much better. When I got back from America, more and more images of the dress and even toys, started making there way online and I knew it was time to give it another, more accurate go.
So without further ado, here’s how I made the most accurate version I could!
gallery


Things used :
- 1 yard of gold glo mesh
- 1 can of satin black spray paint
- 1 meter of flesh coloured spandex
- A roll of clear book cover
- 1 meter of pink and gold ribbon
- Half a meter of gold spandex
- 1 meter of PVC tassels
- 10 meters of gold rhinestone chain
- Some gold jewellery wire
- Some gold jewellery hoops
- 1 gold hoop
- Liquid latex
- Small amount of tulle
construction
Shoes : The shoes were one of the most difficult parts for me because there were no high quality images available. I had to guess at them based on re-watching the film frame by frame, and the toys based on this outfit.
I started out with with a pair of shoes I was gifted for being a bridesmaid. During the wedding, they got completely munted on the heel so I didn’t mind altering them.
I cut some gold spandex (the same used for my booty shorts) into strips wide enough the cover the ankle and toe straps. For the ankle straps, I removed the strap from the shoe and sewed the spandex on mimicking the stitch lines that were already there. For the toes, I hot glued the strip on the underneath as there were no stitch lines at all on that part. Finally, I cut some lengths of black pleather tassels and glued them on the heel.
Tattoos : The tattoos were my most favourite part to make of this costume, as they were the least stressful thing to work on. I had photos of all her tattoos from the book Suicide Squad : Behind the Scenes with the Worst Heroes Ever which I scanned into my computer and using photoshop, separated into individual pictures.
If I wasn’t making this costume to compete with, I would have just photoshopped out the background of each tattoo and made them transparent, but as this was a competition piece, I decided to redraw every tattoo she has.
Luckily I am quite skilled with painting in photoshop, so I proceeded to redraw and colour every tattoo from scratch using my favourite brush set and the book photos as reference.
Once they were all finished, it was just a matter of resizing them to fit my body. I’d measure where I wanted them to sit and scaled them either up or down accordingly. Then all I had to do is print them on special temporary tattoo paper and apply them in the appropriate place.
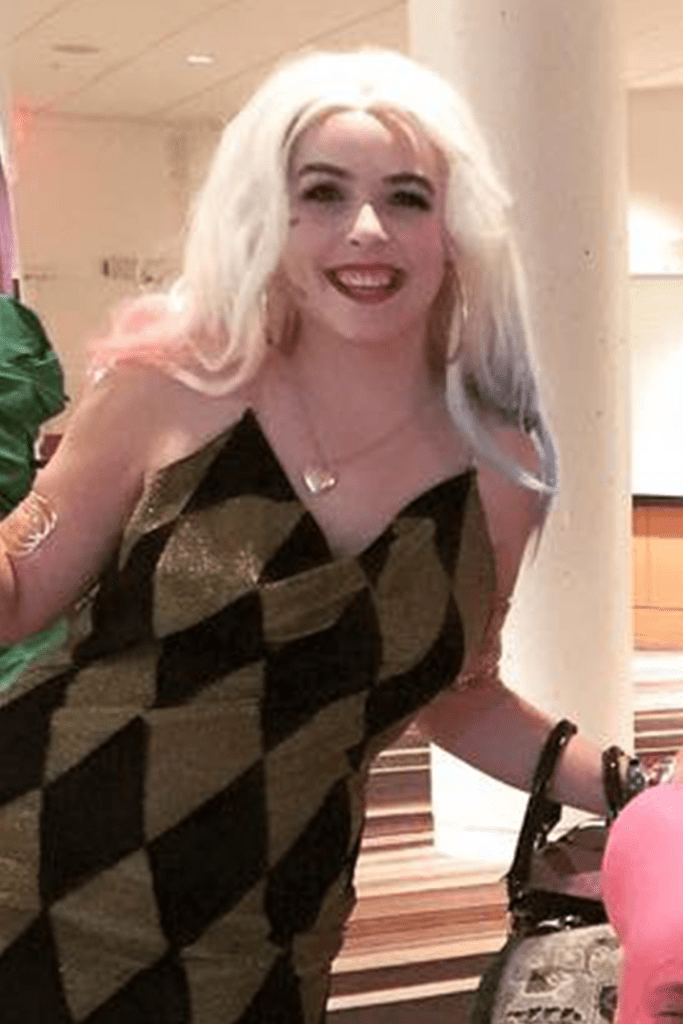
Hair/Makeup : Going in making this costume, I knew I would be making a few other Harley’s all with the same hair colours, but with different styles. So I made the decision that it would be cheaper to colour my own hair rather than buy different wigs for each one.
I’m a natural brunette, so I knew getting to platinum blonde/white would be no easy task. I also had a red based colour through the ends of my hair from a previous dye job and red is the hardest colour to remove from hair. I’m no stranger to dying my own hair, but stripping a previous colour out to eventually lighten hair was foreign to me and I didn’t want to risk damaging my hair. So I had that done professionally and it took two sessions to remove all the red from my ends. The roots were left as it was virgin hair meaning there was no dye in it, and once bleached would lighten a heck of a lot quicker than the ends.
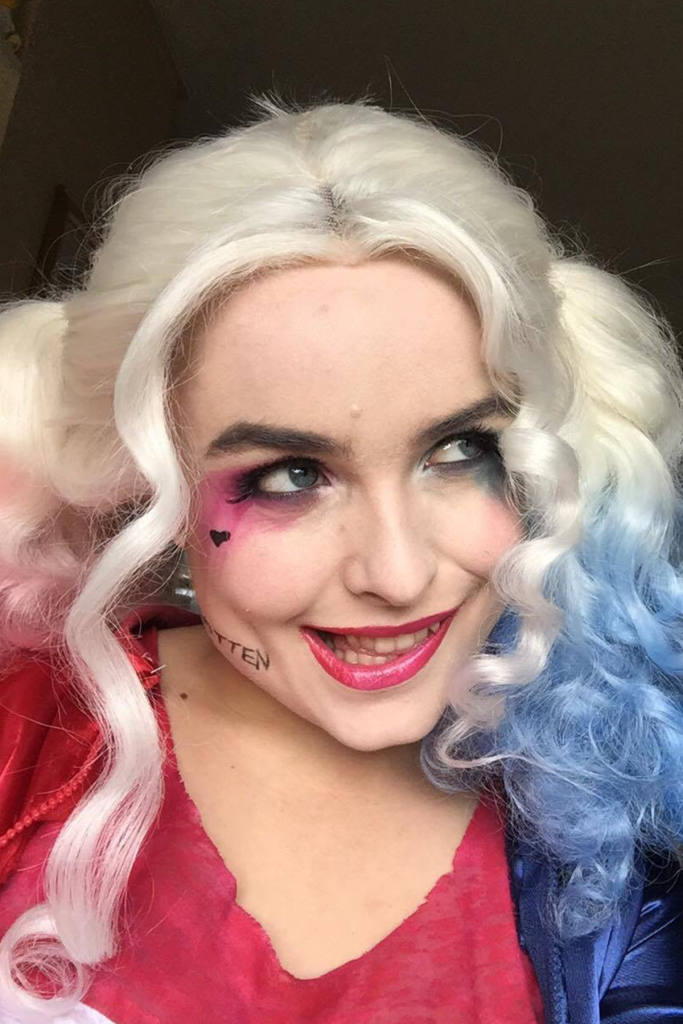
Once the ends were stripped of any old colour it was time for me to take over. I started by using swartzcoff Nordic blonde bleach kits in the highest lifting level I could find and applied it just on the roots and through the lengths of my hair leaving the very tips as these had already lightened to a level I was happy with. I let it develop for 45 minutes and rinsed out the bleach. I then towel dried my hair and applied a purple shampoo all over my head which acts as a toner to cancel out all the yellow and leave the hair looking much more white blonde. I left that in for 20 minutes and washed it all out.
Then I used Lust hair dye (a kiwi brand), in pink and blue on half my head each just on the ends.
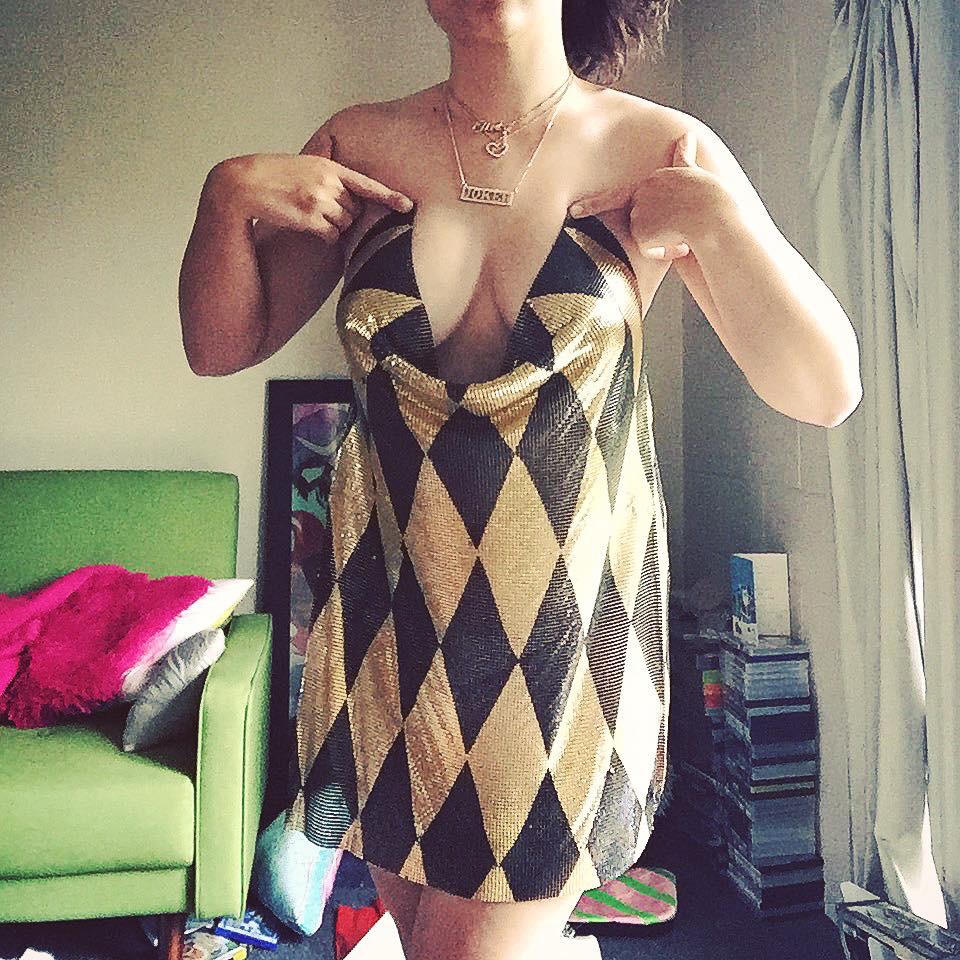
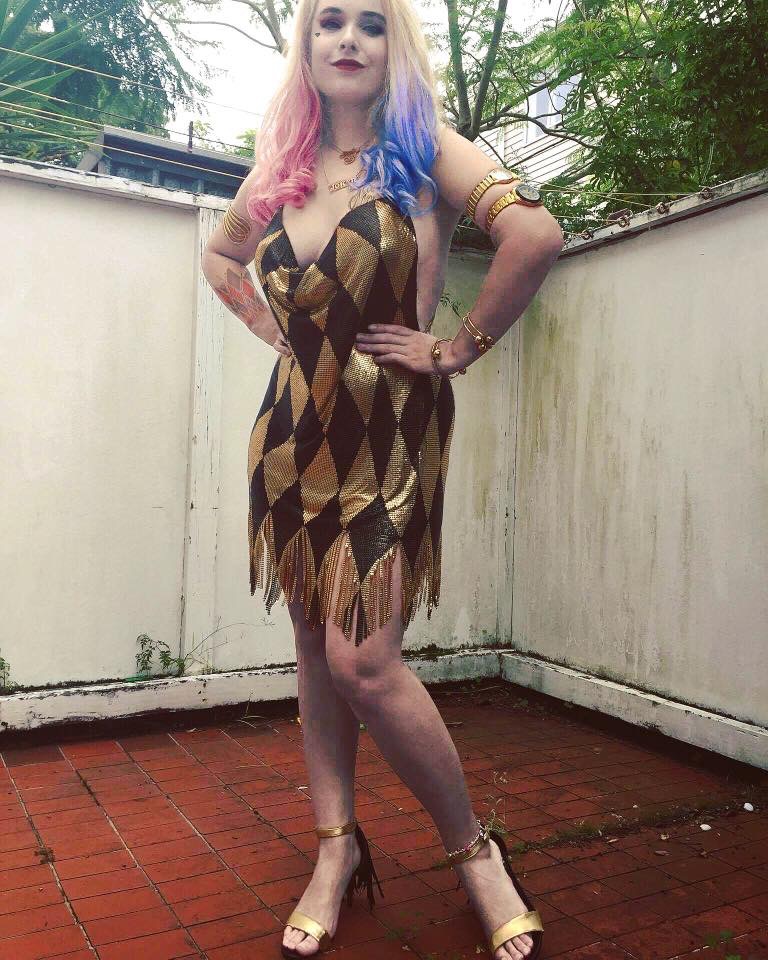
Dress : Like I said before, when I first made this dress, there were little to no images of it online and all I could tell for what I’d seen, it was a sparkly fabric. However, after the film had come out in cinemas, the pictures started popping up online and it became apparent that it wasn’t a textile at all but rather a series of metal squares all chain linked together.
I knew I’d seen the stuff before, on those handbags that were popular in the 90s, but I had no idea what it was actually called. Then one day I was browsing the Harley Quinn cosplay tag on instagram and I came across a user called nightclubharley. She was making her own version of the gown and she’d posted a key word that would help me source the fabric – “glomesh”.
A quick search on Ali Express and I’d found it. The only issue was, that it only came in half yard lengths (at the time I purchased it) and block colours. I figured I’d buy a yard of gold and paint the diamonds on. Little did I know, that my yard of fabric would arrive as two half yard loops. The loop I wasn’t worried about, but it being two halves, I was.
I cut one of the loops using scissors I really didn’t care about blunting and draped it on my dress form at the bust, trying to mimic the fall of the movie one. That was the easy part.
After I realized it was going to work, I set about putting the diamonds on the fabric.
Harley has a row of half black diamonds along the top of the dress which are made up of 5 whole wide ones and two half wide ones on the ends. There’s then another three whole black diamonds that run vertically down from the halves and the bottom of the dress is finished with another half that sits in the tassels.
For modesty sake, I wanted the dress to be a fraction longer as I’d be wearing it to family friendly conventions, so when doing all the maths required to work out what size to make the diamonds, I made them a little longer length-wide. Don’t ask me what maths I did to work out the width and length again because it makes my brain hurt just remembering how long it took. I basically measured the width of the fabric, and divided it by how many diamond points needed to be and where.
Once I’d worked out the size I need them to be, I drew the diamond out on a piece of craft foam which I used as a template to draw ALL the diamonds onto a sheet of clear book cover. Then it was a matter of trying to lay out the gold fabric and stop it from shifting about so I could stick the diamonds on. I did this by pinning it stretched out to the carpet in my sewing room floor. Next I peeled the back off each diamond and stuck them to the fabric on the parts I wanted to remain gold. Then I hung it up on my washing line and spray painted it with a satin black spray paint and let dry.
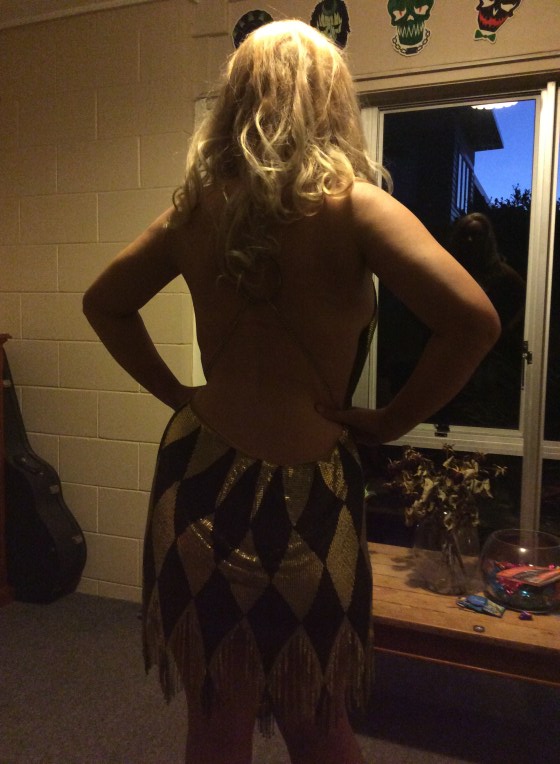
Now that the fabric looked the part, it was a matter of working out how to turn it in to a wearable dress. I once again pinned it to my dress form, making sure the drape at the bust was correct, and cut it to what I thought was the right length (I’ll later find out that it wasn’t). That was the front part sorted, to do the back, I measured the widest part of my butt and used that to gauge how wide to make the back rectangle. It was at this time, when counting the height of the diamonds in the back, that I realized I’d cut the front panel much too short. I hadn’t accommodated for the tassels. Luckily I still had some left over fabric so I cut the bit extra that I needed for the front and began the incredibly time consuming part of opening each link on the back and rejoining it together. But now I had a front and back that were the same length.
Then came the fun part. How to join it together? To my joy, there was a photo that showed the side of the dress quite close up, in it you could very much see a seam and even better, the diamonds on the front and the back panels, didn’t line up. My first attempt at joining the panels together was to sew them together with thread in between all the links. It worked but I wasn’t convinced it would hold up very well as all the weight and tension on the links made them somewhat weak. Plus it made the seam bulky and ugly. After unpicking everything I’d just sewn, my next option was to take out a row of squares down one length and then link them together with the other panels squares.
The next step was cutting the fringe that runs along the bottom of the dress which was easy enough to do. I cut them two squares wide, and almost all the way through each gold diamond stopping about a centimeter before reaching the black. I’d then find the longest point of the gold tassel I’d just cut, leave that one at its full length, and cut four squares high off on either side until reaching the halfway point of the half black diamond.
After the tassels, I decided to tackle the back part of the dress. At the moment when it was worn, the top of the waist was draped similar to the bust in the front. Once again, there were/are no reference images other than the toys to go by, so I could have left it but the toys had it sitting flat so that’s what I decided I wanted to achieve. I first thought about adding darts all the way along, but then I’d loose a lot of the gold along the top. Then I thought, what about attaching it to a stretch fabric so it would pull the links as close together as possible.
I sewed the lining for my dress from some skin coloured spandex. I chose skin colour as you can see the lining slightly through the overlay fabric and I didn’t want it to be gold or black and make one of the diamonds more prominent than the other. I got the shape by making two rectangles in the same shape as the dress and sewed them together in the same way. I attached it to the gown by sewing the edges together by hand in through all the o-rings that connect the squares together.
On the back though, I wanted the the metal to sit flat on my back, so I cut that one a bit smaller so the lining would have to stretch and sit snug over my butt. By doing this, I had to stretch the spandex out little by little as I sewed it to the metal.
For the chains there once again wasn’t a clear photo of the back that showed how many or how they attached. There was a pretty decent one of the shoulders that showed they were at least the same material as the dress.
The fabric of the dress is incredibly fragile and I knew the two square chain that the shoulders required would in no way support the weight of the gown. So I came up with the idea of sandwiching a ribbon in between two layers of chain. I chose a skin coloured ribbon with gold edges so it would appear invisible in between the two layers. I stitched it in place going through every circle link on the chains. I then threaded a length of this chain through a gold hoop which would hang in the center back.
I left a small bit of ribbon at each end which I sewed to the lining of the dress so that when I chain linked the chain to the gown, that wouldn’t be where the weight sat causing stress on the fragile links.
Although I said there isn’t a clear photo of how many chains there are on the back, there’s a good one from the side which shows that it’s not the same chain as used on the shoulders but more like a series of rhinestones.
Next came my dilemma of – I’m not a small busted person, how can I wear this dress make sure everything stays where it should and keep it PG.
I knew I’d be gluing it to myself so I wanted something with as much sticking power as possible that was okay to use on human skin. After a bit of research I came across a medical glue called pros-aide. I also had a brilliant idea suggested to me to make latex strips to put on the inside of the dress so 1. The glue would stick to that really well rather than being absorbed into a fabric and 2. They could be replaced and wouldn’t ruin the lining of the dress.
I created the strips by cutting strips of tulle and coating them in latex. I chose to add tulle rather than just straight latex as I felt it would be more durable. After the latex dried, I dusted them with baby powder (so it wouldn’t stick to itself), peeled them up and glued them to the lining along the edge of my dress. Then when I wore the dress it was just a matter of doing a thin layer of pros-aide on the latex, waiting for it to get tacky and then sticking it to my skin, holding it in place until it dries.
Gun : Her gun is a customized Rhino so I searched the web for templates and came across this awesome three part one on YouTube that I was able to print off. I ended up only using one of the templates (as the original way of putting it together was sandwiching several layers), the one of the side profile. I used it to gauge how high and long the gun needed to be. My dad traced this part on to a block of wood and then proceeded to carve the main bulk of the gun out using chisels and lots of sanding/filing.
Most of the smaller details dad added on with smaller pieces of wood and/or matchsticks using wood glue and tiny nails. In places that nails or screws were used, he filled them over with a wood putty which was then sanded back to become flush with the rest of the gun.
Jewelry : The necklace, armband and watches were brought from eBay. The rings and palm cuffs were brought from Lovisa.
progress photos


related costumes


One thought on “Harley Quinn – Nightclub | 2017”