

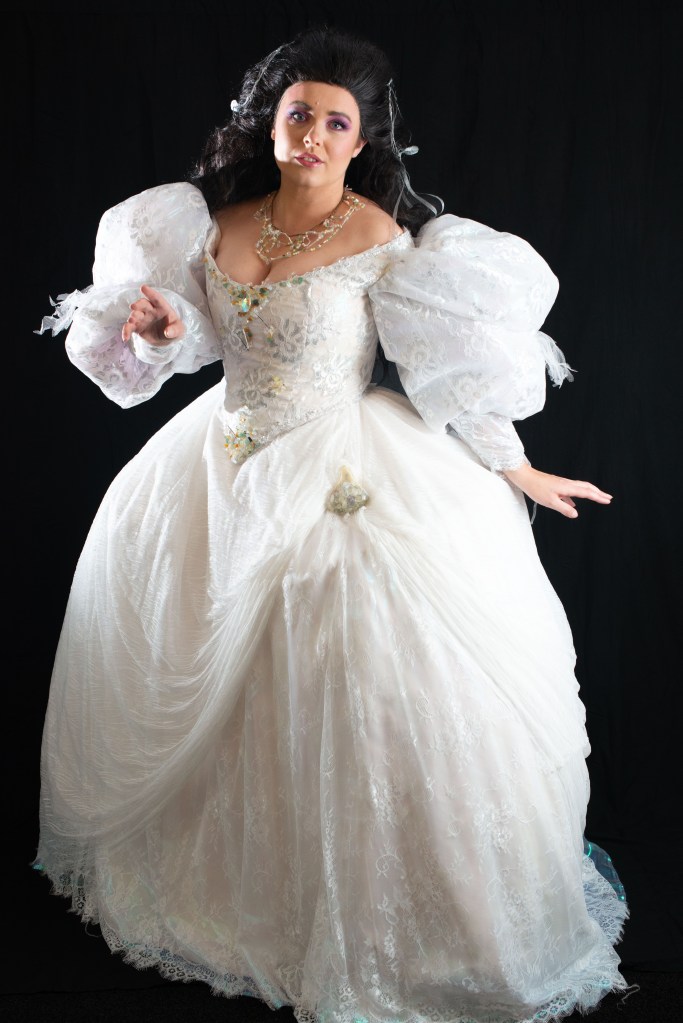
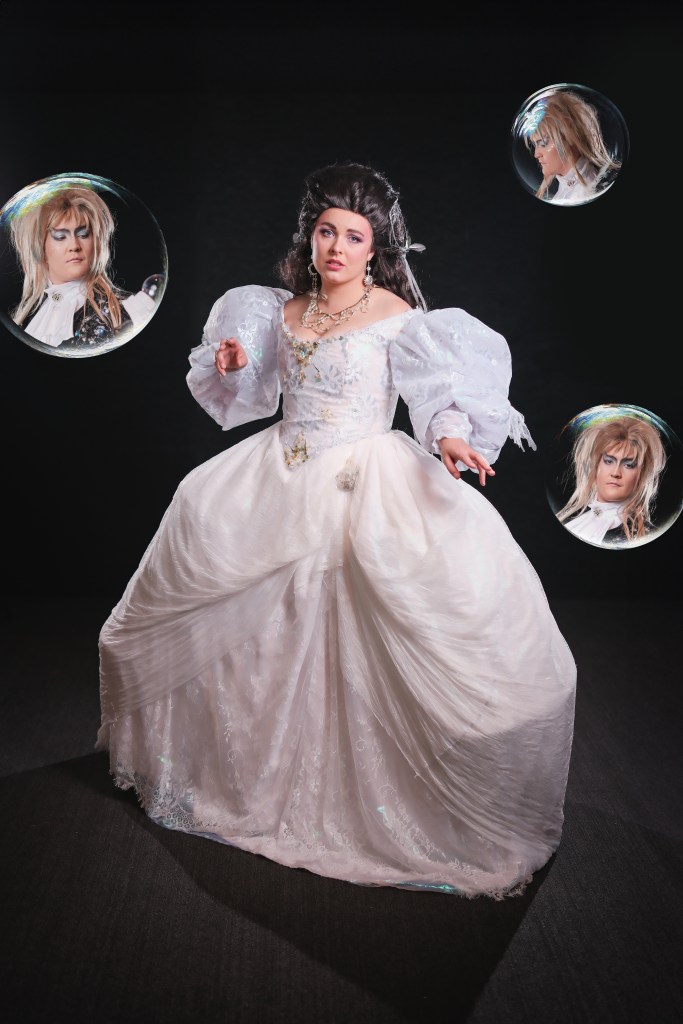
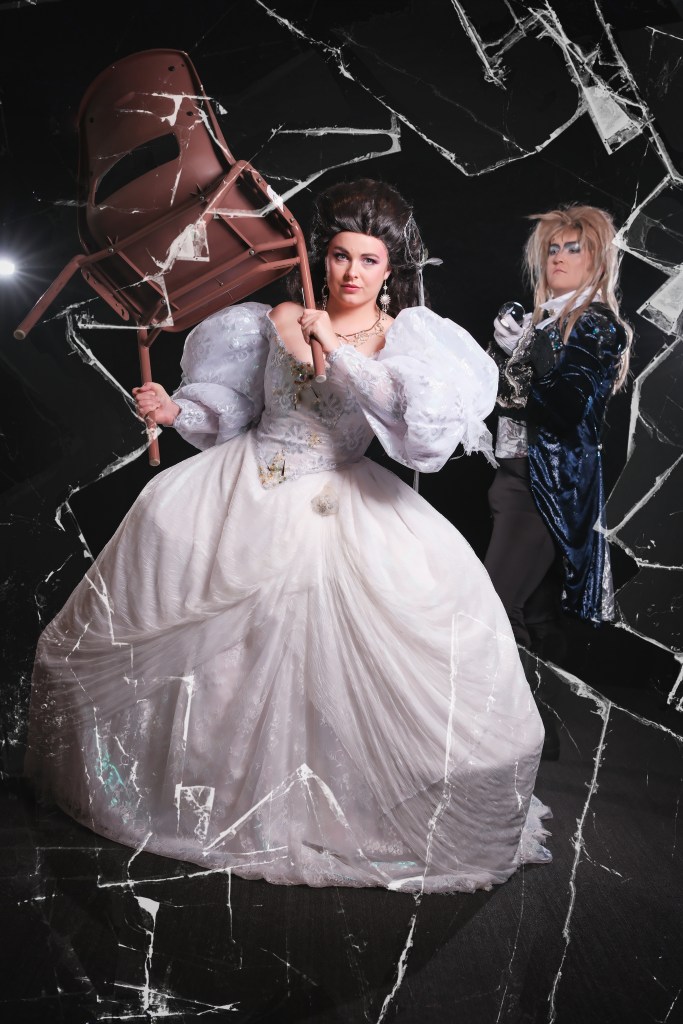
Sarah Williams | Labyrinth
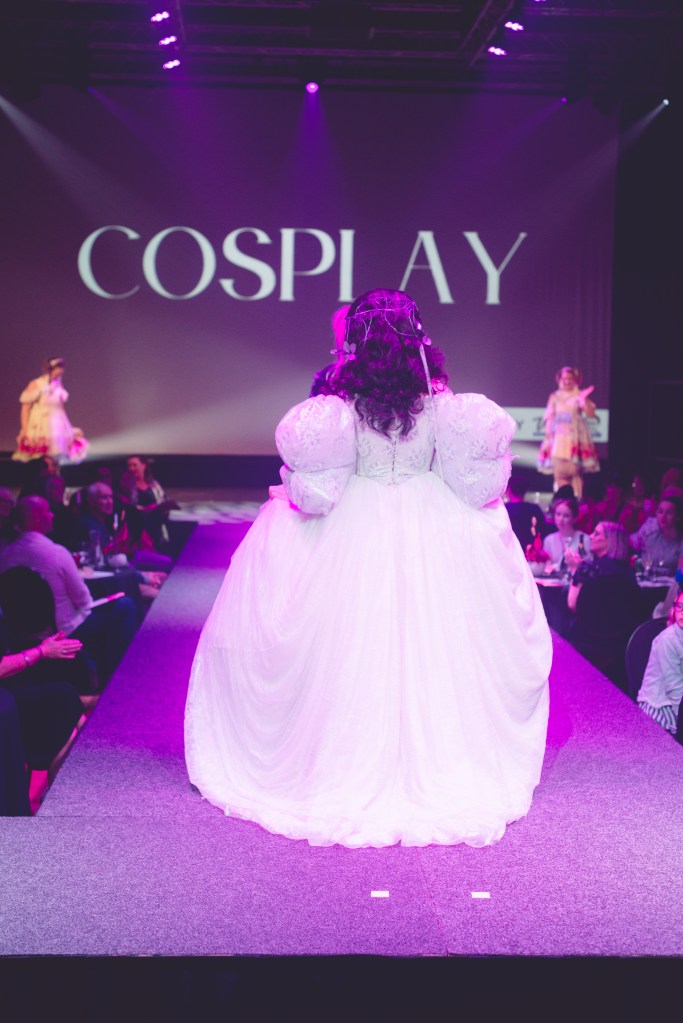
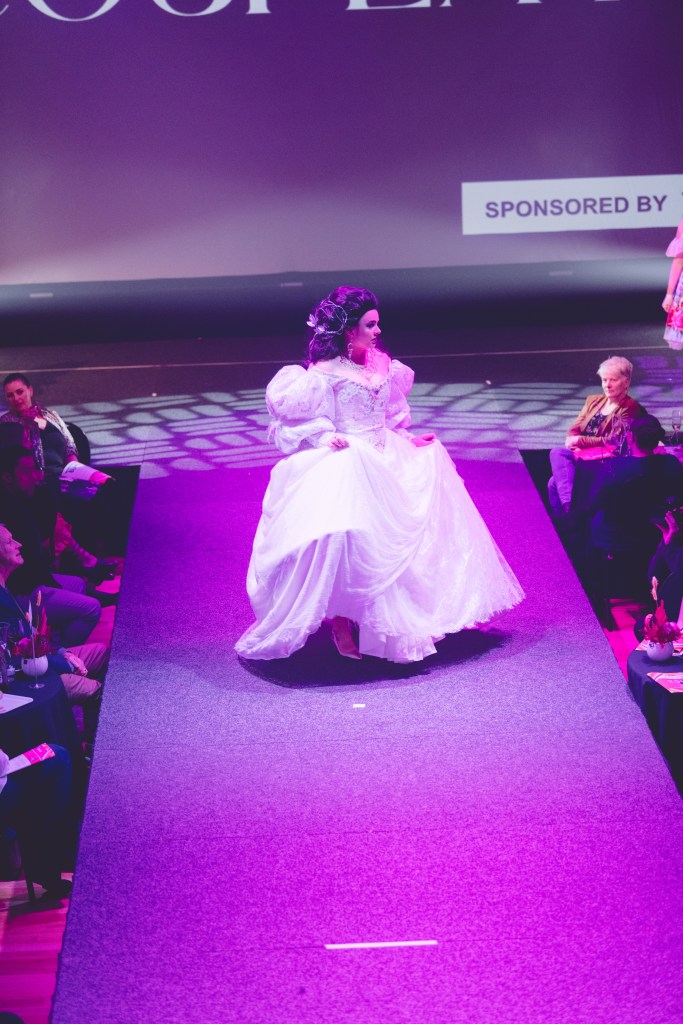
Made for : Auckland Armageddon Expo 2022
Background : I originally made this costume in 2016, back then there were little to no photos of it online and what there were, were grainy and blurry screen caps and stills. I did my best with what was available and was proud of the result. But in typical I-swear-this-only-ever-happens-to-me fashion, I soon as I had finished that version, the original costume was pulled out of the archives and put on a permanent display at the Jim Henson museum. Cue all the HD photos and closeups I could ever want appearing online. That’s when I knew I’d be remaking it one day.
gallery


Things used :
- Simplicity 1139
- Simplicity 1728
- McCall’s M7885
- Good Hunter 8741
- Truly Victorian 495
- iridescent organza – white : 10m
- wavy eyelash lace – white : 10m
- eyelash lace floral – white : 9m
- cotton drill – white : 3m
- double cheesecloth bunny : 1.5m
- stiff tulle – white : 3m
- organza – ivory : 2m
- floral brocade – yellow + white : 3m
- floral lace – silver + white : 4m
- steel boning 6mm : 15m
- silver pipping : 3m
- spiral boning 7mm : 10m
- corset busk 31cm
- end caps 7mm x 100
- flat king single sheet x 4
- assorted crystals
- assorted glass beads
- assorted pearls


construction
Jewellery : Another first for me was making her necklace. I watched one beaded necklace tutorial on YouTube and decided to have a crack at it. I used a loop of jewellery wire that just fit around my neck, added a lobster claw to it, strung it with little bronze beads, added a loop to the other end and viola! A necklace base.
From there I kept added strings of jewellery wire and assorted beads and pearls in a way that best matched the reference I was using.
Corset : Made using Simplicity 1139. I was fortunate enough that this pattern fit me right out the envelope without any alterations. It was made of two layers of drill and a layer of double cheesecloth. The drill was for structural integrity, the cheesecloth was because it had cute tiny bunnies and mice on it.
On the inside, I added boning channels using cotton twill tape. This was also my first ever time using spiral steel boning. It was marked to the length I wanted, cut and then caped before being placed in the channels. A busk was put in the front.
After the bones were added, I finished the top and bottom edges using bias tape which was all completely hand sewn in place. I also added white and black lace along the top edge purely for decorative purposes.
Finally, I marked out spaces in the back evenly for the eyelets to go. Using an awl I pushed through the fabric so that I wasn’t cutting holes and weakening it and hammered the eyelets in place. I use two shoelaces to tie up the corset.
Pannier : Sooo, I wanted to use Simplicity 3635 for this unfortunately for me, this pattern was out of print. Double unfortunately for me, when I went to purchase it secondhand via eBay/etsy, all the listings for it were over $100 and I’m much too stingy to pay that for it. That’s when my DIYness kicked in.
I scoured the internet looking for any mention on blogs of people who had made that pattern hoping one of them may have posted a photo of the pattern pieces themselves and, someone had! I saved the photo, opened it in photoshop and scaled it up until it was life size. From there I broke it down in to A4 size pieces and printed and taped it all together to create a pattern.
What amazed me most is that this actually worked. I threw caution to the wind and decided to not make a mock up despite not being too confident in it working but it paid off. I used a bed sheet that I had brought secondhand as my fabric of choice, sewed twill tape in for the hoop casing and used steel boning for the hoops themselves.
For the waistband I cut two rectangular strips half the width of my waist measurement, added twill tape to the ends and they tie around my waist in the front and back.
After making all the petticoat and skirt layers, I think I’ll have to replace the hoops with something a little thicker/sturdier as the steel I originally have used keeps collapsing under the weight.
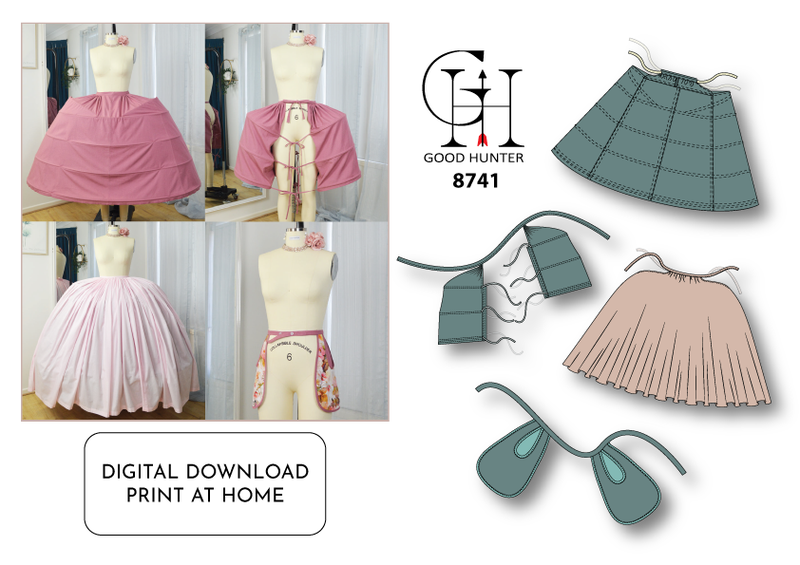
Petticoat : Made from 4 bed sheets using the Good Hunter 8741 pattern. The pattern was released the week after I finished my pannier or else I would have used it to make that too. It’s a good thing it was because I had no idea how to make a petticoat to fit the panniers awkward size. After a bit of maths and a ridiculous amount of hand gathering, I had a petticoat that fit over my pannier. Similarly, it also ties up on either side of my waist.
Skirt : Made using McCall’s M7885. What a find this pattern was! I chose it for it’s skirt shape as obviously it was made to be worn over a pannier. There are four layers of fabric in the skirt
- A base of white polyester lining fabric
- Iridescent crystal organza
- White floral eyelash lace
- White wavy eyelash lace
All layers but the organza layer were made together as per the instructions ie out of several pieces sewn together to make one large piece. Instead for the organza layer, in an attempt to minimise the amount of seams in it (because it is such a horrible fabric to work with because it frays like mad), I took the lining layer after all the pieces had been sewn together, folded it in half, lay I on the fold of the organza and cut the entire thing out so it was one continuous piece.
After that, all the layers were basted together along the top edge, pleated and sewn in to a waistband. The back half of the waistband had to be sewn by hand due to how thick the pleats had made all the fabric, it wouldn’t fit in my machine.
Bodice : The main part of the bodice was made using McCall’s M7885. I altered the length by adding more at the hips, making a sharper point in the front and making the shoulder seams in the back meet diagonally rather than straight across.
The bodice is made from three layers of fabric
- a white and yellow floral brocade
- Iridescent crystal organza
- Silver and white floral lace
And then two layers of lining fabric - White cotton drill
- White polyester lining
All layers were basted together before been sewn as per the patterns instructions. The lining had boning channels sewn in using cotton twill tape and I used spiral steel bones (same as the corset). Before the lining and outer layers were sewn together, I added a silver pipping along the top and bottom edge of the outer fabric.
I also added sleeves.
Originally I wanted to use Simplicity 1728 (same as my 2016 version) and I had ordered a secondhand copy off of eBay two weeks prior. I thought that was plenty of time to arrive from Australia but spoiler alert, it wasn’t. I ended up digging an unfinished Ariel costume out of my UFO pile, and because it had been made using the 1728 sleeves, I cut them off, traced them out and made my own pattern from them.
The sleeves were made from layering the following fabric
- A base of ivory organza
- Stiff white tulle
- Iridescent crystal organza
- Silver + white floral lace
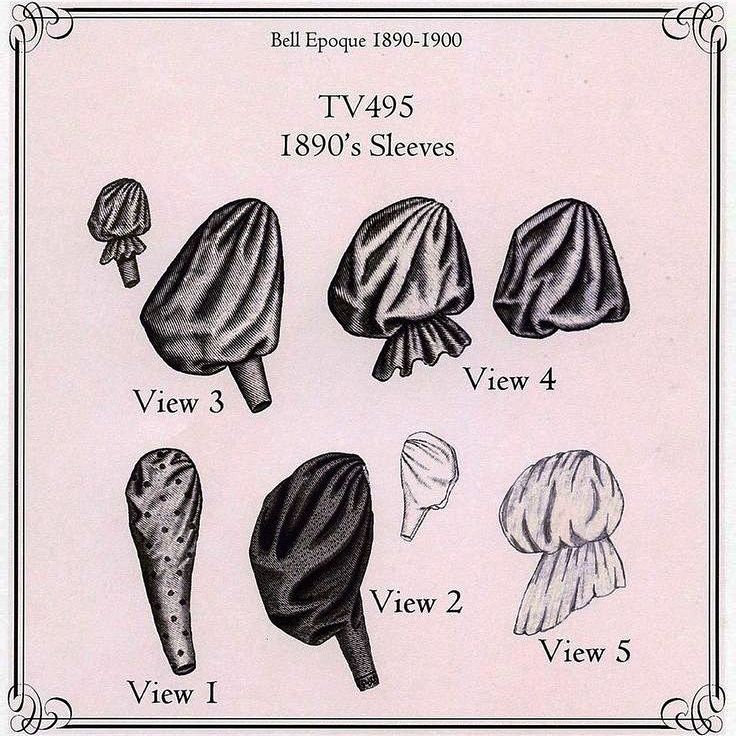
It was only altering finishing the 1728 sleeves and sewing them to the bodice that I came to the realisation that they’re weren’t poofy enough. I searched for poofy sleeve patterns on the internet and came across a fellow Sarah dress maker who had used Truly Victorian 495 for her own gown and it was perfect. They were HUGE.
I brought the pattern, unpicked off my 1728 sleeves and proceeded to make the 495 sleeves (layering the fabrics in the same way again. Before I sewed the new sleeves to the bodice, I stuffed them with all the left over and off-cut tulle and crystal organza. I then pinched them on the sides toward the bottom to give them a butterfly like shape and tacked that in place.
Once the lining and outer layers were sewn together, I added a hook and eye closure in the back and began bejeweling the bodice. I started off by added cuttings of silver lace along the neck and waist line. Over the top of that, I sewed on crystals and beads using invisible thread, matching the reference as best as I could. Lastly I cut triangle shapes of silver mirror card and glued them on.
Shoes + Stockings : Shoes were thrifted. Stockings I already had.
progress photos


beautiful work
LikeLike
Wow! As an Aussie, can I say that’s bloody awesome!
LikeLike