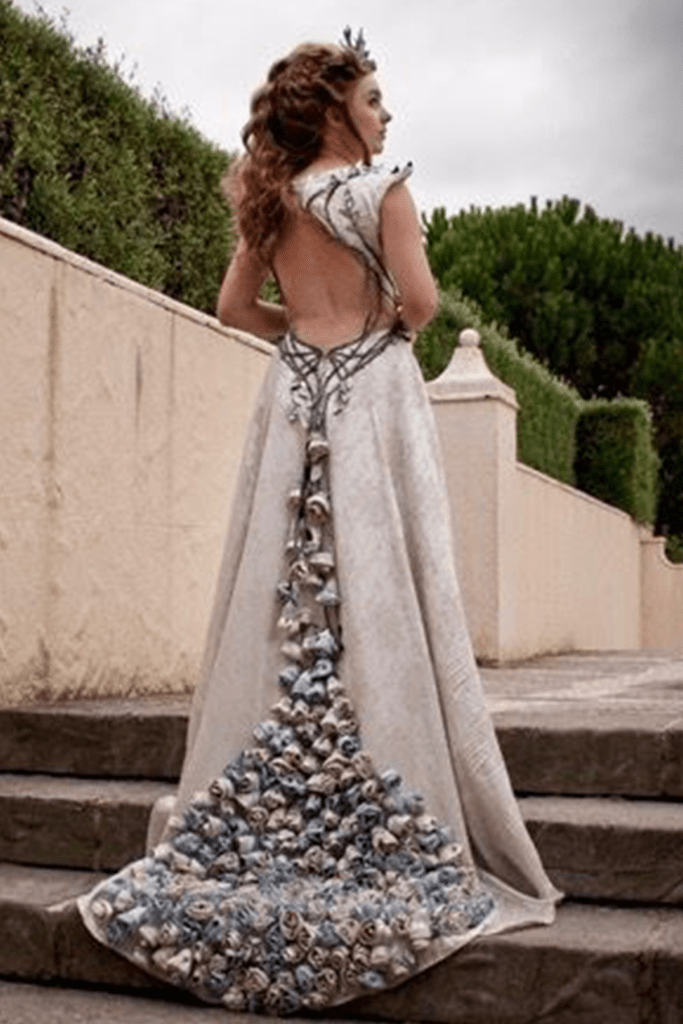
Katniss Everdeen – Parade | The Hunger Games : Catching Fire
Made for : Dragoncon 2023
Background : My husband and I are finally going on our Honeymoon this year after getting married in 2020. One of our stops is Dragoncon in Atlanta. For those who don’t know the elevator from The Hunger Games : Catching Fire was filmed in one of the host hotels – The Marriott Marquis. Armed with this information I thought it would be really neat to make the costumes from that scene and recreate the stills.
gallery


Things used :
- Butterick B4131
- 5m gold oil slick electric dance knit | Spotlight
- 5m black cotton floral lace | Spotlight
- 2m black cotton | Spotlight
- 3m black bemsilk | Spotlight
- worbla
- black leather scraps
- 2m pipping cord
- 22 inch zip black
- 3m black cotton twill tape
- brown florist wire
- gold florist wire
- 2 large buttons
- eva foam scraps
- hot glue
- batting scraps

construction
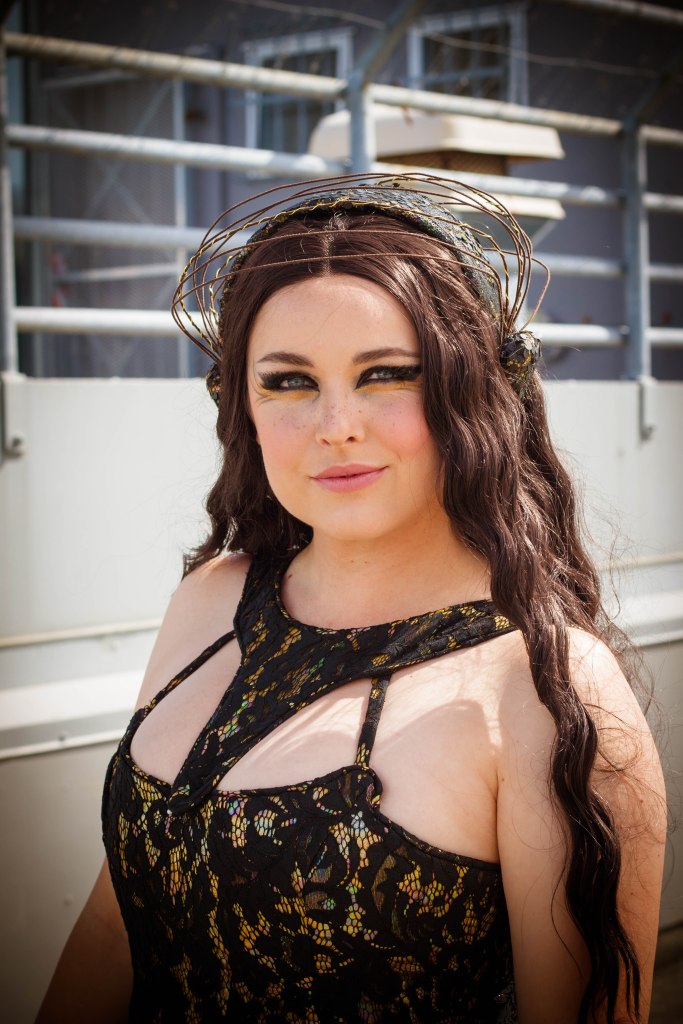
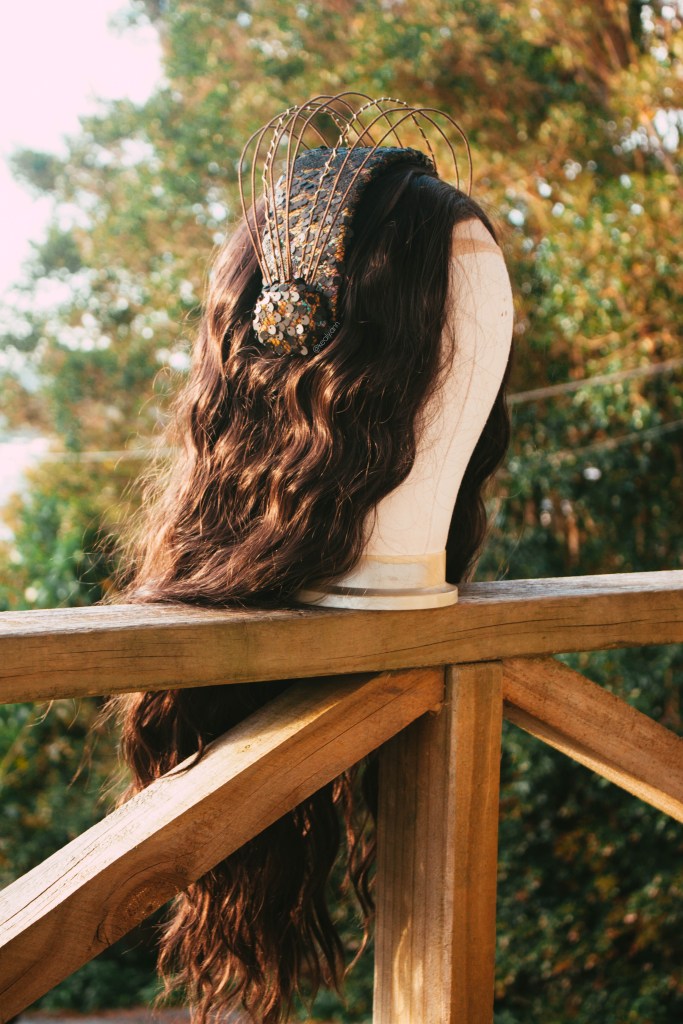
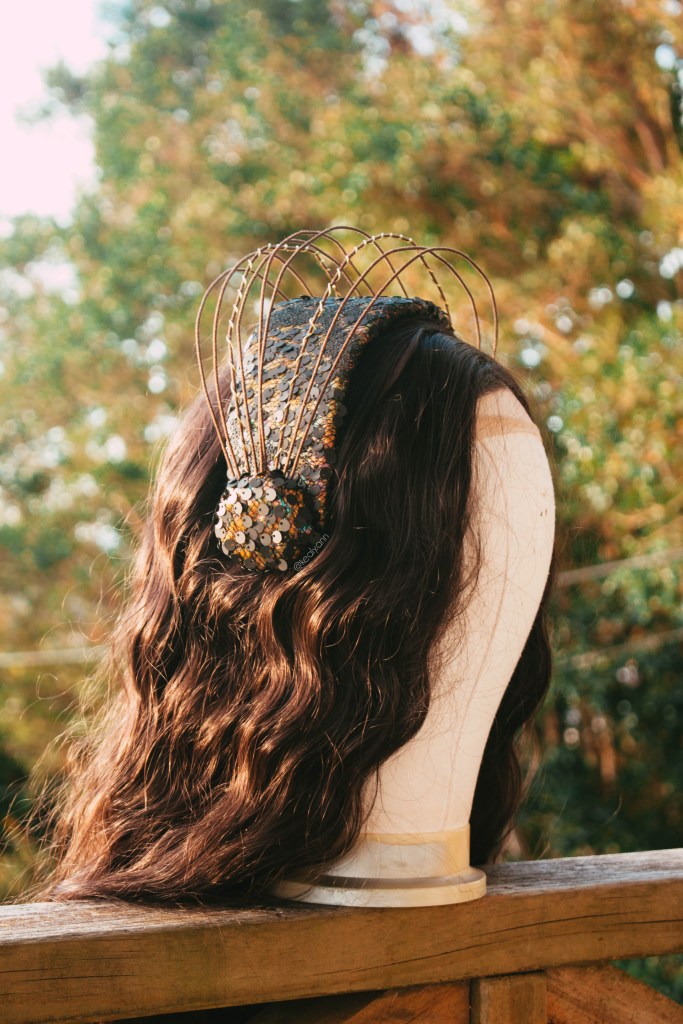
Headdress : I made a wide headband shape out of eva foam and covered it in worbla. While it was warm, I curved it into a headband shape until it cooled. I then covered it in a layer of black felt, gold oil slick fabric and matte black sequin fabric.
I then covered to oversize buttons in a layer of batting, the gold oil slick fabric and then the matte black sequins. I covered the messy side of them with a felt circle to hide it.
I then glued some florist wire to the headband in a sort of halo shape before cover the ends with the covered buttons.
As for now it just sits on the head but I plan to add hair combs to it before I take it too Atlanta.
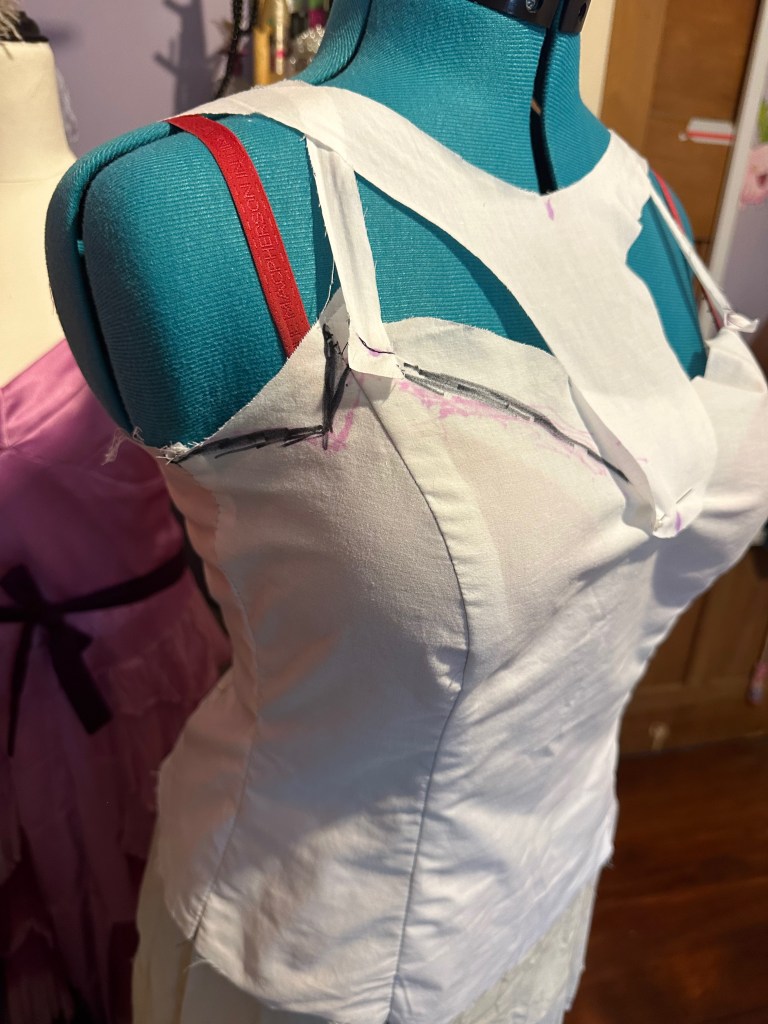
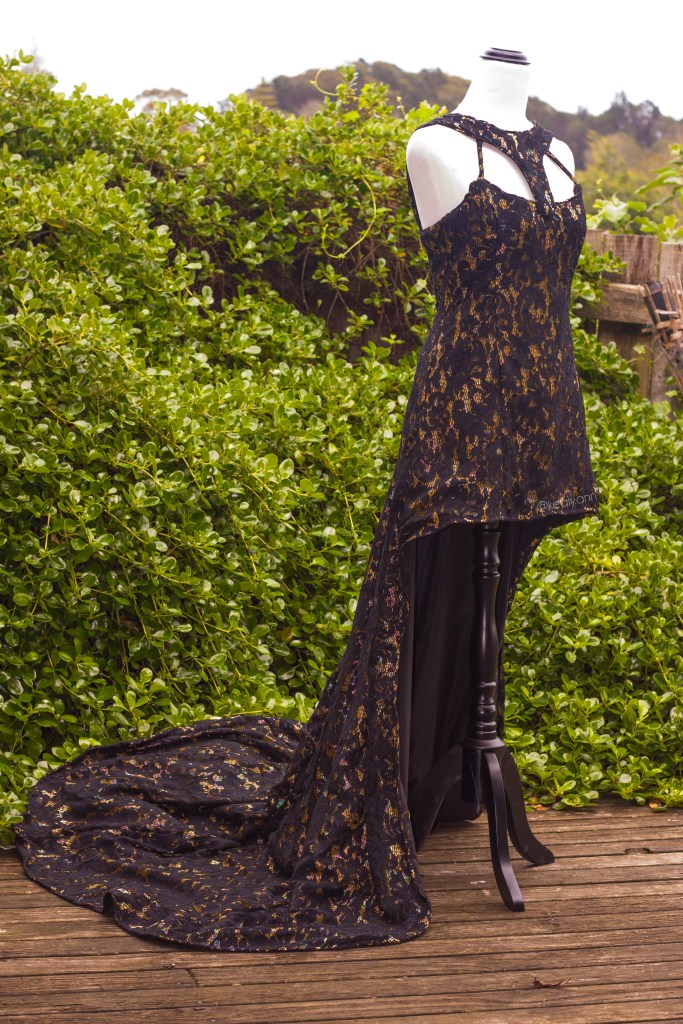
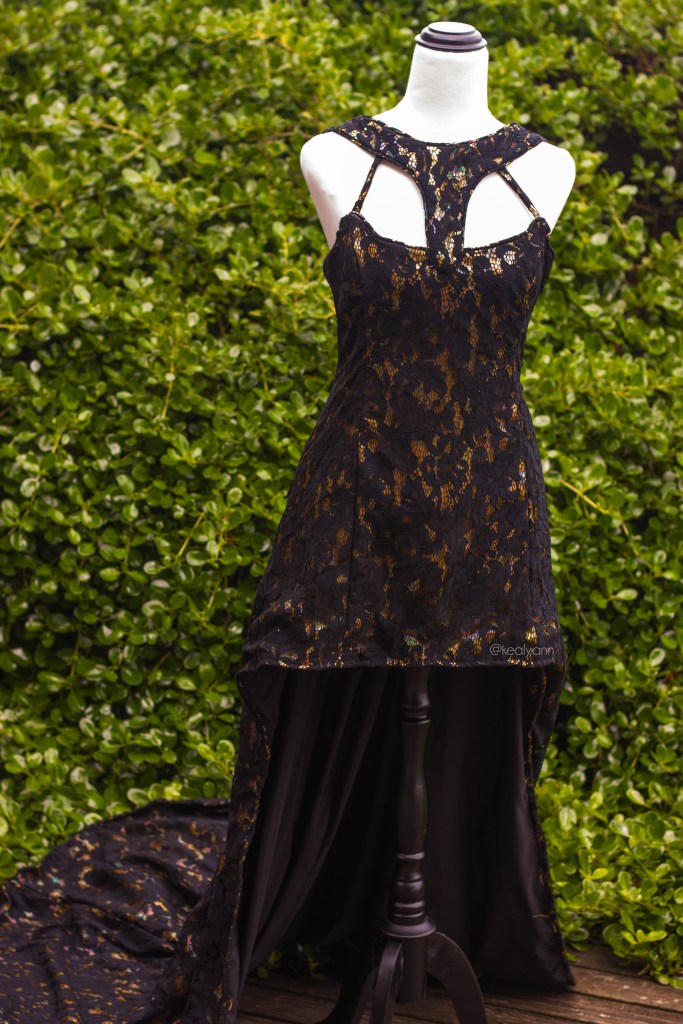
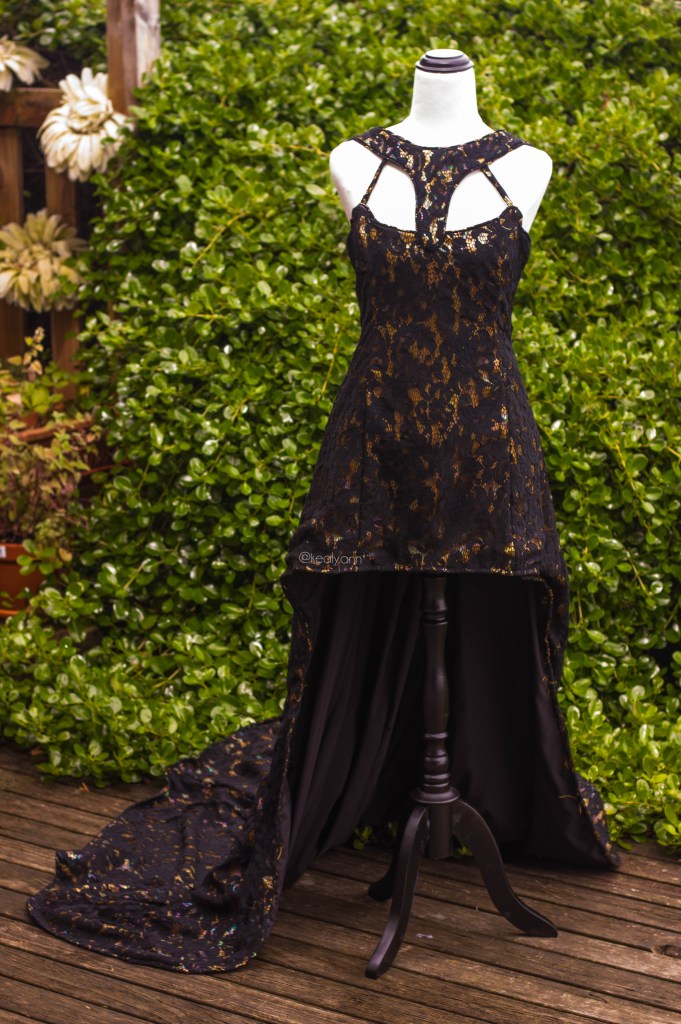
Dress : I started with Butterick B4131 views A and F as the base for the mockup. First I worked on the skirt, made a muslin in full and drew on the changes I wanted in vivid which was a mullet style skirt, high in the front and low in the back. This was the most simple part of the dress and I only needed to do the one mock up of it before moving on to the top part of the dress.
The first challenge of the top was sizing the pattern up because mine was old and too small for me. After that was done, I sewed the muslin and just like the skirt began drawing in the changes I needed to make. First was flattening out the neckline and then adding a right angle under the arm. This took several attempts and mockups before I was happy with both the shape and fit.
I then made mockups of the collar(?) and straps bit. I lay pattern paper on my mannequin and drew in half the shape I wanted on it, cut it out and then cut it from the muslin fabric. I think I tweaked it about three times before I was happy with how it sat.
Once happy with my pattern, I traced all the pieces onto new bits of paper and combined the skirt and top pieces in to one continuous pattern piece. I did one final mockup to check the fit and make sure it was what I wanted before moving on to the real fabric.
Although the dress in the film is made from a laser cut leather, I opted to use other, lighter fabrics for my own recreation because –
1- I’m travelling overseas with this costume and I felt a heavy dress made entirely from leather may take up my entire suitcase allowance
and
2- I’m wearing this costume to march in the Dragoncon parade in Atlanta and it’s HOT. I didn’t want to die from heat stroke.
The fabrics I chose were a light oil slick gold to layer under a 100% soft cotton lace. For the lining I went with a 100% cotton for the top and a polyester bemsilk for the skirt half.
I made the lining first using the patterns pieces before I had combined them to cut the pieces from. The top was made from two layers of black cotton basted together for stability with a waist tape and boning channels with sturdy plastic boning added so I could wear the dress braless. The skirt was cut from a single layer of the bemsilk and sewn to the cotton top. I wanted the skirt layer to be as light as possible so it would look dramatic and blow behind me as a I walk in the parade.
Using the combined pattern pieces, I cut the gold oil slick and cotton lace fabrics. I then spent an eternity hand-basting the layers together before sewing the pieces together.
After the dress outer layer was sewn together, I cut some bias trips from the gold and lace fabrics and made a long length of pipping with them. I sewed some of it along the neckline of the dress and some along the collar bit.
I added the straps and collar part to the lining and sewed it along the outer layer of the dress. I did this backward 2x in a row before I realised I was very tired and left it for the next day. The next day it went in perfectly. Now that the layers were joined I added an invisible zip in to the back and finally finished the dress with a rolled hem on the skirt.
Bracelet :
I started off by tracing my hand and drawing the metal part of the bracelet on this to make a pattern. I then cut this pattern piece from worbla, used a heat gun to warm it to the point it was pliable and moulded it to my hand shape while it was still hot.
After it cooled, I cut the the slits in to it where the leather straps would go and sprayed it silver with a metallic spray paint.
I cut one long 1cm wide strip of leather and three smaller .5cm wide ones. I braided the smaller pieces and glued each end so it would hold. Once the glue had dried I threaded each of the leather straps through the “metal” part of the bracelet and glued them in place.
progress photos


related costumes